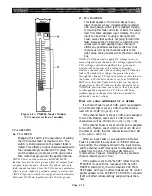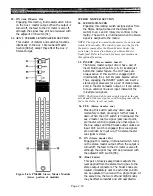
STEREO INPUT MODLUE INPUT STRIPS
Figure 2-8. PM4000 Rear Panels
Stereo Channel Input Strip
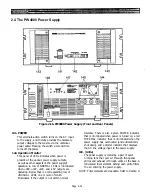
Figure 2-9. PM4000 Rear Panel:
Cooling Fans and Lamp Connectors (2 shown)
The PM4000 contains three or four cooling fans,
depending on mainframe size, distributed across
the rear panel. These operate continuously to draw
heat away from the internal circuits and prolong
component life.
NOTE: The factory still recommends that you turn off
the console when it is not to be used for prolonged
periods. An exception is in high-humidity environments,
or where a sudden temperature change is likely to
produce condensation, in which case the console may be
left on to avoid moisture accretion.
108. LAMP (4-pin XLR connector)
These four-pin female XLR connectors provide
dimmer-controlled DC power for “LittLites” that
are supplied with the console. There are three
lights on the 24 channel and 32 channel
mainframes, and four on the 40 and 48 channel
mainframe. Maximum output is 12 volts. (Pins 1
and 2 of the XLR are not used, pin 3 is the 12 volt
supply, and pin 4 is DC ground.)
Page 2-28
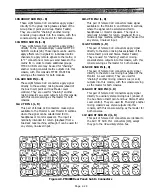
104. INPUT L & INPUT R (connectors)
These electronically balanced, female XLR-3
connectors apply signal to the left and right sides of
the correspondingly numbered input channel. The
nominal input level may vary from -70 dBu to +4
dBu depending on the settings of the channel input
gain control and 30 dB pad switch. Since stereo
input GAIN [5S] is a split control, the sensitivity of
the L and R input connectors can be made to differ.
105. INSERT R OUT, INSERT R IN (Jacks)
These phone jacks serve as a patch point for the
signal from the right side of the correspondingly
numbered stereo input channel. Nominal output
and input level is +4 dBu (1.23 V).
106. INSERT L OUT, INSERT LR IN (Jacks)
These phone jacks serve as a patch point for the
signal from the left side of the correspondingly
numbered stereo input channel. Nominal output
and input level is +4 dBu (1.23 V).
NOTE: The stereo INSERT jacks function exactly as
those in a standard input channel [102] except that there
is no front-panel Insert Pre switch. As shipped, the insert
point is post-EQ, pre-fader. However, you can move an
internal jumper switch in each stereo input module if
you want to change the insert point from post-EQ to pre-
EQ. Refer to Section 6 for details.
OTHER REAR PANEL FEATURES
107. Cooling Fan
Содержание PM4000
Страница 1: ...PROFESSIONAL AUDIO MIXING CONSOLE PM4000 OPERATING MANUAL YAMAHA ...
Страница 2: ...PM4000 OPERATING MANUAL ...
Страница 7: ...Section 1 Introduction ...
Страница 11: ...Section 2 Brief Operating Instruction ...
Страница 47: ...Section 3 Specifications ...
Страница 51: ...Dimensional Drawings PM4000 Console all versions Page 3 4 ...
Страница 52: ...Page 3 5 ...
Страница 53: ...Page 3 6 PM4000 Console Rear Profiles ...
Страница 54: ...Module Block Diagrams See back of the manual for overall system block diagram Page 3 7 ...
Страница 55: ...Page 3 8 ...
Страница 56: ...Page 3 9 ...
Страница 57: ...Page 3 10 ...
Страница 58: ...Page 3 11 ...
Страница 59: ...Page 3 12 ...
Страница 60: ...Section 4 Installation Notes ...
Страница 72: ...Figure 4 13 Cables For Use With Balanced Sources Page 4 12 ...
Страница 79: ...SECTION 5 Gain Structure and Levels ...
Страница 82: ...Figure 5 1 Dynamic Range and Headroom in Sound Systems Page 5 3 ...
Страница 86: ...Section 6 Optional Functions ...
Страница 106: ...Section 7 Operating Notes and Hints ...
Страница 119: ...Section 8 Applications ...
Страница 124: ...Figure 8 3 System Diagram For 5 Independent Stereo Output Mixes via the Stereo Bus and the Mix Matrix Page 8 5 ...
Страница 127: ...Section 9 Maintenance ...
Страница 131: ......
Страница 132: ...YAMAHA VN02300 ...


