background image

88

APPENDIX

The Sound is Too Loud (The Velocity is Permanently Too High)

Lower the gain setting.

Lower the minimum value of the velocity range.

Try another velocity curve.

If you are using a sensor made by other manufacturers, it may be sending a large signal.

Reset the INPUT ATTENUATION switch on the rear panel.

The Hi-hat Foot Controller or Footswitch Works Oppositely

Turn the power switch on again with the foot controller or footswitch connected to the 
rear panel. The DTXTREME will automatically detect the polarity of the switch and enable 
regular operation. (If the power is currently ON, turn it OFF once and then ON again).

Make sure you are not stepping on the foot controller or footswitch when you turn the 
power ON.

The Bass or Chord Patterns do Not Play in Pattern or Song Mode

Make sure the tracks are not muted.

Make sure the Tr parameter in Song Play mode is not set to “mute.”

The DTXTREME does Not Receive any Switch or Trigger Data

A data error has occurred. Turn the power OFF and then ON while holding the Play and 
Trigger buttons and the DTXTREME will reset to its initial settings. Beware that all the data 
will be lost. Frequent data back-up storage to external MIDI devices such as the Yamaha 
MDF2 is recommended to prevent lost data.

The Sound will Not Stop

Some sounds may have an extremely long release when the Rev Key Off function is 
enabled. In such a case, press the VOICE button while holding SHIFT to temporarily stop 
the sound.

The Edge Sound is Hard to Produce

You need to use the position sensing RHP120SD pad.

Содержание DTXTREME

Страница 1: ......

Страница 2: ...he unit is operating as designed are not covered by the manufacturer s warranty and are therefore the owners responsibility Please study this manual carefully and consult your dealer before requesting service ENVIRONMENTAL ISSUES Yamaha strives to produce products that are both user safe and environmentally friendly We sincerely believe that our products and the production methods used to produce ...

Страница 3: ...ORTANT When connecting this product to accessories and or another product use only high quality shielded cables Cable s supplied with this product MUST be used Follow all installation instructions Failure to follow instructions could void your FCC authorization to use this product in the USA 3 NOTE This product has been tested and found to comply with the requirements listed in FCC Regulations Par...

Страница 4: ...the volume controls while playing the instrument to set the desired listening level Do not expose the instrument to excessive dust or vibrations or extreme cold or heat such as in direct sunlight near a heater or in a car during the day to prevent the possibility of panel disfiguration or damage to the internal components Do not use the instrument near other electrical products such as televisions...

Страница 5: ...Unit 55 Insertion Units 55 Localizer 56 Chain Play Mode 58 Entering Chain Play Mode 58 Page Configuration and Operations in Chain Play Mode 58 Choosing a Chain 58 Choosing a Step 58 Chain Edit Mode 59 Entering Chain Play Mode 59 Page Configuration and Operations in Chain Play Mode 59 Chain Edit Page 60 Song Job Mode 61 Entering Song Job Mode 61 Edit Pages and Basic Operations in Song Job Mode 61 E...

Страница 6: ...REME Overall Structure Trigger Input Edit Buffer OUT Drum Kits Preset Drum Kits P1 P90 User Drum Kits U1 U40 MIDI IN MIDI OUT Memory Card SmartMedia C1 C99 Effects Store Store Trigger Edit Mode Voice Edit Mode MIDI Note Numbers 13 15 17 18 20 22 24 15 16 19 21 23 85 87 89 90 92 94 86 88 91 93 ...

Страница 7: ...thermore you can apply System Effects to complete drum kits and Insertion Effects to individual voices In accordance with all these settings the voice will be produced in the tone generator section and output through the OUTPUT and PHONES jacks Triggers When you hit a pad or a drum with a trigger microphone or sensor connected a trigger signal is sent to the tone generator section of the DTXTREME ...

Страница 8: ...o has a variety of 128 keyboard voices which can be used in DTXTREME songs as melody or accompaniment instruments The tone generator is 64 voice polyphonic and compatible with the GM sound set Therefore it can be used to play back generally available GM compatible MIDI files as well as MIDI files created using an external sequencer Also you can load waveform data from Memory Card and play it back ...

Страница 9: ... page Drum Kit Play Mode Press the PLAY button Drum Kit Trigger Edit Mode Press the TRIGGER button Chain Play Mode Press the CHAIN button once Chain Edit Mode Press the CHAIN button twice or once if you re already in Chain Play Mode Store Mode To enter Drum Kit Store Mode press the STORE button while in Drum Kit Play Mode Trigger Edit Mode or Voice Edit Mode If you press the STORE button while in ...

Страница 10: ...NTER YES Buttons Press the EXIT NO button when you want to exit from any mode This will take you back to Drum Kit Play mode If you want to apply a particular setting press the ENTER YES button Also you can use these buttons when performing or canceling a Store operation Sequencer Buttons The Start Stop and Record buttons are used to control the song sequence Use the CLICK button to switch the metr...

Страница 11: ... screen Drum Kit Song Selection Page 1 KIT Drum Kit Selects a Drum Kit The name and number of the Drum Kit will be displayed P1 P90 are Preset Kits U1 U40 are User Kits and C1 C99 are Drum Kits held on Memory Card SmartMedia Settings P1 P90 U1 U40 C1 C99 n C1 C99 can only be selected if a Memory Card SmartMedia containing Drum Kits has been inserted 2 SONG Selects a Song you wish to play with the ...

Страница 12: ...performances About Songs Song Structure A song consists of two sequence tracks Tracks 1 and 2 and header data The header data at the beginning of the song contains song information such as tempo time signature and program change and volume for each MIDI channel The data is automatically loaded when you select a song Each sequence track can contain performance information for MIDI channels 1 to 16 ...

Страница 13: ...to stop the song playback The LED above the button will turn off If you press the Start Stop button once more playback will resume from the stopped point Forward Rewind and Top Buttons While the song is stopped you can use the Forward or Rewind button to select the measure from which you want to resume playback Each time you press one of these button the playback point measure count will be moved ...

Страница 14: ...ront panel can be used to control volume 1 MAIN OUT slider Controls the total volume of the DTXTREME at the OUTPUT L R jacks 2 PHONES slider Controls the volume at the headphone PHONES jack 3 CLICK slider Controls the volume of the metronome click 4 ACCOMP volume slider Controls the volume of song parts other than MIDI channel 10 When playing a Drum Kit accompanied with song playback you can use t...

Страница 15: ...ual drums sent to Individual Outputs 1 to 6 by moving the associated volume slider while holding down the SHIFT button You need to have set the sliders up to control individual output levels beforehand at the UT 4 page in Utilty mode page 72 Assignment of each drum voice to one of the Individual Output can be done in the VOICE6 page in Drum Kit Voice Edit mode page 48 1 SHIFT button SNARE slider C...

Страница 16: ...on off the playback of rhythm bass or accompaniment parts For example you could mute the rhythm part and play rhythms yourself using the pads or you could play along with just the bass part sounding If the LED above one of the following button is lit this means that its corresponding part is playing If it is unlit this means that part is muted Press each button to enable or disable muting 1 RHYTHM...

Страница 17: ... n The Tap Tempo feature cannot be used during recording or in recording standby state Groove Check When playing pads or drums along with a song or click you can check how far your timing is off Specify the length of the note this is used as the basis by which the timing accuracy of your playing is measured to an accuracy of 1 96 quarter note n The Groove Check feature can only be used when playin...

Страница 18: ...Therefore you can record drum and accompaniment parts separately Each track can be used to simultaneously record on all MIDI channels 1 to 16 so you can record everything on a single track Alternatively you can use the Song Job function to merge everything to a single track later You can record your performances in real time Replace or Overdub or on a note by note Step basis In real time recording...

Страница 19: ...d button will be lit in red If you press the Record button again you will be returned to the Drum Kit Song page While in Recording Standby state select the recording mode and track 1 Recording Mode Set the recording mode Replace This is one of the modes for recording drum kits or connected MIDI synthesizers in real time You can set a specific number of measures to be recorded or you can use the St...

Страница 20: ...ding and recorded in 1 96 quarter note resolutions You can correct the timing of your performance by applying quantization to it after recording Setting off quarter note quarter note triplet eighth note eighth note triplet 16th note 16th note triplet n When recording on top of existing data overdubbing if you choose a quantization note length that is larger than that used in the existing data the ...

Страница 21: ...te 16th note triplet 2 Step Recording 1 Press the Start Stop button and you will see the data entry screen You will see the following blank data entry area if no data has been entered before n If data already exists it is represented by a mark 1 Measure beat clock Shows the current input cursor position 2 Data area Entered data is represented by a mark Each measure is separated by a vertical line ...

Страница 22: ...ntinue entering events as necessary To end Step Recording press the Start Stop button again You will be returned to the Drum Kit Song page Changing or erasing events To change parameter values for an event move the cursor to the position of the event use the Data Control knob assigned to each parameter and change its value Each parameter value will blink until you press the ENTER YES button to app...

Страница 23: ...semble is possible by entering a different program change for each MIDI channel in the song Num Number Set the program number Settings 1 128 CC Control Change This information controls effects and volume levels and can be used to increase the expressiveness of a performance Control change numbers 0 to 127 can be used to control each of a wide variety of parameters Some of the most commonly used co...

Страница 24: ...ttings 30 300 PolyKey Polyphonic Key Pressure This information is identical to that transmitted when you apply pressure to a key before releasing it However unlike with Channel Aftertouch mentioned earlier each key pressure can transmit a different value Num Note Number Set the note number which makes Polyphonic Key Pressure effective Settings 0 127 Val Value Set the amount of pressure generated b...

Страница 25: ...e you were working in when you enter the edit mode If this parameter has been set to off you will have the first edit page See page 73 for details of the JumpRecnt parameter Edit Pages and Basic Operations in Drum Kit Trigger Edit Mode The DTXTREME s trigger functions are found in this mode consisting of 18 pages These pages contain settings for each individual pad input and settings common to all...

Страница 26: ...settings page 38 FootCtrl1 Foot Controller 1 FootCtrl2 Foot Controller 2 FootSw1 Foot Switch 1 FootSw2 Foot Switch 2 Common parameters page 40 COMMON1 Common 1 COMMON2 Common 2 KitName Kit Name Functions on Each Page Input paramters Set the trigger related parameters for each individual input 1 to 16 TrgSens1 Trigger Sense 1 You can set the pad type and the gain for each trigger input By selecting...

Страница 27: ... or TP80S are connected When KP60 KP80 or KP80S are connected When PCY60 PCY80 or PCY80S are connected When BP80 is connected When using DT series Trigger pickups with Snare When using DT series Trigger pickups with small tom When using DT series Trigger pickups with large tom When using DT series Trigger pickups with small bass drum When using DT series Trigger pickups with large bass drum RH RH ...

Страница 28: ...velocity 3 Velocity Set the maximum and minimum velocity values for each input These settings are used together with the maximum and minimum Level settings to determine how loud each sound is output When you hit a pad the output velocity value is displayed to the right of the Velocity If for example you set a high minimum velocity the sound will be loud even if you hit the pad gently Note however ...

Страница 29: ...nob on the right to specify the input Settings Input 1 16 0 no rejection 9 TrgFunc Trigger Function Set the function for each trigger input As well as being used as normal drum pads the pads can also be set up to play back songs or to enable or disable the click when hit 1 Input Select the trigger input Settings 1 16 n If the Learn parameter in the UT 5 page in Utility mode has been set to always ...

Страница 30: ...gle measure of the song will be played back If you hit the pad again while the measure is still playing back the next measure will be played back cutoff When using just a single pad this is the same as play If you start a different pad song during playback the current song will be stopped Settings play chase cutoff n A pad song can play back only MIDI channels 7 8 9 and 10 of a song Furthermore to...

Страница 31: ...r multiple trigger inputs that are assigned hold in the Mode Key On mode parameter The Hold Group setting allows only a single pad to play notes at any given time If you set the same group number to multiple trigger inputs hitting a pad from that group will mute notes triggered by other pads in the same group It is useful to prevent an unnecessary stack of notes Settings off 1 32 TrgMIDI2 Trigger ...

Страница 32: ...te numbers for the 9 numbers 1st to 9th mute and rim for the currently selected input Since the note number is displayed with its note name key and octave both will change accordingly as you turn the associated Data Control knob to select the note number If a is displayed to the left of the note number this means that the same note number has been assigned elsewhere Note numbers below 13C 1 or abo...

Страница 33: ...en set the 2nd and all other note numbers to 1st Settings Gate time off 0 0 9 9s in 0 1s increments 1st when assigning same value as 1st to note numbers other than 1st 5 Channel MIDI Channel Select the MIDI transmission channel to individual note numbers assigned to 1st to 9th notes mute or rim of each trigger input n To set the same channel number for all note numbers set the channel number for t...

Страница 34: ...bers If you press the EXIT NO button instead the chord will not be assigned and you will be returned to the TrgMIDI2 page TrgMIDI3 Trigger MIDI 3 Set the velocity crossfade curve for each trigger input n Available if the Mode parameter in the TrgMIDI1 page has been set to stack or hold 1 Input Select the trigger input Settings 1 16 n If the Learn parameter in the UT 5 page in Utility mode has been...

Страница 35: ...urve 3 to the second note You can control the volume balance between these two notes by hitting the associated pad harder or softer As shown in the illustration below 1st note will play louder when you play softer generate a small velocity value and 2nd note will play louder when you play harder generate a large velocity value The following curves are available Settings Velocity crossfade 1 10 n T...

Страница 36: ...endent on the Velocity Curve in TrgSens1 and the Level Range and Velocity Range in TrgSens2 Since the muting sensitivity is set to a higher level with this setting you can mute a sustained sound with a small trigger input level generated at the rim Appropriate for cymbal pads mute lo Same as mute hi but the muting sensitivity is set to a lower level So if you want to use just the muting feature us...

Страница 37: ...to Drum Kit Play mode TrgCopy2 Trigger Copy 2 Copy the trigger related settings from the current drum kit to another drum kit specified This is useful when creating a drum kit with similar settings 1 to Kit Select the destination drum kit number to copy to Settings U1 U40 Procedure 1 Specify the destination drum kit to copy to 2 Press the ENTER YES button and you will see an Are you sure message 3...

Страница 38: ...ngs Set the footswitch and foot controller parameters FootCtrl1 Foot Controller 1 Set up the foot controller connected to the HI HAT CONTROL jack on the rear panel 1 Func Function Set the foot controller function The following two functions are available HiHat Hi hat and MIDI channel messages continuous controller are sent simultaneously MIDI Only MIDI channel messages continuous controller are se...

Страница 39: ...mber if it is as a MIDI controller 1 Func Function Set the foot controller function The following functions are available HiHat Acts as a hi hat controller switching between open and closed positions With this setting selected you can also set the Velocity parameter in this screen click Enables or disabled the click inc Increments the Drum Kit number in Drum Kit mode and the step number in Chain m...

Страница 40: ...kit and accessibility to the Memory Card 1 Volume Set the volume of the drum voices MIDI channel 10 This applies to the internal tone generator but not to external MIDI devices n This is the same as the Volume parameter for Ch 10 in the MIDI2 page page 51 of Drum Kit Voice Edit mode Settings 0 127 2 WaveDir Wave Directory Specify the directory on the Memory Card from which the wave or User Voice d...

Страница 41: ...n input 9 will be reproduced on input 10 Settings off on 4 11to12 Trigger inputs 11 and 12 accept two separate pad outputs using a single stereo jack If you set this to on a signal on input 11 will be reproduced on input 12 Settings off on KitName Kit Name Enter a name consisting of up to 8 characters for the current drum kit 1 Use the Data Control knob assigned to cursor to move the cursor to the...

Страница 42: ...le drum kit The following illustration shows relations among a drum kit MIDI note numbers drum voices and edit parameters After editing drum voices you can save them into a user drum kit U1 to U40 n You can choose the same drum voice to multiple pads MIDI note numbers By setting that voice differently to each pad you have similar sounds with different characters n To cancel your edits simply switc...

Страница 43: ...2 Select a MIDI note number 13 to 94 to start editing any voice parameter see below In a voice parameter page you need to first specify the MIDI note number drum pad to edit the voice attached to that note number drum pad To easily specify the note number you can set the Learn parameter to always in the UT 5 page in Utility mode page 73 Each time you hit a drum pad you can interactively specify it...

Страница 44: ...hem easily while confirming the information about the voice such as whether it is 2 layered looped and so on 1 Note Number Name Choose a target MIDI note number Each note number has a specific note name shown in the LCD letting you easily associate the voices to keys on a MIDI keyboard Settings 13C 1 94A 5 2 Type Choose a voice type from the following According to the voice type specified here you...

Страница 45: ...s the material and the depth in inches of the shell Settings Mapl1370 MCAbs55 MCVint55 Beech55 Maple55 Alumin55 Brass35 Brass55 Brass65 Steel65 Bamboo FRPSnr 2 Muffle Specify the muting method for the batter side head You can simulate the muting material using the following values off no muting tape muted using tape ring muted using a ring material put along the rim Settings off tape ring 3 Snare ...

Страница 46: ...e volume level 50 50 to each layer If the voice is not 2 layered this parameter is not editable Settings 64 100 0 0 50 50 63 0 100 4 Filter Adjust the filter setting for the voice you have chosen This low pass filter that cuts the frequencies higher than a specified point cut off point and passes the rest By combining with the Q parameter you can use these parameters to provide unique sonic charac...

Страница 47: ... cymbal with a long release set its decay rate to a large positive value Settings 64 63 Voice5 VOICE5 Set the key assignment for each MIDI note number drum pad Key assignments determine how each voice is played when you hit each pad how each MIDI note number will be accepted by the DTXTREME tone generator 1 Note Number Name Choose a target MIDI note number Each note number has a specific note name...

Страница 48: ...y in last note priority Only a single note can play at a time from one alternate group 4 RvKeyOn Receive Key On For each MIDI note number specify whether the DTXTREME tone generator receives MIDI Note On messages triggered from the corresponding drum pad This is useful when you want to output MIDI Note On from the MIDI OUT of the DTXTREME without routing it to the DTXTREME tone generator for the p...

Страница 49: ... with the master send level RevSend or ChoSend in the Effect Setup page 53 The final send level is given by multiplying the send level in the VOICE6 page by the send level in the Effect Setup page VoiceCopy VOICE COPY You can copy all voice parameters values for a specific MIDI note number voice in the current drum kit to a MIDI note number in another drum kit 1 from Note Specify the source note n...

Страница 50: ...bles all MIDI transmissions on that channel and any following MIDI parameters become unavailable Settings on off 3 PC Program Change Specify a program number you want to output when switching from the current drum kit to another By simply selecting another drum kit on the DTXTREME you can conveniently change programs on other MIDI devices including synthesizers Also notice you can set up to 16 pro...

Страница 51: ... value with the following Value parameter Settings 000 127 5 Value Specify the control value with this parameter according to the previous Ctrl parameter Settings 000 127 MIDI3 MIDI SETUP3 Continuing from the MIDI2 page specify the effect send levels on each MIDI channel you want to output when switching from the current drum kit to another Effect send levels specified here will be sent to the DTX...

Страница 52: ...us types of soft to hard modulations chorus flanger jet effect and so on You can even specify the amount of chorus applied to each voice in the drum kit using the ChoSend parameter in the Voice Edit page page 49 This is useful for instance if you want unique flanging sounds for hi hats and other cymbals Note that the chorus effect will be disabled when the Localizer effect is enabled page 54 Inser...

Страница 53: ...e Effect Setup page 53 Effect EFFECT SETUP Reverb Unit page 54 Reverb Reverb1 Reverb Reverb2 Reverb Reverb3 Chorus Unit page 55 Chorus Chorus1 Chorus Chorus2 Insertion Units page 55 InsFX INS FX SETUP1 InsFX INS FX SETUP2 Localizer page 56 Loclizr HEADPHONE LOCALIZER SETUP1 Loclizr HEADPHONE LOCALIZER SETUP2 n The edit pages for the insertion effect INS FX SETUP1 or INS FX SETUP2 consist of 3 page...

Страница 54: ...t be output from MIDI OUT as MIDI messages Settings disabled when Localizer is enabled 0 127 n This parameter is identical to the ChoSend parameter available in the MIDI3 page in Drum Kit Voice Edit mode n You can also specify a ChoSend level for each drum voice in Drum Kit Voice Edit mode page 42 Reverb Unit Reverb Reverb1 In this page set the reverb effect parameters This is a system effect and ...

Страница 55: ... for each insertion effect you want to apply to a specific voice in the drum kit Note that the insertion effects are unavailable when the Localizer is enabled in the Effect page page 54 Procedure 1 Use the Data Control knob assigned to FX and choose either insertion effect 1 or 2 2 Use the Data Control knob assigned to Type and assign an effect type to the insertion effect you have chosen Paramete...

Страница 56: ...Loclizr HEADPHONE LOCALIZER SETUP1 You can specifically set the Localizer s 3D stereophony in this page when you have enabled it in the Effect page page 54 The Localizer s 3D effects are only effective when monitored through stereo headphones When monitored through speakers sounds applied the Localizer effects may be heard strangely 1 Type Choose a stereophonic effect from 5 preset types The follo...

Страница 57: ... HEADPHONE LOCALIZER SETUP1 page you can set parameters for the 3D effect monitored with the headphones in this page when you have enabled it in the Effect page page 54 1 Rotation Specify the position angle of all instruments available on the DTXTREME This is a virtual position perceived when monitored with headphones As a larger positive value is set all instruments including the drum kit will ac...

Страница 58: ...tart playback of a song assigned to that step 4 Repeat steps 2 and 3 as necessary to choose a drum kit or a song when you want it Choosing a Chain Use the Data Control knob corresponding to CHAIN and choose a chain number you want to use Settings 1 32 n If the LED display is set to indicate a drum kit in Utility mode page 72 the display shows the drum kit number assigned to each step Choosing a St...

Страница 59: ...ple Programming a Chain 1 Choose a chain to create or edit in Chain Play mode 2 Enter Chain Edit mode 3 Specify a chain name as necessary 4 Set the desired drum kit or song in the first step 5 Proceed to the second step and set the desired drum kit or song in the same manner 6 Continue programming for as many steps as you want up to 32 steps 7 Enter Store mode and save that chain when you complete...

Страница 60: ... kit name for that number Settings Song P1 P31 Q1 Q67 R1 R66 U1 U32 Drum kit P1 P90 U1 U40 C1 C99 Creating or Editing a Chain 1 When creating a new chain use the Data Control knob corresponding to the Step parameter and choose the first step When editing an existing chain choose the step number you want to edit 2 Use the Data Control knob corresponding to the Type parameter and specify either song...

Страница 61: ... page of each category The illustration below shows the first page for each category Song1 Song4 Song8 and Song12 2 Use the Page and buttons and select the page containing the parameter you wish to edit The Page and buttons let you select any page regardless of category 3 Use the Data Control knob below each parameter and change the parameter s value Song Job mode Song level editing page 62 Song1 ...

Страница 62: ... the ENTER YES button again and the song will be copied If you press the EXIT NO button instead the song will not be copied and you will be returned to Drum Kit Play mode Song2 SONG CLEAR Clears all data in the current song Procedure 1 Press the ENTER YES button and you will see an Are you sure message 2 Press the ENTER YES button again and the song will be cleared If you press the EXIT NO button ...

Страница 63: ...NO button instead the track will not be quantized and you will be returned to Drum Kit Play mode Song5 SONG MIX TRACK You can merge the data held on both tracks onto either Track 1 or 2 The data that existed previously on the destination track is overwritten by the newly merged data 1 Track Track Number Specify the track to which the merged data will be written Settings 1 2 Procedure 1 Use the rig...

Страница 64: ...the track will not be copied and you will be returned to Drum Kit Play mode Song7 SONG CLEAR TRACK You can clear data that exists on either track in the current song 1 Track Select the track you wish to clear Settings 1 2 Procedure 1 Use the center Data Control knob to select the track you wish to clear 2 Press the ENTER YES button and you will see an Are you sure message 3 Press the ENTER YES but...

Страница 65: ...nd overwrite as many measures of the current song as specified in the first page Settings 001 999 Procedure 1 Use the Data Control knob assigned to Copy from to select the source preset or user song to be copied 2 Use the Data Control knob assigned to Track to select the source track to be copied 3 Use the Data Control knobs respectively assigned to Measure from and Measure to and select the first...

Страница 66: ...o Beat to enter the time signature of the empty measures to be inserted 4 Use the Data Control knob assigned to Measure to enter the starting point from which empty measures will be inserted 5 Press the ENTER YES button and you will see an Are you sure message 6 Press the ENTER YES button again and the empty measures will be created If you press the EXIT NO button instead the empty measures will n...

Страница 67: ...asures containing no data Therefore the measures after the erased portion will not be moved 1 Track Specify the track number containing the data to be erased Settings 1 2 2 Measure from Specify the first in the block of measures to be erased Settings 001 999 3 Measure to Specify the last in the block of measures to be erased Settings 001 999 Procedure 1 Use the Data Control knob assigned to Track ...

Страница 68: ...l and change it 3 Repeat steps 1 and 2 for each MIDI channel you wish to set Song13 SONG VOICE2 You can set a Program Change value for each MIDI channel in the current song i e change the voice information in the song header These values will be transmitted via MIDI OUT whenever you select this song n As for MIDI channels set to off not to transmit MIDI messages with the Transmit parameter in the ...

Страница 69: ...NG VOICE1 page page 68 has been set to off 1 Ch Channel Select the MIDI channel The Filter RevSend Reverb Send and ChoSend Chorus Send settings for the selected channel will be displayed Settings 1 16 2 Filter Set the Filter value for the MIDI channel Settings 64 0 63 3 RevSend Reverb Send Set the Reverb Send level for the MIDI channel Settings 000 127 4 ChoSend Chorus Send Set the Chorus Send lev...

Страница 70: ... the parameter s value In Utility mode the values are stored as you enter them no Store operation required n By turning the knobs while holding down the SHIFT button the values will change in larger increments Utility Mode Master EQ Master Equalizer page 71 3Band Master EQ settings UT 1 Master EQ 1 UT 2 Master EQ 2 TG Tone Generator page 71 Tone generator settings UT 3 TG 1 UT 4 TG 2 SYSTEM page 7...

Страница 71: ... the center frequency of the middle range of frequencies Settings 100Hz 10 0kHz 4 Mid Gain Set the gain for the middle range of frequencies Settings 12 12 UT 2 Master EQ 2 You can set the High settings here The following parameters are available 1 High Freq Set the center frequency of the higher range of frequencies Settings 0 5kHz 16 0kHz 2 High Gain Set the gain for the higher range of frequenci...

Страница 72: ...YMBAL MISC are sent respectively to Individual Outputs 1 to 6 However if the Insertion Effects are applied their settings determine the output routing for each voice Settings manual auto 2 Slider Set what is controlled by moving the panel slider SNARE KICK TOM HI HAT CYMBAL or MISC while holding down the SHIFT button RevSend Reverb send level of each part indiv Output volume levels of Individual O...

Страница 73: ...llows 1 TrgLink Set the Trigger Link settings where all trigger input data uses the settings for User Kit 1 regardless of the drum kit you have selected For example if the trigger input data is different for each drum kit the pad connections would have to be reconfigured for each drum kit However with the Trigger Link function enabled the drum voice assignments for the pads are simply changed when...

Страница 74: ...ng fully depressed to half depressed The larger the value the sooner the footsplash effect will appear although the effect will also erroneously appear if you repeatedly press the pedal Settings 0 127 3 IncFunc The pad connected to the trigger input specified here can act as the Increment switch regardless of the Trigger Function settings page 29 In Drum Kit mode this feature lets you use the pad ...

Страница 75: ...ill be returned to Drum Kit Play mode MIDI Set the DTXTREME s MIDI related settings here UT 9 MIDI 1 Set the Bulk Dump settings on this page The available parameters are as follows Transmit Bulk Data You can select and sent various types of Bulk Dump data to say a Yamaha MDF3 MIDI Data Filer or an external MIDI sequencer that can handle system exclusive messages all data All DTXTREME data is sent ...

Страница 76: ...s all 1 16 2 DumpIntrvl Set the interval time between packets sent via bulk dump When sending to older or less powerful devices it may be useful to set this to a high value Settings 50 100 150 200 250 300 unit milli second 3 MIDImode Set the MIDI operation mode You can set how the DTXTREME responds to Program Change messages from an external MIDI device native Program Change messages will select r...

Страница 77: ...tings off on 2 SendHH Enable or disable the transmission of Control Change messages for continuous hi hat control via a foot controller The continuous hi hat sound changing from its closed position to its open position is converted into Control Change messages and transmitted over MIDI to an external MIDI device This does not affect how the DTXTREME s internal tone generator responds however off C...

Страница 78: ...eat of the measure If the VoiceSet in UT 13 is not a UserVoice will be displayed and this will be unavailable The available parameters are as follows 1 Type Select the category of the voice to be used for the accented click 2 Voice High Select the number and name of the voice to be used as the accented click You can select from the voices in the category selected in Type Settings Drum voice number...

Страница 79: ...t click Settings 24 00 24 00 SEQ Sequencer Set the DTXTREME s sequencer related settings here UT 17 SEQ1 In this page you can set the sequencer s MIDI related parameters The available parameters are as follows 1 MIDICtl Enable or disable the reception and transmission of MIDI Start Stop and Continue messages Settings off on 2 SyncMode Set the type of synchronization used when the DTXTREME is conne...

Страница 80: ...ing data 1 Switch to the appropriate page in Card mode 2 Use the Data Control knobs to select necessary parameters in the page 3 After entering the settings press the ENTER YES button and you will see an Are you sure message 4 Press the ENTER YES button again and the selected command will be executed If you press the EXIT NO button instead the command will not be executed and you will be returned ...

Страница 81: ...The DTXTREME can import AIFF files recorded in mono n Using a computer you can create a new directory under YAMAHA DTXTREME VOLUME and then leave wave data or other files containing settings all data all kit allChain all song allVoice in that directory In this case you can verify the new directory by selecting VOLUME in the CARD LOAD page When you select and load the directory the wave and setting...

Страница 82: ...les of the type specified in Delete do not exist the message no file will be displayed UT 22 CARD RENAME In this page you can rename files on the memory card The available parameters are as follows 1 Rename Select the type of file you wish to rename The available types are the same as for loading Settings all data system one kit all kit oneChain allChain one song all song allVoice 2 FileName Enter...

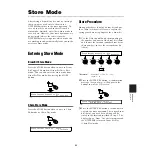
Страница 83: ...ay mode Store Procedure Storing procedures one for a drum kit and one for a chain are identical Here we explain the saving procedure using displays for a drum kit 1 Use the Data Control knob corresponding to the number and name of the drum kit chain and choose the location another drum kit or chain number to save the current drum kit chain Location Drum kit U1 U40 C1 C99 Chain 1 32 2 Press the ENT...

Страница 84: ...tions makes it easy to observe the differences between original and edited versions of drum kits or chains 1 Choose a drum kit or a chain original in Drum Kit Play mode or Chain Play mode 2 Press the STORE button and enter the Store mode without editing that kit or chain 3 Choose a location you want to copy the original and execute the store operation Now you have an identical drum kit or chain in...

Страница 85: ...rmatting Memory Cards Before using a Memory Card with your instrument it must first be formatted Once it is formatted all data on it will be erased Be sure to check if the data is unnecessary for you or not beforehand n The Memory Cards formatted with this instrument may become unusable with other instruments About the Memory Cards To handle Memory Cards with care There are times when static elect...

Страница 86: ...e MIDI connectors are correctly connected Make sure the MIDI channels match the input jack numbers of the connected external devices Make sure the value of the MIDI note numbers are set correctly Make sure the Trigger Bypass switch in Utility mode is off Make sure the HOST SELECT switch is set correctly The Sound does not Match the Settings Make sure you have not plugged the monaural phone plug wh...

Страница 87: ...f rejection parameter Try switching the INPUT ATTENUATION switch on the rear panel You are Experiencing Crosstalk Replace the sensor away from the nearby drum The minimum input level needs to be higher Raise the gain setting Raise the rejection parameter Be careful not to set it too high or it may cause a sound to be muted when another drum is played at the same time If the sound crosstalks with a...

Страница 88: ...oot controller or footswitch when you turn the power ON The Bass or Chord Patterns do Not Play in Pattern or Song Mode Make sure the tracks are not muted Make sure the Tr parameter in Song Play mode is not set to mute The DTXTREME does Not Receive any Switch or Trigger Data A data error has occurred Turn the power OFF and then ON while holding the Play and Trigger buttons and the DTXTREME will res...

Страница 89: ...TXTREME may be running low All setting data may be lost if the DTXTREME is turned off after this message is shown First try to save necessary data to a memory card or so on then consult your nearest Yamaha dealer on replacing the battery Checksum of the received bulk data is incorrect Check if the data is not corrupted and appropriate for the DTXTREME and then retry Received bulk data contains ill...

Страница 90: ... corrupted The DTXTREME cannot recognize the specified file file format Check if the file is suitable for the DTXTREME and is not corrupted This message will be shown if you attempt to load a song from the memory card or by receiving bulk data when a preset song is selected in Drum Kit Play mode First select a user song and then retry loading a song This message will be shown if you attempt to loa...

Страница 91: ...LEDs Memory Card SmartMedia 3 3V card used only Input and Output Rear Panel MIDI IN OUT THRU TO HOST Host select SW FOOT SW mono phone FC4 FC5 HH60 HI HAT CONTROL stereo phone HH80 HH80A HH60 OUTPUT L MONO mono phone OUTPUT R mono phone INDIVIDUAL OUTPUT 1 6 mono phone Trigger input 1 8 stereo phone L trigger R sw x 8 Trigger input 9 10 11 12 13 14 15 16 stereo phone L R trigger x 4 INPUT ATTENUAT...

Страница 92: ... Type 85 Controlling Individual Outs 1 to 6 15 Controlling Reverb 15 Copy from 65 Copy From Song 62 64 Copy to Track 65 Create 66 Ctrl Controller Number 38 51 Cursor 21 Curve 27 38 CYMBAL slider 14 D Data area 21 Data Backup 85 Data Control Knobs 10 Decay 47 DecFunc 74 Delete 82 Dev No 76 Dist Distance 57 DrSens Drum Sense 57 Drum 8 Drum Kit Store Mode 83 Drum Kits and the Tone Generator 8 DumpInt...

Страница 93: ...rogram Change number 68 PC Program Change 50 PC10 77 Performing Bulk Dump 75 PHONES slider 14 Playback Track 1 12 Playback Track 2 12 PlayCount 80 POINT 57 PolyKey Polyphonic Key Pressure 24 Q Q 46 R RecCount 80 Receive10 76 Receiving Bulk Data 76 Rej Rejection 29 Relationship Between Velocity Curve Input Level and Velocity 28 Rename 82 Repeat 30 63 Repeated Playback 12 RevBypas 72 Reverb 54 Rever...

Страница 94: ...rgCopy2 37 TrgFunc 29 TrgLink 73 TrgMIDI1 30 TrgMIDI2 31 TrgMIDI3 34 TrgRim 36 TrgSens1 26 TrgSens2 28 TrgSens3 29 TrgSet 74 Trigger Copy 1 37 Trigger Copy 2 37 Trigger Function 29 Trigger MIDI 1 30 Trigger MIDI 2 31 Trigger MIDI 3 34 Trigger Rim 36 Trigger Sense 1 26 Trigger Sense 2 28 Trigger Sense 3 29 Triggers 7 Tuning 45 78 79 Type 26 39 40 44 54 55 56 60 78 79 U UseTempo 80 UT 1 71 76 77 78 ...

Страница 95: ...ssible to select a drum voice for any MIDI channel except 10 In this case the drum map used for that voice is identical to that for MIDI channel 10 2 2 2 1 modulation Reception only 2 2 3 4 foot controller Supports both transmission and reception 2 2 4 6 data entry Reception only Used to specify RPN data 2 2 5 7 main volume Supports both transmission and reception 2 2 6 10 pan Supports both transm...

Страница 96: ...h is pressed on off Data specifies the switch number bit0 bit5 00 3F and its status bit6 40 1 on 0 off See Data Tables for the switch number 3 1 10 parameter change F0 43 7D 1n 44 58 p1 p2 p3 p4 data1 data2 F7 n is device number 1 F Changes values for various parameters on the DTXTREME The parameter number specified with p1 p2 p3 and p4 is given a value specified with data1 and data2 If the target...

Страница 97: ...ar K 00 fix 00 fix numM stack number MS7bit numL stack number LS7bit data data data csum check sum F7 Stack number is specified with numM and numL 00 0F for each and determines the user stack 1 16 Each data byte is divided into 4 bit MSnible and LSnible and then transferred as successive 2 bytes See Data Tables for details of data 3 3 Dump Request When the DTXTREME receives dump request reception ...

Страница 98: ...00 MASTER TUNE MSB7bit 7 2 OB 800 MASTER TUNE LSB7bit 7 3 0 127 MASTER VOLUME 7 4 0 1 REVERB BYPASS 7 5 0 1 SWAP L R 7 6 0 1 AUTO INDIV OUTPUT 7 7 0 1 SLIDER MODE m 0 2 click type A 4 parameter change Drumkit pad note parameter P1 4 range name 8 1 in n 0 127 MIDI NOTE NO 8 2 in n 0 99 GATE TIME 8 3 in n 0 16 MIDI CHANNEL 8 4 in n 0 9 VELOCITY TABLE in 0 15 trigger input number n note index number ...

Страница 99: ...18 0 16 DRUM SENSITIVITY 21 19 0 16 ACMP SENSITIVITY A 12 parameter change Drumkit MIDI setup parameter P1 4 range name 14 1 i 0 1 ENABLE SW 14 2 i 0 127 PROGRAM CHANGE 14 3 i 0 127 BANK SELECT MSB 14 4 i 0 127 BANK SELECT LSB 14 5 i 0 127 VOLUME 14 6 i 0 127 PAN 14 7 i 0 127 C C NUMBER 14 8 i 0 127 C C DATA 14 9 i 0 127 REVERB SEND 14 10 i 0 127 CHORUS SEND i 0 16 MIDI channel A 13 parameter chan...

Страница 100: ...MIDI DEV NO UC LOCAL SW UC RECEIVEVE P C UC RECEIVE MIDI CH10 UC RECEIVE MIDI CH10 P C UC RECEIVE SYSEX UC SEND HH CONTROL UC SEQ CONTROL UC MIDI THRU PORT UC BULK TIME 4 bytes reserve UC GAIN LO UC GAIN MID UC GAIN HI UC FREQ LO UC FREQ MID UC FREQ HI 4 bytes reserve UC VOICE SET UC OUTSEL UC CLICK MIDI OUT UC CLICK MODE UC PLAY COUNT UC REC COUNT UC SYNC MODE UC GLOBAL TEMPO 4 bytes reserve USER...

Страница 101: ...ARAMETER 10 UC PARAMETER 11 UC PARAMETER 12 UC PARAMETER 13 UC PARAMETER 14 UC PARAMETER 15 UC PARAMETER 16 UC TYPE UC DRUM SENSITIVITY UC ACMP SENSITIVITY 1 byte reserve CHORUS block type NAME UC PARAMETER 1 UC PARAMETER 2 UC PARAMETER 3 UC PARAMETER 4 UC PARAMETER 5 UC PARAMETER 6 UC PARAMETER 7 UC PARAMETER 8 UC PARAMETER 9 UC PARAMETER 10 UC PARAMETER 11 UC PARAMETER 12 UC PARAMETER 13 UC PARA...

Страница 102: ...ency 7 52 76 EQ low gain 8 28 58 EQ high frequency 9 52 76 EQ high gain 10 1 127 dry wet balance 11 14 54 EQ mid frequency 12 52 76 EQ mid gain 13 10 120 EQ mid width C 6 PHASER1 param range name 1 0 127 LFO frequency 2 0 127 LFO depth 3 0 127 phase shift offset 4 1 127 feedback level 6 4 40 EQ low frequency 7 52 76 EQ low gain 8 28 58 EQ high frequency 9 52 76 EQ high gain 10 1 127 dry wet balanc...

Страница 103: ...60 EQ HPF frequency 2 10 120 EQ HPF Q 3 0 60 EQ LPF frequency 4 10 120 EQ LPF Q C 21 DELAY L C R param range name 1 1 7429 delay time L 2 1 7429 delay time R 3 1 7429 delay time 4 1 7429 feedback time 5 1 127 feedback level 6 0 127 delay level C 7 1 10 feedback high damp 10 1 127 dry wet balanc 13 4 40 EQ low frequency 14 52 76 EQ low gain 15 28 58 EQ high frequency 16 52 76 EQ high gain C 22 DELA...

Страница 104: ... BSHi BDbonzo2 Rock1 BigSteam Birch55 BDersko1 Rock2 Boomer Birch55R BDevolvr ROOM1 Dance1 BomSD BDpalmer ROOM2 Dance2 Brass 65 BDstomp1 ROOM3 Dance3 Brass65B Bdvman ROOM4 Dance4 BrassMpl BECHBASS RoomBob Dance5 BrassRim BEECH22 ROOMer Dance6 BS edge BEECH22T Roomy1 Dance7 DarkAmb BEECHAMB Roomy2 DelayBD DG35 BS BigSofty SDRY 1 DIGIBS DryPICSD Bottom SDRY 2 DirtBD DW1355AL Bushy SDRY 3 DlayBDlo DW...

Страница 105: ...nalogL1 SnapOn BeatyRim RIMwatts AnaMeRim Snippet Beauty Rock AnaMetal Snippet2 BETA Sn RockH AnaShh Sparky BigWdRim RockL AnaShRim Standby BigWood RockM AnaSlegh Standby2 Binky RoldGold AnaSlRim Standby3 BlastX RoldRim AnaTite Steel 65 Blue90 Room AnaVel Steel55F Blue90R SAmbie1 AnaWee Steel65R BluePIC SAmbie2 AnaWeRim SunSD Brass55 SAmbie3 AnaWide TambSNpf BrassRim SD1931W AnaWiRim TambSnrH Bras...

Страница 106: ... BrshTpF MC16 BCH10abi S Gate1 BrshTpSo MC10J BCH12abi S Gate2 BrsUpRim MC12J BCH14abi S Gate3 BrSwH MC14J BCH16abi S RuberS BrSwL DryMPL10 BCH10ab2 SAmbie4 BrSwTime DryMPL13 BCH12ab2 Sambie6 BrSwTRim DryMPL14 BCH14ab2 SAna1 BrushHrd DryMPL16 BCH16ab2 SAna2 BrushOpn RC10PN TMMvAm10 SAna3 BrushPly RC12PN TMMvAm12 Sddark BruhPly2 RC14PN TMMvAm13 SDdkrim BrushSwp RC16PN TMMvAm16 SDind58 SdStkDry RC10...

Страница 107: ...3 TOMDOOMH TMTom14 Room3Mid AnlgTom2 Tombienc TMTom16 Room3 Lo AnlgTom1 TomCymH NY8abi Room3Flr TEKK 1H TomCymL NY10abi RoomP H TEKK 1M TM Revrs NY13abi RoomP M TEKK 1L Analog NY16abi RoomP L TEKK 1F T GongE NY18abi RoomP F TEKK 2H V TOM10 RoomQH TEKK 2M V TOM12 RoomQM TEKK 2L V TOM14 RoomQL TEKK 2F V TOM16 RoomQF TEKK 3H richTom1 Room 6 TEKK 3M richTom2 Room 5 TEKK 3L richTom3 Room 4 TEKK 3F rich...

Страница 108: ...2 FTopSizz 91 Ride Anl 22 H TiCls2 23 JazzRide 23 HH32cls 24 RideAC22 24 HHbrtcls 25 Ride EM 25 HHcl2Xfd 26 RideFTK 26 HHclsXfd 27 RideFTKS 27 Bell 28 RideKC1S 28 Bell tip 29 RideKC21 29 H ClsTc1 30 RideKC22 30 H ClsTc3 31 RideLite 31 ClsDance 32 RideMIni 32 Open09 33 RideP21 33 Open ACL 34 Rider 3 34 Open01 35 RideS Si 35 Open01L 36 RideS21 36 Open02 37 RideXG 37 Open02L 38 RockRide 38 Opn01AC 39...

Страница 109: ...um 93 J Okawa 25 CongaTw 94 Timbal1L 25 Tabla B 94 J Atarg 26 Conga 95 Timbal2H 26 Tabla BL 95 J AtargM 27 Conga8H 96 Timbal2L 27 Tabla BM 96 J AtrgM2 28 CongaC 97 TimCas 28 Tabla BV 97 J ShimD1 29 CongaG 98 TimpH 29 Tabla OV 98 J ShimD2 30 CongaH 99 TimpL 30 TablaH 99 J ShimD3 31 CongaM 100 Triangl 31 TablaM 100 J ShimD4 32 CongaMV 101 Trianglo 32 TablaN 101 J ShimD5 33 CongAn 102 TriMute1 33 Tab...

Страница 110: ...og 20 BDSUBSNK 21 DogHats 21 TENDO 22 Door 22 SPIKER 23 DSqrm 23 PULSAR 24 FM Met 24 PULSAR2 25 FStep 25 PULSAR3 26 Funky 26 DALIBAS1 27 Gargoyle 27 DALIBAS2 28 Glass1 28 DALIBAS3 29 Gun 1 29 IRONBASS 30 Gun 2 30 SEAMNSTR 31 Gun 3 31 D BFRAG1 32 HaHoHee 32 POPPX 33 HandyDad 33 WINER 34 HandySon 34 DOOMED 35 Heli 35 ANVILISH 36 HipNs 36 TRANQUL 37 INDbells 37 MOSHER 38 INDchina 38 D BFRAG8 39 INDco...

Страница 111: ...dvox 23 HeliLoop 24 Drink 93 WatrBell 24 HellsBel 25 DUOFRG1 94 WhichWay 25 HipLoop 26 DUOFRG2 95 ZAPOIDS1 26 Hipspoof 27 Evilamb 96 ZAPOIDS2 27 Hollis L 28 Fall 97 ZAPOIDS3 28 House1 29 fantSoun 98 ZAPOIDS4 29 IDloop 30 FATRIZER 99 ZAPOIDS5 30 Indian 31 Fizlshot 100 Zip Opn 31 JgFrag1 32 Frapnel1 101 Zip fire 32 JgFrag2 33 Frapnel2 102 Zip Cls1 33 JgFrag3 34 GEDDON 103 Zip Cls2 34 JgLoop1 35 Ghos...

Страница 112: ... 3 19 TOM 2 L 19 Trp 4 20 TOM 2 F 20 vibe 541 21 SIMM H 21 Xylophon 22 SIMM M 22 SStrngA4 23 SIMM L 23 SStrngB4 24 SIMM F 24 STRNG 3 25 Conga H 25 STRNG 4 26 Conga L 26 Syn 3 27 Conga Mu 27 SynSt 3 28 Conga Sf 28 AcBass 29 Cabasa 29 BassSAWH 30 CabasSht 30 BassSAWL 31 Cowbell 31 BassSINH 32 ChestTOM 32 BassSINL 33 HH Cls 33 SyBass2H 34 HH Qter 34 SyBass2L 35 HH Opn 36 Splash 37 Ride 38 SteamCy 39 ...

Страница 113: ...iz 1 123 Seashore 2 124 Tweet 2 125 Telphone 1 126 Helicptr 2 127 Applause 2 128 Gunshot 1 No Category Display Layer 33 Bass Aco Bass 1 34 FngrBass 1 35 PickBass 1 36 Fretless 1 37 SlapBas1 1 38 SlapBas2 1 39 SynBass1 1 40 SynBass2 1 41 Strings Violin 1 42 Viola 1 43 Cello 1 44 ContraBs 1 45 Trem Str 2 46 Pizz Str 2 47 Harp 1 48 Timpani 1 81 Synth Lead SquareLd 2 82 Saw Lead 2 83 CaliopLd 2 84 Chi...

Страница 114: ... Cymbal HiHat Cymbal HiHat HiHat HiHat HiHat HiHat HiHat HiHat HiHat AcKick HiHat AcKick AcKick Cymbal AcKick Percs1 Cymbal Cymbal Percs1 Percs1 Percs1 Cymbal Cymbal Cymbal Cymbal Cymbal HiHat HiHat HiHat HiHat HiHat AcKick AcKick Cymbal Percs1 Cymbal Percs1 Percs1 Percs1 Num Num 15 44 62 45 94 47 102 1 95 66 103 2 96 67 104 3 97 68 105 8 30 69 41 27 2 41 58 14 7 53 35 7 9 35 62 35 71 55 38 71 56 ...

Страница 115: ...cTom2 Cymbal Cymbal Cymbal Cymbal HiHat HiHat HiHat HiHat HiHat AcKick AcKick Cymbal Percs1 Cymbal Percs1 Percs1 Percs1 Num Num 47 1 45 62 2 2 9 113 94 10 95 12 96 13 97 26 41 11 54 7 35 35 59 71 48 7 8 49 38 3 12 3 2 3 114 4 115 5 116 40 41 11 7 48 48 59 71 48 21 21 49 38 63 12 38 41 Name Name Loosy head MCV edge OpnRim rim DRY10 MCV10CL ACTomH TMMvAm10 MCV12CL TMMvAm12 MCV14CL TMMvAm13 MCV16CL T...

Страница 116: ... AcSnr1 AcTom1 AcTom1 AcTom1 AcTom1 AcTom1 AcTom1 AcTom1 AcTom1 Cymbal Cymbal Cymbal Cymbal Cymbal HiHat HiHat HiHat HiHat HiHat AcKick AcKick Cymbal Percs1 Cymbal Percs1 AcKick AcKick Cymbal Cymbal Cymbal Cymbal HiHat HiHat HiHat HiHat HiHat AcKick AcKick Cymbal Percs1 Cymbal Percs1 Percs1 Percs1 Num 1 2 75 102 76 103 76 104 77 105 40 Num 83 74 98 102 99 104 100 105 101 105 26 41 10 58 4 38 7 57 ...

Страница 117: ...eKC1S RideKC22 CrshAC Splash 6 CrshDRK Open01L Open01 H PdlDW Hpsplsh1 Opn02AC MCV20AMB MCV20AMB RidB Drk CowB1 CR Z18 Bell Tre CowB1 CowBM LoRoom1 LoRoom1 RidB Drk CowB1 CR Z18 Bell Tre CowB1 CowBM Name DarkAmb MCVdynam Night10 ACTomH Night12 ACTomM Night14 ACTomL Night16 ACTomF RockRide RideKC22 CR S18 Splash 6 CrshDRK Open01L Open01 H PdlDW Hpsplsh1 H OpnLK Bell Tre CowB1 CowBM CR S18 Splash 2 ...

Страница 118: ... HiHat HiHat HiHat HiHat Voice ElKick ElKick Voice Percs1 Cymbal Percs1 Percs1 Percs1 Type EleSnr AcSnr2 EleTom EleTom EleTom EleTom EleTom EleTom EleTom EleTom Cymbal Cymbal Cymbal Cymbal Cymbal HiHat HiHat HiHat HiHat HiHat ElKick ElKick Cymbal Percs1 Cymbal Percs1 Efect3 Efect3 Num 32 36 23 23 24 24 25 25 26 26 91 89 90 86 51 17 18 52 35 16 16 37 40 81 12 49 50 Num 10 62 2 23 3 24 3 25 4 26 43 ...

Страница 119: ...2 Efect1 Percs2 Efect1 Percs2 Percs2 Percs2 Percs2 Percs2 Percs2 Percs2 Percs2 Percs1 Percs2 Percs2 Percs2 Percs2 Percs2 Percs2 Percs2 AcKick Percs2 Percs1 Percs1 Percs1 Percs1 Percs1 Percs1 Percs1 Percs2 Percs2 Efect1 Percs2 Percs1 Percs2 ElKick Percs2 Percs2 Percs2 Efect1 Percs2 Percs2 Percs2 Num Num 97 35 93 37 105 15 107 17 106 1 99 2 88 66 89 78 72 40 101 39 94 47 95 66 89 66 83 69 80 102 84 ...

Страница 120: ...rcs2 Cymbal Percs2 Percs1 Percs2 Cymbal Percs2 Percs1 Percs2 Percs1 Num 102 62 56 42 57 43 58 44 59 45 43 31 48 Num Num 51 102 56 62 81 56 30 42 101 57 44 43 76 58 76 44 37 59 84 45 40 43 21 31 59 11 4 54 53 7 55 43 54 19 91 55 52 71 23 35 19 21 19 33 108 50 49 38 108 63 63 12 64 50 Name X4Loosy OpnRim DRY GM5 XTMMCA10 DRY GM4 XTMMCA12 DRY GM3 XTMMCA13 DRY GM2 XTMMCA16 SizzlLit RideLite Gong1 Name...

Страница 121: ...bal Percs1 Percs1 Cymbal Cymbal Percs1 Percs1 OtrSnr OtrSnr Type AcSnr1 AcSnr1 AcTom1 AcTom2 AcTom1 AcTom2 AcTom1 AcTom2 AcTom1 AcTom2 Cymbal Cymbal Cymbal Cymbal Cymbal HiHat HiHat HiHat HiHat HiHat AcKick Cymbal Cymbal Percs1 Cymbal Percs1 Percs1 Percs1 Percs1 Percs1 Num 13 62 43 35 44 36 45 37 46 38 43 31 11 54 7 43 43 19 19 55 55 71 71 47 47 78 78 34 34 50 50 38 38 63 63 12 12 7 30 Num 102 46 ...

Страница 122: ... TMTom14 ACTomL TMTom16 ACTomF JazzRide SizzlDrk Crash 3 China H OpnL1 H Cls13 H PdlDW FTsplsh1 H OpnL1 SoTight Bell A Bell A CowB2 Crash 3 CowB2 China CowB2 Name Loosy BuzRgRim Dry1 Hi ACTomH Dry1 Mid ACTomM Dry1 Lo ACTomL Dry1 Flr ACTomF SizzlDrk JazzRide Crash 3 China H OpnL1 H Cls13 H PdlDW H SplNB H OpnL1 BassCasS SoTight Bell A Bell A Bell A Bell A CowB2 CowB2 Crash 3 Crash 3 CowB2 CowB2 Chi...

Страница 123: ...ideS Si CR S18 CR VFX Crash 2 HHopen 1 H ClsNB1 H PdlDW Hpsplsh1 METOID1 SoftBotm 2HedMed2 DirtBD CowB2 RideB20K China China Shake2 Shake2 Shake2 Voice No 70 FX UL8R Voice No 69 Inputs Voice Input 1 2 3 4 5 6 7 7 8 8 9 9 10 10 11 11 12 12 13 13 14 14 15 15 16 16 Note 1st rim 1st rim 1st rim 1st rim 1st rim 1st rim 1st 1st rim rim open open clse clse fcls fcls spls spls rim rim 1st 1st 1st 1st 1st ...

Страница 124: ...9 57 49 38 83 12 28 28 AcBass SizzlDrk sizzle A sitar599 sitar599 sitar599 sitar599 sitar599 sitar599 sitar599 sitar599 Splash 2 sitar599 Open01L Open01L H PdlDW AcBass AcBass TablaFil JgLoop6 MCV20D RidB Drk CowB1 TEKNEW5 Bell Tre AcBass AcBass No 71 MIAMINO No 72 SHAMY Type AcSnr1 AcSnr2 Percs1 Percs1 Percs1 Percs1 Percs1 Percs2 Percs1 Percs2 Cymbal Cymbal MIAMINO Percs1 HiHat HiHat Efect3 HiHat...

Страница 125: ... Type EleSnr Efect3 EleTom Efect3 Type AcSnr1 EleSnr Voice Voice Voice Voice Voice Voice EleTom EleTom Efect3 EleTom Efect3 Efect3 Cymbal Cymbal Cymbal Cymbal HiHat HiHat HiHat HiHat HiHat ElKick Cymbal Cymbal Percs1 Cymbal Percs1 Percs1 Percs1 EleTom EleTom EleTom Cymbal Cymbal Voice Cymbal HiHat Voice HiHat HiHat HiHat Voice ElKick Cymbal Cymbal Percs1 Cymbal Percs1 Percs1 Percs1 Num 41 1 64 40 ...

Страница 126: ... Splash 3 Splash 2 ChiMiSiz Open01 HHbrtcls PDL XG2 Hpsplsh1 RideVFX1 MCA20 RC18 MCA20 GMH Vnlspn CowB1 China XG Bell Tre Gong3 Gong1 Name DBflufer DelyShot TECHSD1 fantSoun Sexy TablaTkH Voice No 85 DEJAVU No 86 AnDerd 3 4 5 6 7 8 9 10 11 12 1st 2nd rim 1st rim 1st rim 1st 2nd 3rd 4th 5th 6th 7th 8th 9th rim 1st 2nd 3rd 4th 5th 6th 7th 8th 9th mute rim open clse fcls spls rim 1st 1st 1st 1st 47 4...

Страница 127: ... AcTom1 AcTom1 AcTom1 HiHat EleTom AcKick Efect3 AcTom1 Cymbal Cymbal Cymbal Cymbal HiHat HiHat HiHat HiHat HiHat AcKick Cymbal Cymbal AcTom2 Cymbal AcTom2 AcTom2 AcTom2 Type AcSnr2 AcSnr1 AcTom1 AcTom1 AcTom1 AcSnr1 AcTom1 Cymbal Cymbal Cymbal Cymbal HiHat HiHat HiHat HiHat HiHat AcKick Cymbal Cymbal AcTom2 Cymbal AcTom2 AcTom2 AcTom2 Percs1 Percs1 Num 82 1 41 73 82 93 69 91 82 85 54 66 43 19 55 ...

Страница 128: ...er 30 Electro1 76 FutrKIT1 22 ROCK 2 31 Latin 3 12 GM std 1 31 Electro2 76 FutrKIT1 23 ROCK 3 32 Latin 4 12 GM std 1 32 Electro3 76 FutrKIT1 26 POWER 1 33 Latin 5 12 GM std 1 33 Electro4 76 FutrKIT1 29 POWER 4 34 Latin 6 12 GM std 1 34 Electro5 76 FutrKIT1 30 ELECTRIC 35 Latin 7 12 GM std 1 35 D Bfill1 76 FutrKIT1 26 KitDemo3 9 RC Reglr 36 Latin 8 55 GM Jazz 36 D Bfill2 76 FutrKIT1 10 RC Jazz 37 L...

Страница 129: ...rn 0 127 RevSend 0 127 ChoSend 0 127 SYMPHONIC MIDI Ctl 0 119 Parameter Value MIDI Sens 64 63 LFO 0 00Hz 39 7Hz Depth 0 127 DelayLR DlayOfst 0 0 50 0 Parameter Value Control Pan L64 C R63 Dry Wet D63 W D W63 Cho Rev 0 127 LchDlay 0 1 742 9 ChoRetrn 0 127 RchDlay 0 1 742 9 FBDlay1 0 1 742 9 ENSEMBLE FBDlay2 0 1 742 9 Parameter Value FBLevel 63 63 Detune 50 50 HiDamp 0 1 1 0 LchDlay 0 0 50 0 Pan L64...

Страница 130: ... Dry Wet D63 W D W63 F RDpth 0 127 LFO 0 00Hz 39 7Hz PanDir L R L R L R Lturn Rturn L R Depth 0 127 Pan L64 C R63 FBLevel 63 63 Output stereo IND1 2 IND3 4 IND5 6 IND1 6 DlayOfst 0 0 50 0 RevSend 0 127 Pan L64 C R63 ChoSend 0 127 Output stereo IND1 2 IND3 4 IND5 6 IND1 6 MIDI Ctl 0 119 RevSend 0 127 MIDI Sens 64 63 ChoSend 0 127 MIDI Ctl 0 119 PHASER MIDI Sens 64 63 Parameter Value Control Dry Wet...

Страница 131: ...rol ChoSend 0 127 Attack 1 40 MIDI Ctl 0 119 Release 10 680 MIDI Sens 64 63 Threshld 48 6 Ratio 1 0 20 0 2BandEQ OutLevel 0 127 Parameter Value Control Pan L64 C R63 LoFreq 32 2 0k Output stereo IND1 2 IND3 4 IND5 6 IND1 6 LoGain 12 12 RevSend 0 127 HiFreq 500 16k ChoSend 0 127 HiGain 12 12 MIDI Ctl 0 119 Output stereo IND1 2 IND3 4 IND5 6 IND1 6 MIDI Sens 64 63 RevSend 0 127 ChoSend 0 127 NOISEGA...

Страница 132: ... for boosting or cutting lower frequencies Gain level for boosting or cutting lower frequencies Frequency above which frequencies are cut off by low pass filter Frequency above which frequencies are cut off by low pass filter Q value for low pass filter Center frequency for boosting or cutting middle frequencies Gain level for boosting or cutting middle frequencies Bandwidth for boosting or cuttin...

Страница 133: ...rom the compressor effect NOISEGATE Time until the gate closes RevDlay Reverb Delay System Reverb only Delay time between the early reflections and the reverberation RevSend Reverb Send All types send level of insertion effect output to system reverb effect RevRetrn Reverb Return System Reverb only return level of system reverb effect Sens Sensitive TOUCHWAH1 2 sensitivity range of wah filter for ...

Страница 134: ...ges Reset Mode Default Changed Note ON Note Off Key s Ch s 0 4 7 10 32 Control 1 6 11 64 71 72 73 Change 74 84 91 93 100 101 1 16 1 16 Ø 9nH v 1 127 9nH v 0 Ø Ø 0 127 Ø Ø Ø Ø 0 127 0 127 Ø Mode 1 OMNI ON POLY Mode 2 OMNI ON MONO Mode 3 OMNI OFF POLY Mode 4 OMNI OFF MONO 1 16 1 16 Ø v 1 127 Ø Ø Ø Ø Ø Ø Ø Ø Ø Ø Ø Ø 123 127 Ø 3 3 0 127 0 127 Ø Ø 7 bit resolution Ø Yes No Default Messages Alterd YAMAH...

Страница 135: ...EDEN Yamaha Scandinavia AB J A Wettergrens Gata 1 Box 30053 S 400 43 Göteborg Sweden Tel 031 89 34 00 DENMARK YS Copenhagen Liaison Office Generatorvej 8B DK 2730 Herlev Denmark Tel 44 92 49 00 FINLAND F Musiikki Oy Kluuvikatu 6 P O Box 260 SF 00101 Helsinki Finland Tel 09 618511 NORWAY Norsk filial av Yamaha Scandinavia AB Grini Næringspark 1 N 1345 Østerås Norway Tel 67 16 77 70 ICELAND Skifan H...

Страница 136: ...String Guitar Percussion Division Yamaha Corporation 2000 Yamaha Corporation Printed in Taiwan ...

Отзывы: