ECDIS User manual
18
2.2 Route design
2.2.1 New route
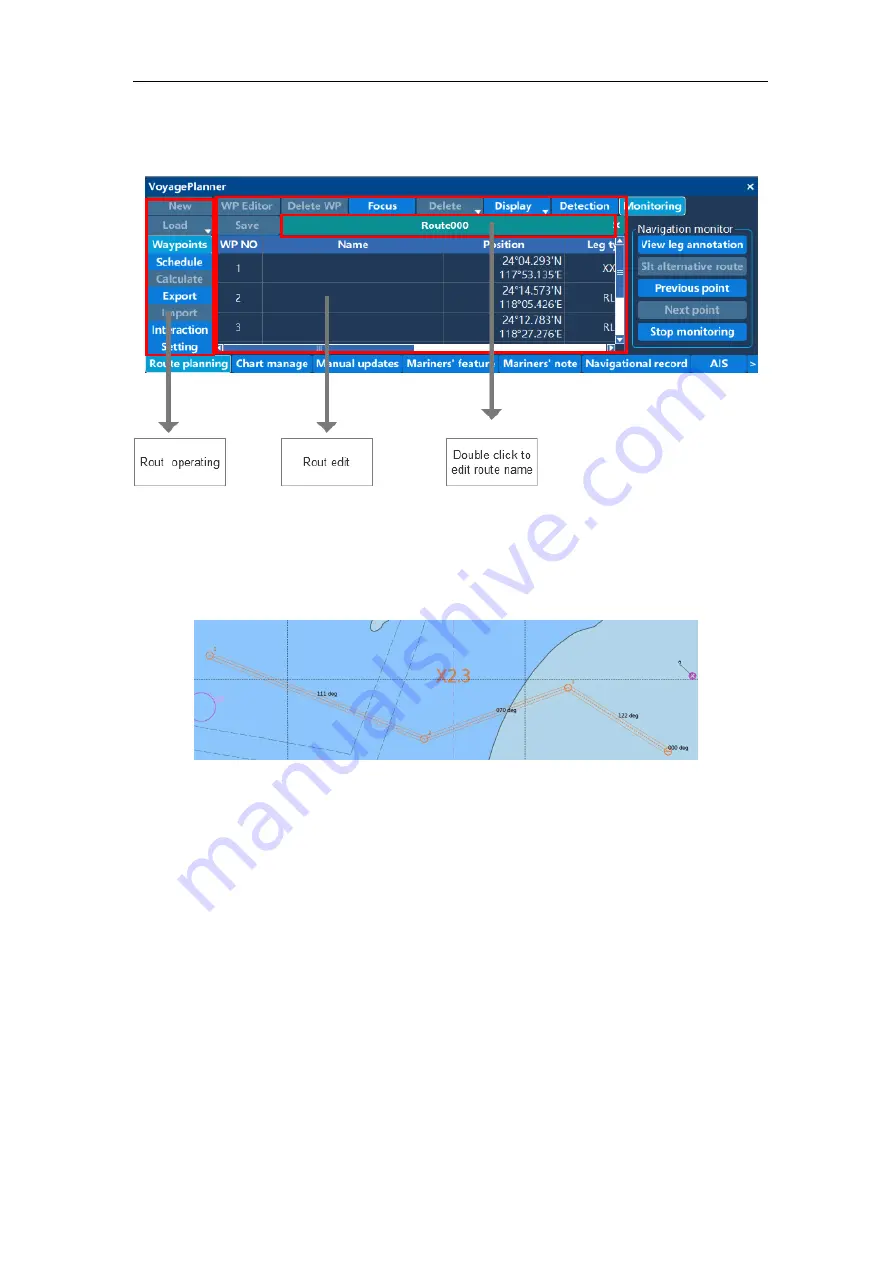
Click "New Route", move the cross cursor, click the left button to add a waypoint, and right
click to end the route design. After adding the waypoints required for the route, click on
the menu "Save Route" button to save the newly created route. As shown below:
In the route editing area, you can view the information of the waypoints in the route,
including the total number of waypoints, name, latitude and longitude, range type, range,
safety distance, steering radius and other parameters can be edited.
In the route editing area, select a waypoint and click the right mouse button to “insert
waypoints” or “delete waypoints”.
Double-click the route name to edit the name of the route.
2.2.2 Editing waypoints
Click the "Edit Waypoint" button, the mouse will automatically jump to the chart center,
and enter the edit waypoint state.
Click the waypoint 1 on the route, move the cursor, and click the left button. The waypoint
1 is moved to the specified position of the cursor, and the right button is clicked to cancel
the move. To re-select the waypoint, click the “Edit Waypoint” button, re-select the
Содержание HM-5818
Страница 9: ...ECDIS User Manual 8 ...
Страница 10: ...ECDIS User Manual 9 Model 2 ...
Страница 80: ...ECDIS User manual 79 Mounting Dimensions of Display 24inch Counter Mounting Flush Mounting ...


