background image

4

4-27

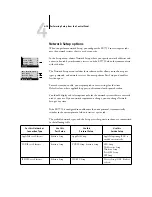
Network Setup options

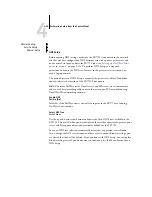
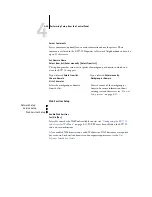
Is user login needed to browse NDS tree?
Yes/No [No]

Select No if no password is required to browse the tree. You can proceed to navigate to 
the Print Server object. 

Select Yes if network permissions require that you log in to browse the NDS tree and 
see the Print Server object you want to select. If you select Yes, you are prompted to 
navigate to the User Login object.

Navigate the NDS tree to the User Login object.

This message is displayed if you selected Yes for the previous option. Choose OK and 
browse the NDS tree, as described in the following paragraphs.

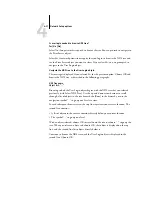
NDS Tree name
Object list, “..”

Browsing to find the User Login object begins with the NDS tree that you selected 
previously (with Select NDS Tree). Use the up and down arrow buttons to scroll 
through a list of objects in the tree beneath the [Root] in the hierarchy, or use the 
navigation symbol “..” to go up one level at a time.

In each subsequent browse screen, the top line represents your current location. The 
second line contains:

• A list of objects in the current container directly below your current location

• The symbol “..” to go up one level

With an object selected, choose OK to travel down the tree, or choose “..” to go up the 
tree. When you select an object and choose OK, that object is displayed on the top 
line, and the second line lists objects directly below it.

Continue to browse the NDS tree until the User Login object is displayed in the 
second line. Choose OK.

Содержание Phaser EX7750

Страница 1: ...ONFIGURATION UIDE...

Страница 2: ...ting Guide describes the printing features of the Xerox EX7750 for users who send jobs from their computers The Color Guide provides information on managing the color output of the Xerox EX7750 It exp...

Страница 3: ...roteus RIP While Print Splash and Spot On are registered trademarks of Electronics for Imaging Inc in the U S Patent and Trademark Office and or certain other foreign jurisdictions Bestcolor is a regi...

Страница 4: ...d by turning the equipment off and on the user is encouraged to try to correct the interference by one or more of the following measures Reorient or relocate the receiving antenna Increase the separat...

Страница 5: ...ight or license of any kind is granted You receive no rights or license under any patents copyrights trade secrets trademarks whether registered or unregistered or other intellectual property You agre...

Страница 6: ...NT SHALL EFI AND ITS SUPPLIERS BE LIABLE FOR COST OF PROCUREMENT OF SUBSTITUTE SOFTWARE PRODUCTS OR SERVICES LOST PROFITS OR DATA THIRD PARTY CLAIMS OR ANY SPECIAL INDIRECT RELIANCE CONSEQUENTIAL EXEM...

Страница 7: ...eement will be governed in all respects by the laws of the State of California exclusively as such laws apply to contracts between California residents performed entirely within California The United...

Страница 8: ...This page is intentionally blank...

Страница 9: ...erts Windows with TCP IP 2 2 Configuring a Windows 2000 server to communicate with the EX7750 2 3 EX7750 on a NetWare network 2 8 Tips for experts IPX networks 2 9 Overview of IPX printing to the EX77...

Страница 10: ...twork 3 11 About the EX7750 default password 3 13 Chapter 4 Performing Setup from the Control Panel EX7750 Setup from the Control Panel 4 1 EX7750 Control Panel 4 3 Safety warnings 4 3 Activity light...

Страница 11: ...p 5 3 General Setup options 5 5 Job Log Setup 5 7 Network Setup 5 8 Adapters Ports 5 9 Protocols 5 10 Services 5 15 Printer Setup options 5 41 Printer connections 5 41 PS PostScript Setup 5 42 PCL Set...

Страница 12: ...rinting a Configuration page from the Control Panel 7 17 Maintaining optimal EX7750 performance 7 18 Using FieryBar 7 19 Messages 7 19 Activity light 7 19 Commands 7 20 Installing a ZIP drive for Font...

Страница 13: ...ent the EX7750 The term Windows is used to refer to Windows 2000 and Windows XP wherever appropriate The term Setup is used to refer to configuring the EX7750 for proper performance in your network en...

Страница 14: ...ork connectors on the EX7750 Chapter 2 provides guidelines for setting up Windows network servers and UNIX systems for printing to the EX7750 and for using WebTools Chapter 3 describes how to prepare...

Страница 15: ...ws SMB printing The SMTP simple mail transfer protocol is the protocol that sends e mail between servers The SNMP simple network management protocol manages complex networks The port 9100 is the print...

Страница 16: ...lation are Physically connecting the EX7750 to a functioning network Prepare a network node for the EX7750 obtain cable route it to the location where the EX7750 will be installed near the printer and...

Страница 17: ...ons for printing Install the files needed for printing install additional user software and connect the client to the EX7750 over the network These steps are described in the User Software Installatio...

Страница 18: ...est print EX7750 available on the network Network server UNIX Mac OS Windows EX7750 EX7750 Prepare a network node Connect the EX7750 to the printer and the network If you use a computer running Comman...

Страница 19: ...network A variety of physical arrangements is possible with each logical arrangement For example twisted pair Ethernet networks commonly use a star configuration around a hub rather than a bus arrange...

Страница 20: ...c OS computer 2 EX7750 connected to printer TCP IP http for WebTools TCP IP Printing on this network Mac OS computers can print directly using the AppleTalk and TCP IP protocols Mac OS X computers can...

Страница 21: ...Printing on this network All Windows computers can print through the NetWare server For using WebTools A Windows computer with TCP IP http loaded 1 3 3 4 IPX protocol Another supported protocol TCP IP...

Страница 22: ...protocol available on the Windows 2000print server Windows computers can print using TCP IP with the lpd protocol For running Fiery utilities and WebTools A Windows computer with TCP IP loaded NETBEU...

Страница 23: ...to setup 1 Windows computer User Software Installation Guide 2 EX7750 Setup Chapter 4 TCP IP nbt For Windows printing Windows SMB printing enabled on the EX7750 Windows NetBios and TCP IP enabled on t...

Страница 24: ...d protocol Another supported protocol TCP IP client PC 4 Printing on this network UNIX workstations with the TCP IP lpd protocol can print directly and act as host for shared printing TCP IP clients c...

Страница 25: ...ocessing wait five seconds after the system reaches the Idle state before using the power button on the front of the EX7750 to turn it off For the proper shutdown procedure see Starting and shutting d...

Страница 26: ...BaseTX respectively also known as Fast Ethernet If an Ethernet hub is used it must be a 100BaseTX or 1000BaseTX hub The term 100BaseT and 1000BaseT are used to refer to 100BaseTX and 1000BaseTX respec...

Страница 27: ...ectly from Windows 2000 XP or UNIX workstations Because AppleShare servers require no special configuration they are not discussed in this chapter except for use in a Windows 2000 environment see the...

Страница 28: ...r the IP address subnet mask and gateway address for the EX7750 You can enter these addresses manually or use DHCP or BOOTP protocols to assign them dynamically Make sure the EX7750 name and address a...

Страница 29: ...Setup On the Windows sever create a printer for each EX7750 print connection install the appropriate printer drivers and optionally share the printer on the network see Installing the EX7750 as a shar...

Страница 30: ...Services DNS equivalent It has the same format as the etc hosts file on UNIX servers The format of the hosts entry is IP Address TAB host name TAB comments where TAB indicates that you press the Tab...

Страница 31: ...ugh the server You can specify sharing of the printer during installation of the EX7750 printer files If you have not yet installed the EX7750 printer files on the Windows 2000 print server computer d...

Страница 32: ...SERVER For Windows 2000 XP clients Before printing install the printer driver with the User Software CD and configure the port After clients have selected the printer they can choose it from the Prin...

Страница 33: ...nting where a server is not present The prerequisites are summarized in the following list and you can find more detail in your Microsoft documentation Print a Configuration page see Printing a Config...

Страница 34: ...or bindery objects The term bindery server is used to refer to a Novell file server running NetWare in bindery emulation mode The term NDS is used to describe components of a NetWare operating system...

Страница 35: ...NetWare print server per bindery server Queues in each print server can store jobs for any print connection on the EX7750 Overview of IPX printing to the EX7750 NetWare file servers support the creat...

Страница 36: ...for printing The following sections explain how to set up a NetWare file server so networked users can print to the EX7750 from their workstations and the EX7750 can obtain print jobs from the NetWare...

Страница 37: ...DS connection Abbreviations FS file server PS print server PQ print queue on the NetWare server On NDS FS In Setup from Command WorkStation On client workstation In NetWare administration tools Create...

Страница 38: ...h object Rights are established by network administrators Setting the NetWare bindery context You can connect only one directory tree to the EX7750 If you need to connect additional NetWare servers yo...

Страница 39: ...k Setup see PServer Setup options on page 4 25 Setting up NetWare Windows clients for printing Before setting up client workstations for printing perform Network Setup see Network Setup options on pag...

Страница 40: ...the EX7750 supports the PServer service in Bindery emulation or through NDS For more information about IPX based printing see EX7750 on a NetWare network on page 2 8 NOTE Setting up a NetWare environm...

Страница 41: ...cally Bidirectional communication features in NDPS are not supported on the EX7750 Configuring a NetWare server for printing with NDPS To configure a NetWare server for printing with NDPS NDPS must be...

Страница 42: ...ob management tools to manage print jobs that originate from all workstations on the network Tips for experts UNIX workstations Setting up the EX7750 in a UNIX environment has the same requirements as...

Страница 43: ...printer driver enter the remote printer name for Queue Name under LPR Settings in the Configure Standard TCP IP Port Monitor dialog box Setting up the EX7750 on TCP IP networks Every machine host on...

Страница 44: ...work printers 2 In the file or utility used by your network specify the remote printer name the print server protocol the queue and the spool file for the EX7750 name you assigned 3 Make the EX7750 av...

Страница 45: ...UNIX utilities for viewing the list of jobs and for printing and removing jobs that are spooled to UNIX servers If the network includes a Windows 2000 XP workstation that has TCP IP protocols loaded y...

Страница 46: ...This page is intentionally blank...
Страница 47: ...ons Although there may be an administrator or operator charged with certain duties all users have equal access to the system and job management tools Maximum control might be appropriate for a high vo...

Страница 48: ...job management tools see the Job Management Guide Print queue This is the standard EX7750 queue Jobs sent to the Print queue are processed and printed in the order they are received Jobs prioritized b...

Страница 49: ...0 For information about setting or changing the passwords see Setting passwords on page 7 2 Administrator privileges Administrator control which confers control of Setup is the highest level of contro...

Страница 50: ...WebTools you must do the following in Setup Enable TCP IP Set an IP address subnet mask and gateway address for the EX7750 Enable Web Services Enable 515 LPD Fiery Tools option in Port Setup For more...

Страница 51: ...you to print PostScript EPS PDF and TIFF files directly to the EX7750 without first opening the file in an application For information about supported file versions see the User Software Installation...

Страница 52: ...qual access to all system functions including Setup clearing the EX7750 deleting printer fonts setting the WebLink address performing calibration printing to all EX7750 print connections and managing...

Страница 53: ...tor intervention no access to WebTools 5 An administrator and an operator operator controls all jobs no WebTool access Maximum control Only an administrator can perform Setup calibration and other adm...

Страница 54: ...ved by the EX7750 job processing cannot occur job data cannot be transferred to the printer for printing and the job management tools cannot connect to the EX7750 In the event that you need to restart...

Страница 55: ...perform Setup locally at the EX7750 using Setup Fiery from the FieryBar menu Some of the settings you specify in Setup configure the Server process such as print job defaults while some configure the...

Страница 56: ...twork or port settings may require that you also make changes to other Setup options NOTE You must configure the EX7750 with the correct domain name This is especially important for Windows printing a...

Страница 57: ...nect the network cable to the EX7750 as described in Chapter 1 The network should already be installed and operational 6 Turn on the printer and then the EX7750 For information about how to start the...

Страница 58: ...s of three network drives C D and E These drives are hidden for network administrative functions and do not appear in the Windows Explorer window To map the C administrative hidden share enter the fol...

Страница 59: ...soft Corporation To ensure network security in your environment the administrator must set a password Changing the EX7750 system password If you have the FACI installed you can change the EX7750 Admin...

Страница 60: ...to Windows 2000 XP EX7750 name For Old Password Fiery 1 For New Password Fiery 2 For Confirm New Password Fiery 2 3 Click OK The new password Fiery 2 is now set NOTE EX7750 name depends on your EX7750...

Страница 61: ...Server Setup to specify system options Network Setup to specify all the active network systems that transmit print jobs to the EX7750 Printer Setup to specify how print jobs and queues are managed PS...

Страница 62: ...setting and proceed to the next option Display window shows status information and options for setting up the EX7750 Up and down arrow buttons scroll menus options and settings Menu button cancels wi...

Страница 63: ...it to strong shocks If the display window breaks and the liquid crystal material leaks out do not inhale ingest or touch it If the material gets on your skin or clothing wash it off with soap and wat...

Страница 64: ...scroll through alphanumeric characters Menu button Press this button to view other screens Under normal operation the Control Panel displays the Info RIP or Print Status screen with information about...

Страница 65: ...0 is printing a job the Print Status screen appears This screen displays the following Cancel Job Press the top line selection button to cancel the job currently printing User name The name of the use...

Страница 66: ...d disk for example 38062MB Version The system software version running on the EX7750 Functions You can press the Menu button to display the Functions menu Use the up and down arrow buttons to scroll t...

Страница 67: ...d four A3 sized demonstration pages that showcase the color printing capabilities of the system Configuration Prints the Configuration page which gives the current server and device configuration This...

Страница 68: ...ffective Delete Deletes the Secure Print job without printing NOTE Secure Print jobs are not accessible from the job management tools NOTE The Secure Print feature is not effective through the direct...

Страница 69: ...on on the Control Panel to access the Functions menu 3 Scroll down with the down arrow button and press the line selection button next to Run Setup You are prompted to enter the Administrator password...

Страница 70: ...me of the current Setup menu Most of the menus you see are shown on the Control Panel Map a flowchart that you can print from the Control Panel TO PRINT THE CONTROL PANEL MAP 1 At the Control Panel pr...

Страница 71: ...he correct information is displayed Information entry options You must specify the information for your site the printer name or IP address Use the up and down arrow buttons to scroll through the alph...

Страница 72: ...edit or press OK to s elect the choice and continue From the starting position press the up or down arrow buttons to enter the first character When the correct character appears press the right arrow...

Страница 73: ...you exit from the Setup menu Server Setup options The Server Setup menu lets you specify system information that pertains to the EX7750 and all users To access the menu follow the instructions on page...

Страница 74: ...rrent date and time amount of memory installed in the EX7750 network protocols enabled and connections published Use Character Set Macintosh DOS Windows Macintosh Specify whether the Control Panel and...

Страница 75: ...inted Queue 1 99 10 This option appears only if Enable Printed Queue is set to Yes Specify the number of jobs to be stored in the Printed queue Jobs in the Printed queue take up space on the EX7750 ha...

Страница 76: ...ust perform Port Setup and enable at least one port For each item you enable you are prompted to enter settings for that item Default values where applicable appear in this manual with square brackets...

Страница 77: ...ernet Setup from the Port Setup menu and enter the appropriate settings 5 When you finish entering port settings choose Exit Port Setup and then choose Protocol Setup 6 Enter the appropriate settings...

Страница 78: ...the EX7750 is connected NOTE When you select Auto Detect make sure that the auto negotiation settings for speed and duplex are configured for the network port to which the EX7750 is connected Similar...

Страница 79: ...A Choose OK to dismiss the message TCP IP Setup options When you set an IP address subnet mask or gateway address for the EX7750 during Setup you can allow the EX7750 to get these addresses automatica...

Страница 80: ...l over which the EX7750 should search for its IP address Both DHCP and BOOTP allow the EX7750 to obtain the Ethernet IP address and Subnet Mask automatically Depending on your network the EX7750 may b...

Страница 81: ...IP see Chapter 2 Subnet Mask This option lets you modify the subnet mask for printing with TCP IP over Ethernet To set the subnet mask enter one of the following values 255 0 0 0 if the IP address sta...

Страница 82: ...etting Domain Name Enter the domain name of your DNS server Host name Default server name Enter the host name of the EX7750 By default the host name is the Server Name you enter in Server Setup Networ...

Страница 83: ...finish making Setup changes choose Exit Setup from the main Setup menu The EX7750 restarts All changes are saved on restart IPX SPX Setup options For protocols other than IPX SPX the frame type is au...

Страница 84: ...re successfully bound save your changes exit Setup restart the EX7750 and print a Configuration page The Configuration page lists only one of the frame types that were successfully bound If you answer...

Страница 85: ...work connected to the EX7750 Choose NDS Setup if your network uses NetWare in native mode Choose Bindery Setup if your network uses NetWare in bindery emulation mode If your network uses both NDS and...

Страница 86: ...rver Setup NDS Setup Before entering NDS settings make sure the EX7750 is connected to the network and that you have configured an NDS directory tree with a printer print server and one or more Print...

Страница 87: ...ng to find the User Login object begins with the NDS tree that you selected previously with Select NDS Tree Use the up and down arrow buttons to scroll through a list of objects in the tree beneath th...

Страница 88: ...ist of objects in the current container directly below your current location The symbol to go up one level With a container object selected choose OK to travel down the tree or choose to go up the tre...

Страница 89: ...0 set the Polling Interval see Polling Interval options on page 4 36 or choose Exit PServer Setup to return to the Service Setup menu NOTE NDS Service must be set prior to specifying Bindery service o...

Страница 90: ...PServer Setup to return to the Service Setup menu when prompted Bindery Setup options Network Setup Service Setup PServer Setup Bindery Setup Use Bindery Setup if you have already configured one or mo...

Страница 91: ...turn to the Bindery Setup menu where you can set up another server View Server List displays the list of file servers that have already been selected to communicate with the EX7750 Edit Connection let...

Страница 92: ...your network does not have a large number of file servers Choose Search by Name if the number of file servers is so large that scrolling through the list would take a long time If you selected From L...

Страница 93: ...password for logging in to your NetWare file server NetWare Print Server Print Server Name Select the name of the print server that you configured in the NetWare administration tools This print server...

Страница 94: ...List Supported servers This option allows you to view the list of file servers currently connected to the EX7750 that is servers you have added in Bindery Setup You are notified if there are none When...

Страница 95: ...etup Bindery Setup Remove File Server Remove support for File server name This option allows you to select a NetWare file server from a list of connected file servers and remove the connection to it Y...

Страница 96: ...in PServer Setup menu If you do not reset the interval the default value of 15 seconds is used Network Setup Service Setup Windows Setup Enable Windows Printing Yes No Yes Enabling Windows Printing en...

Страница 97: ...vices cannot pass across a router without a WINS name server Setting up the WINS name server is outside the scope of this manual To find out if a name server is available contact your network administ...

Страница 98: ...anually Choose Domain List of domains Select the workgroup or domain from the list Workgroup or Domain Enter the name of the workgroup or domain For more information about entering text and characters...

Страница 99: ...omputers to use IPP printing see the User Software Installation Guide Network Setup Service Setup Port 9100 Setup Enable Port 9100 Yes No Yes This option enables applications to open a TCP IP socket t...

Страница 100: ...he IP address name of the server POP3 IMAP on your network that handles incoming e mail You can enter a maximum of 19 characters Server Type POP3 IMAP POP3 Choose the type of mail server Network Setup...

Страница 101: ...n name is test com You can enter a maximum of 19 characters Account Name Enter the account name This is the internal name your network recognizes which is not necessarily the same as User Name Use the...

Страница 102: ...error occurs while you are executing a job via e mail the e mail service sends an error message to that administrator e mail address The administrator can authorize additional e mail addresses as admi...

Страница 103: ...P Community Name public by default for write access Once it is changed the new community name must be entered to write any information through remote Setup Up to 32 ASCII characters including spaces c...

Страница 104: ...3 1 TO ACCESS PRINTER SETUP OPTIONS In the following list of options default values where applicable appear in brackets NOTE For users to use the Fiery utilities and WebTools or print to the EX7750 o...

Страница 105: ...to the Print queue Jobs that are printed to the Print queue are spooled to the EX7750 hard disk and printed on a first in first out basis Only queues published in the Printer Setup are available to us...

Страница 106: ...ster document it is Ripped held in the EX7750 Hold queue and printed for your reference If you select No the master document is only Ripped and held in the Hold queue Convert Paper Sizes No 8 5x11 11x...

Страница 107: ...ion is set to No jobs with fonts that are unavailable on the EX7750 hard disk generate a PostScript error and do not print This setting does not apply to PDF files font substitution occurs automatical...

Страница 108: ...CL Setup 2 Enter the options appropriate to the printing requirements at the site 3 When you finish save changes In the list of options that follows default values where applicable appear in square br...

Страница 109: ...s Specify the width of scalable type Pitch is measured by characters per inch so 10 pitch type fits ten characters per inch Font Size pt 12 00 When the number selected in Font Number represents a prop...

Страница 110: ...Color Guide NOTE In addition to the defaults described in this section additional settings are available to Mac OS and Windows users from the printer drivers TO ACCESS COLOR SETUP OPTIONS In the list...

Страница 111: ...simulate printed output on a commercial press so that the EX7750 output can be used for proofing The SWOP Coated standard is used in the United States DIC in Japan and Euroscale in Europe Custom simul...

Страница 112: ...Tools becomes the EX7750 default Output Profile Output Profile Profiles Specify the default output profile to use for printing Additional profiles can be created and downloaded to the EX7750 with Col...

Страница 113: ...best equivalents of PANTONE colors With this option Off PANTONE colors are printed using the CMYK values defined in the original applications For more information see the Color Guide Save Changes Yes...

Страница 114: ...disk for backup It also allows you to restore fonts from the ZIP disk to the EX7750 hard disk NOTE This feature is available only if an external USB ZIP drive is installed on the EX7750 TO SET JOB LO...

Страница 115: ...and do not clear the Job Log from the EX7750 or from a remote workstation the EX7750 saves a record of all jobs NOTE If Auto Print Job Log Every 55 Jobs is set to No setting this option to Yes has no...

Страница 116: ...Administrator password can prevent the casual user from accessing the Font Archiving menu TO BACK UP OR RESTORE FONTS Back up Fonts Use this option to back up the EX7750 resident fonts to a ZIP disk...

Страница 117: ...tore Fonts only after reinstallation or restoration of EX7750 system software Additionally if you have the third party fonts already installed on the EX7750 hard disk you need to also reinstall those...

Страница 118: ...ct Cancel to keep the currently resident fonts intact When restoration is complete the Fonts restored message appears The EX7750 resident fonts are now overwritten with the ones previously backed up t...

Страница 119: ...options are listed in the order in which they appear on the local Setup window Some Setup options cannot be accessed from remote Setup use local Setup or the EX7750 Control Panel instead Regardless o...

Страница 120: ...t Up Fiery Start Command WorkStation and choose Setup from the Server menu The Setup window appears You see the available settings only when you select the particular option For example to view or cha...

Страница 121: ...address of the EX7750 To access Setup from Command WorkStation start the Command WorkStation application 2 Log in as Administrator 3 For Fiery WebSetup click WebSetup when the EX7750 home page appear...

Страница 122: ...ting up the EX7750 from a Windows Computer Regardless of how you access Setup remotely the following window appears NOTE The interface of remote Setup from Command WorkStation and Fiery WebSetup is id...

Страница 123: ...ar The following instructions describe setup from Command WorkStation Major differences between the two are noted Server Name Specify a name for the EX7750 This is the name that appears in the Chooser...

Страница 124: ...character set for displaying file names This is important if a file name includes accented or composite characters such as or For mixed platform networks select the setting that gives the best overal...

Страница 125: ...nted number of pages and other job information Auto Clear Job Log every 55 Jobs Specify whether the EX7750 clears the Job Log after every 55 jobs If you do not select this option the EX7750 saves a fi...

Страница 126: ...job When two network ports are enabled print jobs can be received over all ports at the same time You can view and specify the following network settings in Network Setup Adapters and ports view curre...

Страница 127: ...ernet network Transmission Speed Select an appropriate setting according to the settings of the network to which the EX7750 is connected NOTE When you select Auto Detect make sure that the auto negoti...

Страница 128: ...l When you click the Modify or Advanced button next to the setting the system opens the Local Area Connection Properties Control Panel where you complete the settings By default the AppleTalk IPX SPX...

Страница 129: ...have installed additional protocols the choices are Efi Appletalk driver for AppleTalk NWLink IPX SPX NetBIOS Compatible Transport Protocol for IPX SPX and Internet Protocol for TCP IP 4 Click Propert...

Страница 130: ...IPX SPX Use this option to specify IPX SPX frame types The EX7750 supports the following Ethernet frame types for IPX SPX Ethernet 802 2 Ethernet 802 3 Ethernet II and Ethernet SNAP You can also allo...

Страница 131: ...Chapter 2 The EX7750 requires a unique valid IP address You can set a static address or specify that the EX7750 use DHCP or BOOTP to obtain IP addresses automatically NOTE If you specify the DHCP or B...

Страница 132: ...o the EX7750 using TCP IP enter the gateway address NOTE The EX7750 stores assigned IP addresses even if you later disable TCP IP If you need to assign the EX7750 IP address to another device first se...

Страница 133: ...s see NetWare Printing PServer options on page 5 16 Windows Print Sharing SMB Windows Printing Service enable or disable SMB print services SNMP Setup enable or disable SNMP services Local Setup only...

Страница 134: ...rinting TCP IP Enable LPD Printing Service Select to enable or disable LPD printing services NetWare Printing PServer options The following procedures for setting up NetWare printing depict the window...

Страница 135: ...e connected To specify or change the NDS Tree click Modify and specify settings in the NDS Print Server dialog box as follows The currently selected NDS Tree and Print Server are displayed TO SPECIFY...

Страница 136: ...Setting up the EX7750 from a Windows Computer 2 In the NDS Connection dialog box double click an NDS tree in the list on the left 3 Navigate to the NDS container and click OK If necessary enter the pa...

Страница 137: ...a container from the Containers list 5 Double click a print server from the Select Print Server list The full path to the print server appears Another way to change the path is to click Edit and type...

Страница 138: ...55 20 Setting up the EX7750 from a Windows Computer 6 Click OK The Server Setup dialog box appears displaying the path to the selected print server on the Network Setup tab...

Страница 139: ...EX7750 SETUP 1 Select Enable NDS and click Change Trees 2 In the NDS Configuration window that appears double click an NDS tree in the Available Trees list 3 In the Select User Login window select Use...

Страница 140: ...m a Windows Computer 4 Navigate to the NDS container select it and click Next If necessary enter the password NOTE The password must be 19 alphanumerical characters or less If it exceeds this limit yo...

Страница 141: ...55 23 Network Setup 5 Select Use Default Print Queue Root or navigate to the Print Queue Root and click Finish...

Страница 142: ...55 24 Setting up the EX7750 from a Windows Computer 6 Click OK The NDS Configuration window appears displaying information about the print server...

Страница 143: ...indery services The currently connected servers are displayed A maximum of eight bindery servers can be connected To add remove or change bindery connections click Modify and specify settings in the B...

Страница 144: ...dery Connections dialog box appears 2 Select a file server from the Select File Server list If the File Server User Name and Password dialog box appears enter the appropriate user name and password to...

Страница 145: ...e of the newly added server appears in the Connected Servers list To add another server repeat the preceding steps You can connect a maximum of eight servers 4 When you finish adding servers click OK...

Страница 146: ...dows Computer TO REMOVE BINDERY CONNECTIONS FROM LOCAL EX7750 SETUP 1 Click Modify in the Bindery Setup dialog box The Bindery Connections dialog box appears 2 Select a server from the Connected Serve...

Страница 147: ...1 Select Enable PServer mode from the Service1 tab 2 Click Bindery Setup 3 Select a file server from the Available Servers list If the File Server User Name and Password dialog box appears enter the a...

Страница 148: ...rver from the list and click Finish If necessary enter the appropriate password in the Print Server Password dialog box to log on to the selected file server The name of the newly added server appears...

Страница 149: ...E EX7750 SETUP 1 Select Enable PServer mode from the Service1 tab 2 Click Bindery Setup The Novell Setup dialog box appears 3 Make your selection in the Selected Servers list 4 With the file server se...

Страница 150: ...55 32 Setting up the EX7750 from a Windows Computer Poll Interval local Setup or PServer Poll Interval remote Setup Specify the polling interval in seconds for NetWare printing...

Страница 151: ...aring with Server Message Block SMB For setting up the Windows printing service text fields may include uppercase letters numerals spaces and the following characters _ NOTE Lowercase letters are not...

Страница 152: ...not have to be the same name as the server name assigned to the EX7750 see Server Name on page 5 5 Comment Enter information about the printer up to 15 characters These comments are listed in the Pro...

Страница 153: ...ugh remote Setup Up to 32 ASCII characters including spaces can be used for the community name Write Community Change the SNMP Community Name public by default for write access Once it is changed the...

Страница 154: ...n the EX7750 and on users computers A Java enabled Web browser and a valid IP address are required for each user For details on supported browsers and computer requirements see the User Software Insta...

Страница 155: ...rinting Enable Port 9100 Print Services Enables applications to open a TCP IP socket to the EX7750 at Port 9100 to download a print job Port 9100 Queue Allows you to attach Port 9100 to any of the pub...

Страница 156: ...ail Enabling e mail services is also required for printing an E mail log Enable Print via E mail If selected print jobs sent via e mail are accepted If this option is cleared print jobs sent via e mai...

Страница 157: ...e as the EX7750 attempts to connect to the mail server Polling Interval Specify in seconds how often the EX7750 checks the mail server for relevant e mail Account Name Mailbox Account Name Enter the m...

Страница 158: ...tor e mail address specified in EX7750 setup You can enter a maximum of 80 characters The administrator authorizes a unique e mail address to remotely administer e mail services including the Fiery Ad...

Страница 159: ...rinter Setup tab Printer Connections PS PostScript Setup PCL Setup Color Setup NOTE In the following illustrations Device name represents the model of the printer connected to the EX7750 which is EX75...

Страница 160: ...epresents the model of the printer connected to the EX7750 which is EX7550 Color Mode Specify whether to print color CMYK or Grayscale images to the EX7750 by default CMYK gives you full color prints...

Страница 161: ...If you select No the EX7750 prints the job only if it finds a media source in the size specified by the job Print Cover Page Specify whether the EX7750 prints a cover page job summary at the end of ea...

Страница 162: ...In the following illustrations Device name represents the model of the printer connected to the EX7750 which is EX7550 Enable PCL Select to enable PCL printing If you select it users can send print j...

Страница 163: ...r selected in Font Number represents a fixed pitch scalable font the Font Pitch option is selectable Specify the width of scalable type Pitch is measured by characters per inch so 10 pitch type fits t...

Страница 164: ...ttings for color options see the Color Guide and Appendix A of the Printing Guide The color job defaults can be overridden on a job by job basis A user can specify a different setting at print time fr...

Страница 165: ...Output Profile Output Profile Specify the output profile to be used as a default profile for printing Additional profiles can be created and downloaded to the EX7750 with ColorWise Pro Tools In local...

Страница 166: ...bout using the Printing Groups feature see the Printing Guide NOTE The Printing Groups feature cannot be enabled from Command WorkStation LE NOTE To change the Group Name or Group Password settings fo...

Страница 167: ...2 Select the printing group name in the Printing Groups Setup dialog box and click Modify 3 Make the necessary changes 4 Click OK TO REMOVE PRINTING GROUPS AND PASSWORDS 1 Select Printing Groups from...

Страница 168: ...by choosing Start Shut Down at the Taskbar for those changes to take effect When you finish specifying Setup options in remote Setup click Save and then Reboot Server for the new settings to take eff...

Страница 169: ...mmand WorkStation include the Test Page Control Panel Map Font List Job Log Color Charts and E mail Log For information about these EX7750 pages see the Job Management Guide TO PRINT THE CONFIGURATION...

Страница 170: ...This page is intentionally blank...
Страница 171: ...an acces WebTools from a Windows or Mac OS computer TO SET UP WEBTOOLS ON THE EX7750 1 In EX7750 Network Setup enable TCP IP 2 Set a valid unique IP address for the EX7750 and then set the subnet mask...

Страница 172: ...etwork Setup and Printer Setup You also must prepare each user s workstation to communicate with the EX7750 over the Internet or intranet For more information about Network Setup see Chapter 2 TO SET...

Страница 173: ...s been set TO CHANGE THE WEBLINK DESTINATION 1 Start your Internet browser 2 Enter the IP address or the DNS name of the EX7750 The EX7750 home page appears 3 Enter the Administrator password if requi...

Страница 174: ...This page is intentionally blank...
Страница 175: ...he printing environment Setting printer defaults including modes imaging paper size handling error handling Printer Setup page 4 44 and page 5 41 PS Setup page 4 46 and page 5 42 Printing Guide Settin...

Страница 176: ...the EX7750 Setting job specific options Using Fiery utilities Printing Guide Job Management Guide Controlling the job flow Using WebTools Command WorkStation and Fiery utilities and for managing job...

Страница 177: ...ter and confirm the password as described below New Password Use the up and down arrow buttons to select the characters and the left and right arrow buttons to move between them Enter characters from...

Страница 178: ...etup from the Server menu and click Server Setup and then the Password tab From Fiery WebSetup click Server Setup and then the Password tab From local Setup FACI right click FieryBar choose Setup Fier...

Страница 179: ...the EX7750 jobs in the EX7750 Print Hold and Printed queues Jobs can also be deleted either individually or as a group using the job management tools Clear Server also clears the Job Log all jobs arc...

Страница 180: ...o install system software from the system software CDs see page 7 10 Keep in mind the following when installing system software Job Log The list of jobs in the Job Log and any jobs in the queues are d...

Страница 181: ...tion when you install or restore system software The Configuration page is useful for restoring the desired Setup configuration after you install system software Font Lists the PS and PCL Font lists d...

Страница 182: ...e select OK 9 Scroll to Exit and select OK 10 At the message Remove CD and recycle power remove the Restore Update Server Software CD from the DVD drive Then using the power switch on the back panel p...

Страница 183: ...llation takes approximately one minute 12 At the message Remove CD and recycle power remove CD 3 Then using the power switch on the back panel power off the system wait 10 seconds and then power the s...

Страница 184: ...stall ore restore system software The Configuration page is useful for restoring the desired Setup configuration after you install ore restore system software Font Lists the PS and PCL Font lists deta...

Страница 185: ...e power remove CD 1 and insert CD 2 Then using the power switch on the back panel power off the system wait 10 seconds and then power the system back on After you power the system back on the Control...

Страница 186: ...content restored from CD 3 and then reboots once more Wait for the system to boot completely and the Idle screen to appear on the Control Panel This segment takes approximately six minutes 11 Reconnec...

Страница 187: ...ers who have print access Only users whose e mail addresses are in the print address book are authorized to submit jobs via e mail to the EX7750 Unauthorized users receive an e mail reply that their j...

Страница 188: ...dress book For example Address Book Admin List of addresses in the specified address book To add an address to an address book AddAddressTo name of address book For example AddAddressTo Print name dom...

Страница 189: ...he addresses as a text file or save the message for your record To delete an address from an address book DeleteAddressFrom name of address book For example DeleteAddressFrom User name domain or displ...

Страница 190: ...ddress book in the Subject line For the User enter GetAddressTo User For the Administrator enter GetAddressTo Admin or GetAddressTo Print 5 Copy the addresses retrieved and save it in the body of the...

Страница 191: ...and return to Idle before printing a Configuration page In particular the restart is necessary if you specified the DHCP or BOOTP protocol to obtain an IP address automatically for the EX7750 Post th...

Страница 192: ...the job management tools with Operator privileges can move or copy all the Hold queue jobs to the Print queue for printing Reduce unnecessary two way communication Large numbers of users running Fier...

Страница 193: ...splays a flashing red message that describes the error Activity light The activity light in FieryBar indicates current EX7750 activity If the light is Solid red An error has occurred causing the EX775...

Страница 194: ...ears all jobs in all server queues and all jobs archived on the EX7750 hard disk Check with the site administrator before choosing Clear Server Cancel Processing Cancels the job currently processing o...

Страница 195: ...ou are now ready for Font Archiving see Font Archiving on page 4 56 Starting and shutting down the EX7750 Generally you can leave the EX7750 running all the time This section describes how to shut dow...

Страница 196: ...nel reads Idle 2 Press the Menu button to display the Functions menu 3 Use the down arrow button to scroll to the last screen and choose Shut Down 4 Use the line selection button to choose Restart Ser...

Страница 197: ...utton to display the Functions menu 3 Use the down arrow button to scroll to the last screen and choose Shut Down 4 Use the line selection button to choose Reboot System To access the FACI if installe...

Страница 198: ...e on the Control Panel reads Idle If a job has just finished processing or printing wait at least five seconds after the Control Panel status message changes to Idle before proceeding NOTE If a job fr...

Страница 199: ...k cable is not plugged into the hub or network If your AppleTalk network has zones and you want to specify a zone for the EX7750 you must connect the network cable to the EX7750 before performing Appl...

Страница 200: ...owing message Delete Bindery setup and continue Repeat NDS Setup without changing the NDS tree or exit to Bindery Setup to review your current bindery settings Navigating NDS tree Network Setup Servic...

Страница 201: ...f bindery servers which is eight You now have the option of disconnecting one of those servers so as to add another Add Server Enter Your Login Name Enter Your File Server Password Network Setup Servi...

Страница 202: ...e server you are trying to access is running The Novell network has been configured with at least one print server and queue for the EX7750 You have the appropriate permissions and login information i...

Страница 203: ...ile Server Login screen Pressing the Menu button returns to the PServer Setup screen 255 Unable to connect to file server File server is down or out of connections The Novell file server is down or ou...

Страница 204: ...er is not connected or a print job is ready but the printer is not turned on Printer not found Most failures to find a printer on the network are due to conflicting or missing name or address settings...

Страница 205: ...host name DNS name TCP IP host name page 2 1 Name of printer on lpd host machine print or hold UNIX etc printcap file BSD rp line print or hold page 2 16 Solaris lpadmin queuename print or hold NetWa...

Страница 206: ...nfigured Efinl ini file Cannot connect to the EX7750 with Command WorkStation or Command WorkStation LE If there is a problem connecting to the EX7750 an error message is displayed The problem can occ...

Страница 207: ...to itself You review the results of the test by printing an E mail log through the Functions menu TO RUN TEST E MAIL 1 At the Idle screen press the Menu button to access the Functions menu 2 Choose R...

Страница 208: ...This page is intentionally blank...
Страница 209: ...password changing from Control Panel 7 3 changing from Windows computer 7 4 for setting the WebLink destination 3 5 6 3 privileges 3 3 Alert Status screen 4 5 Allow Courier Substitution option 4 47 5...

Страница 210: ...g by default 5 42 CMYK Simulation Method option 4 51 5 47 CMYK Simulation Profile option 4 51 5 47 Color Charts 4 7 Color Mode option 5 42 color server 1 11 back view showing connectors 1 11 Control P...

Страница 211: ...es option 4 46 5 43 Courier font substitution with 4 47 5 43 cover page printing at end of job 4 47 5 43 D date setting 4 13 5 6 Daylight Saving option 4 14 Default Orientation option 4 48 5 44 delete...

Страница 212: ...Server Password Bindery Setup 4 33 4 35 error messages 4 47 A 1 No AppleTalk zone found 4 19 during Setup A 1 during startup A 3 NetWare A 3 runtime A 6 Ethernet 1 12 frame types 5 12 network 2 8 Port...

Страница 213: ...with WebTools 3 4 WebLink access 6 3 Internet Printing Protocol enabling 4 39 IP address assigning automatically 4 20 for Ethernet Setup 4 21 required for TCP IP printing 2 17 IPP Setup 4 39 IPX Nove...

Страница 214: ...DS Setup 4 26 NDS tree browsing 4 26 4 27 5 17 browsing to print queue root 4 29 browsing to Print Server 4 28 browsing to User Login object 4 27 password 4 27 NetWare Bindery and NDS on the same netw...

Страница 215: ...ge Setup 4 48 PDF files font substitution in 4 47 5 43 Point and Print Drivers option 4 37 Polling Interval E mail Setup 5 39 polling interval for NetWare print jobs 4 36 5 32 Polling Interval option...

Страница 216: ...so AppleTalk IPX IPX SPX TCP IP PS PostScript Setup 4 46 5 42 PServer defined 4 24 See also NetWare PServer Setup 5 16 options 4 25 Publish Direct Connection option 4 45 5 41 Publish Hold Queue option...

Страница 217: ...tion 2 12 Setup PCL Setup 4 48 screen types 4 11 4 12 See also PCL Setup See also Server Setup Network Setup Printer Setup PS Setup Color Setup Job Log Setup Setup Fiery command from FieryBar 7 20 Set...

Страница 218: ...tting 4 14 5 6 Timeout option E mail Setup 4 42 5 39 Transmission Speed Ethernet option 5 9 troubleshooting Command WorkStation connection problems A 8 connection to printer fails A 6 Printer not foun...

Страница 219: ...39 5 36 enabling only certain WebTools 6 2 Installer 3 5 listed 3 4 setting up 6 2 Status 3 4 Windows 2000 with TCP IP 1 10 Windows computers printing without a Windows 2000 server 2 7 Windows printi...

Страница 220: ...This page is intentionally blank...
Отзывы: