A.6 Installing the Hard Disk
285
8.
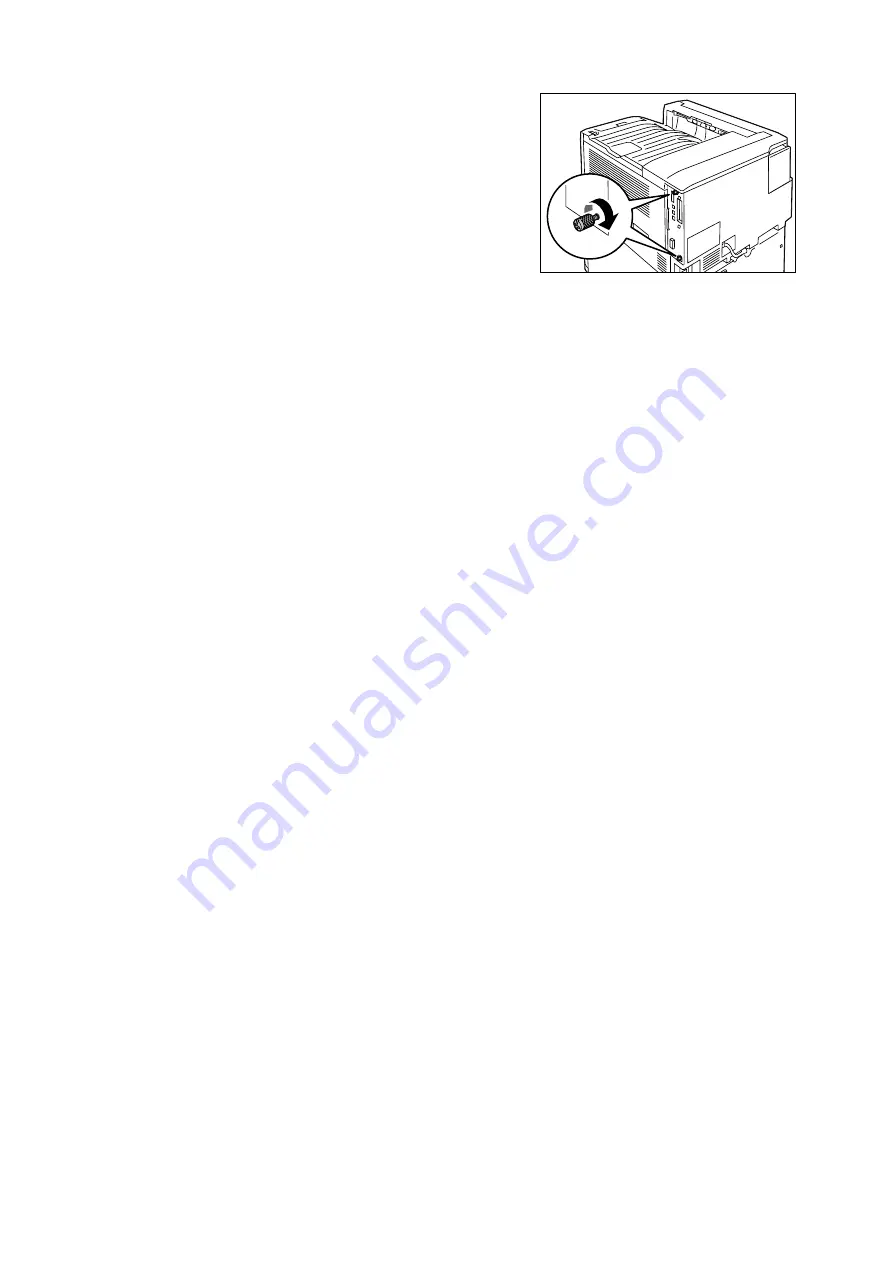
Tighten the two screws to secure the
control board in place.
9.
Connect the power cord to the printer.
Press the <|> side of the printer's power switch to turn on the power.
10. Print the [Configuration Report] and confirm that [Hard Disk] is included for the
[Machine Configuration] item in the [System Settings] section.
Refer to
• List printing procedure: “Printing a Report/List” (P. 222)
Hard disk installation is now complete.
Note
• After installing the hard disk, use the properties dialog box of the print driver to change the printer
configuration. For details, refer to the online help for the print driver.
Содержание DocuPrint C2255
Страница 1: ...DocuPrint C2255 User Guide ...
Страница 176: ...176 6 Troubleshooting 2 Remove the jammed paper 3 Gently close cover C ...
Страница 210: ...210 7 Maintenance 12 Close the front cover ...
Страница 266: ...266 7 Maintenance 7 Rotate the lever to the right to lock it 8 Close the front cover ...
Страница 313: ...Index 313 WSD 26 129 X XeroxStdAccounting 147 XPS 113 XPS file 309 ...
Страница 322: ...DocuPrint C2255 User Guide Fuji Xerox Co Ltd ME4197E2 1 Edition1 March 2008 Copyright 2008 by Fuji Xerox Co Ltd ...


