4
Fax
68
Xerox Phaser 3635 User Guide
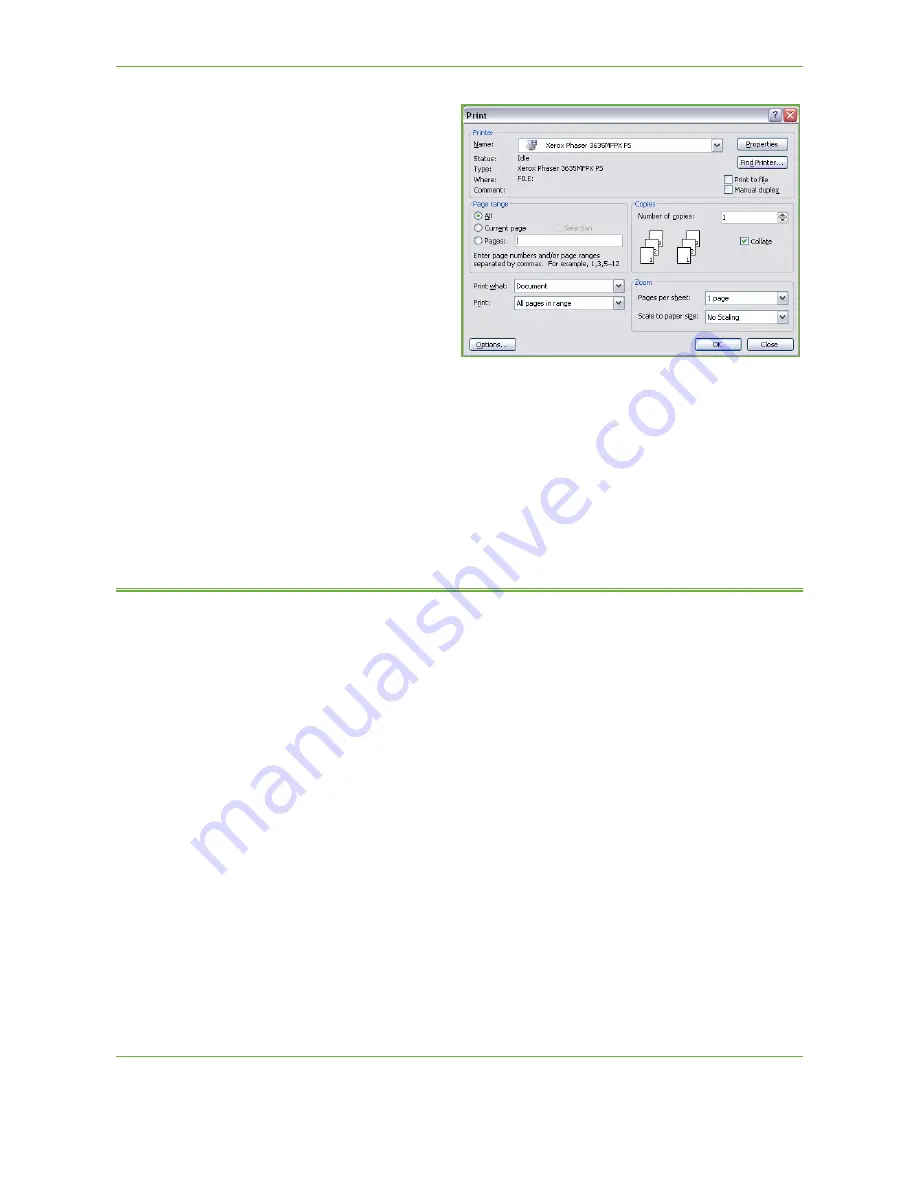
1.
Click
in your
application.
2.
Click on your machine
to choose it as the
printer.
3.
Click on the
Properties
or
Preferences
button.
4.
Click on
Fax
from the
Job Type dropdown
menu.
5.
Click on the
Add
Recipient
or the
Add
From Phonebook
button to add a recipient.
6.
Click
OK
to confirm your recipient selection.
7.
Click
OK
to confirm your selections in the Printing Preferences window.
8.
Click
to print your document.
9.
The Fax Confirmation box will appear. Check the fax number and then click
OK
to send your fax.
Embedded Fax
This section provides more detail on the Embedded Fax features.
•
Fax on page 69
.
•
Image Quality on page 73
.
•
Layout Adjustment on page 74
.
•
Fax Options on page 75
.
NOTE:
For Server Fax information refer to
Server Fax on page 80
.
Содержание 3635MFP - Phaser B/W Laser
Страница 1: ...Xerox PHASER 3635 User Guide ...
Страница 6: ...Table of Contents iv Xerox Phaser 3635 User Guide ...
Страница 26: ...1 Welcome 20 Xerox Phaser 3635 User Guide ...
Страница 42: ...2 Getting Started 36 Xerox Phaser 3635 User Guide ...
Страница 92: ...4 Fax 86 Xerox Phaser 3635 User Guide ...
Страница 110: ...5 Network Scanning 104 Xerox Phaser 3635 User Guide ...
Страница 140: ...7 Store File 134 Xerox Phaser 3635 User Guide 5 Select Confirm to delete the job or Cancel to return to previous screen ...
Страница 142: ...7 Store File 136 Xerox Phaser 3635 User Guide ...
Страница 150: ...8 Print Files 144 Xerox Phaser 3635 User Guide ...
Страница 153: ...9 Print Xerox Phaser 3635 User Guide 147 2 Click OK to confirm your selections 3 Click OK to print your document ...
Страница 162: ...9 Print 156 Xerox Phaser 3635 User Guide ...
Страница 172: ...10 Paper and other Media 166 Xerox Phaser 3635 User Guide ...
Страница 188: ...11 Setups 182 Xerox Phaser 3635 User Guide Tools User Interface Copy Service Settings Reduce Enlarge Preset ...
Страница 218: ...13 Specifications 212 Xerox Phaser 3635 User Guide ...
Страница 228: ...Index 222 Xerox Phaser 3635 User Guide ...


