4
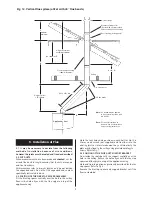
3.1. FLUE HEIGHT AND OFFSETS.
Determine the height of the flue system and if offsets are
needed for the system to miss ceiling/roof joists and any
other obstruction. Refer to Fig. 8.
3.2. INSTALLATION OF BOILER.
Refer to the relevant Installation and Servicing Instructions
for the fitting of the wall-mounting frame assembly and the
boiler.
Flush the system and, where required, the cold water supply
before connecting the boiler.
3.3. FLUE KITS AND EXTENSIONS.
Remove all the packing from the ducts, flue terminal
assembly and flue bends.
Important:
The air duct, flue duct, flue bends and the
terminal assembly are made from aluminium and must be
handled appropriately.
3.4. FLUE ADAPTOR
For some options a flue adaptor must be fitted into the spigot
on the top of the appliance casing. Refer to Fig. 9,10.
Fix the flue adaptor in position with the clamping screw
ensuring that it is correctly located against the stop. Refer to
Fig. 5.
If a flue bend
(WH1 and WR325 RSF may only use 45°
bends)
is to be fitted directly to the top of the appliance then
the flue adaptor is not required.
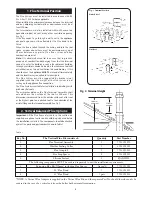
3.5. FLUE SUPPORT
Flue assembly lengths over 2000mm should be
appropriately supported. Refer to Fig. 6 and Section 5.4.
3.6. FIRE STOP SPACER
The fire stop spacer is supplied with the flue kit. Refer to Fig.
7 and Section 5.3.
3.7. ROOF FLASHING
The roof flashing is not supplied. This is available, as a
proprietary item (Selkirk or similar) from the building
suppliers to suit a flue size of 125mm diameter and to suit
pitched and flat roofs.
3. Preparation and General Notes
Fig. 5. Adaptor
Appliance front
Seal
Fixing screws
Vertical flue
adaptor
88mm high.
Clamping
ring
Ensure the ducts are
correctly located into
the socketed joints.
Fix suitable support
bracket to existing joists
(screws not incuded)
twist ends bracket to suit
existing joists if
necessary
Roof space
Ceiling Fire stop spacer
Flue and air ducts
Existing joists
Fig. 6. Flue support - not supplied
Fire stop spacer
Existing joists
25mm minimum gap to
combustible material
Drill a minimum of three holes 6mm
(0.25in.) dia. for No. 10 x 30mm
wood screws
Note:
The small hole at each
corner of the plate is for temporary
fixing prior to marking off and
drilling
Reinforcement nogs
Fig. 7. Fire Stop Spacer


