background image

PAGE  76  OF  102

INFLEXION PLUS 

OPERATING INSTRUCTIONS

TP-5211901-C

JUNE 2021

8.3 Nycoil® (Optional)

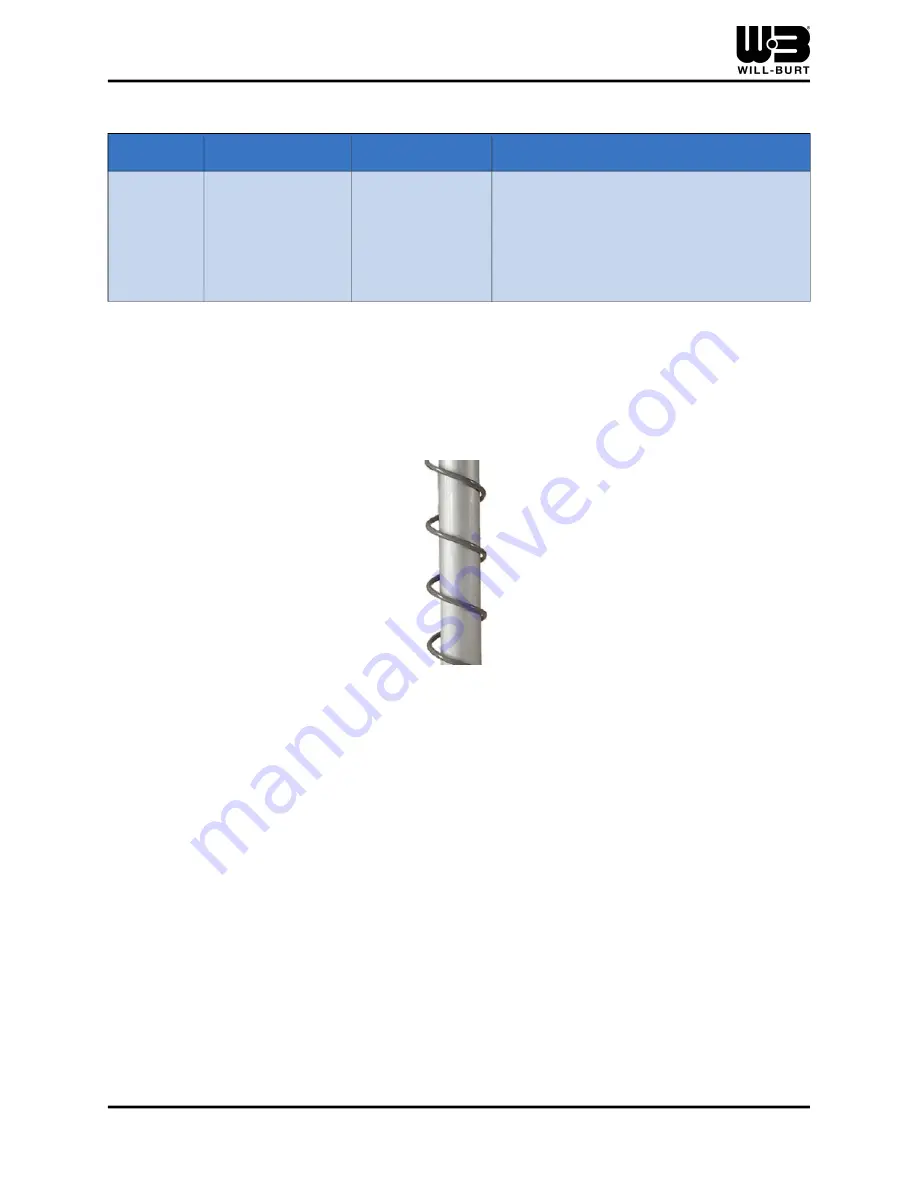
The  Nycoil®  Cable  Conduit  (Figure  8-2)  is  an  optional  external  coiled  hose  used  to  house

electrical wiring, antenna RF, camera and positioner cables.

Figure 8-2 Nycoil® Conduit

Nycoil®  conduit  comes  in  a  variety  of  sizes.  Depending  on  the  system  being  used,  some

restrictions on the size of the Nycoil® may occur. The standard sizes are:

• 1/2 inch (12.7 mm) inside diameter of the conduit with the outside diameter of the coil being 8 

inches (203.2 mm)

• 3/4 inch (19.1 mm) inside diameter of the conduit with the outside diameter of the coil being 

13 inch (330.2 mm)

Consult engineering on specific applications for other Nycoil® sizes.

Note: Nycoil®


is a registered trademark of the Nycoil company.

5,16

Supply Voltage 

Fault

The power 

supply section of 

the D-TEC® 

sensor is 

outside proper 

operational 

limits.

Check power connections, voltage level 

and induced noise on power source.

Table 8-2 D-TEC® Sensor Error Codes (Continued)

Message

Meaning

Root Issue

Potential Cause

Содержание Inflexion Plus 1.8

Страница 1: ...rt com TP 5211901 C June 2021 2021 The Will Burt Company Original Instructions Authorized Representative Will Burt Germany GmbH Co KG Fischergasse 25 D 91344 Waischenfeld Germany Inflexion Plus 1 8 2 3 3 0 4 5 6 0 7 5 Operating Instructions Inflexion Plus 721500020 Inflexion Plus PI 35 720777102 Inflexion Plus PI 75 722515210 ...

Страница 2: ......

Страница 3: ...TS PRODUCTS NO EMPLOYEE DISTRIBUTOR OR REPRESENTATIVE IS AUTHORIZED TO CHANGE THIS WARRANTY IN ANY WAY OR GRANT ANY OTHER WARRANTY ON BEHALF OF WILL BURT Claims for defects in material and workmanship shall be made in writing to Will Burt within thirty 30 days of the discovery of defect Failure to provide notice as required hereby shall be conclusive evidence that the product was in conformity wit...

Страница 4: ...l Data 29 5 Installation 31 5 1 Mounting Location Requirements 31 5 2 Recommended Installation Tools 32 5 3 Unpacking Handling 32 5 4 Attaching to Mounting Location 34 5 4 1 Positioner Mounting 35 5 5 Attaching the Air Connections 36 5 6 Installing Remote Control 37 5 6 1 Wired Hand Held Remote Control HHRC 37 5 6 2 Panel Mount Remote Control PMRC 39 5 6 3 Wireless Hand Held Remote Control WHHRC 4...

Страница 5: ...nance 64 7 6 Spare Parts 64 7 7 Periodic Inspections 65 7 8 Adjusting the 90 and Mast Stowed Limit Switches 66 7 8 1 Diagnostic LEDs on the Base PC Board 67 7 8 2 Adjusting the mast 90 Limit Switch 68 7 8 3 Adjusting the Mast Stowed Limit Switch 70 7 8 4 Adjusting the Mast Magnetic Down Switch 71 7 9 System Disposal 72 8 Reference Information 73 8 1 DIP Switch Definitions 73 8 2 D TEC Sensor 73 8 ...

Страница 6: ...PAGE 4 OF 102 INFLEXION PLUS OPERATING INSTRUCTIONS TP 5211901 C JUNE 2021 ...

Страница 7: ...y result in minor or moderate injury or equipment damage It is also used to alert against unsafe practices 1 2 Safety Instructions Electrocution Hazard Contact with high voltage will result in death or serious injury Observe general safety precautions for handling equipment using high voltage Do not locate or operate mast near electrical lines cables or other unwanted sources of electricity Allow ...

Страница 8: ... brake properly applied Do not put mast in service or operate without the vehicle interlock warning circuit or magnetic warning kit installed to provide confirmation mast is nested prior to moving the vehicle Contact The Will Burt Company Engineering for special on the move situations for military only use on specialized products Burst Hazard For pneumatically operated masts do not operate without...

Страница 9: ...uch as paint gasoline or solvents Do not use in areas of limited ventilation or where high ambient temperatures are present Safety Equipment PPE Proper personal protective equipment PPE like hard hats gloves and safety shoes shall be properly worn while working on mast or near the deployment area of mast In addition eye protection shall be worn during maintenance procedures Follow national PPE gui...

Страница 10: ...rsons clear of mast and mast extension Do not lean directly over mast Locate the operator station such that the operator has a clear view of the operating space of mast and payload prior to deployment to avoid contact with overhead objects Manual Retraction For powered masts make sure all power sources have been disconnected from the system prior to manually lowering mast to avoid unexpected start...

Страница 11: ... Equipment Damage Forces Before unloading the system be certain the unloading region is capable of resisting forces generated from unloading the system including but not limited to system weight Ensure the unloading region is level and has sufficient room and strength to hold the system If the unloading region is incapable of meeting the requirements of the system damage to the system and or unloa...

Страница 12: ...rgency stow button normal operation switches are disabled The mast can be overdriven into saddle and cause damage to the unit Disengage the emergency stow button when the payload reaches the saddle and is tight Do not drive mast beyond this position Pressurized Device Hazard Completely lower the mast depressurize and shut down power before disassembly Mast disassembly prior to depressurization may...

Страница 13: ... motion 1 3 Symbols Used on Product Labels The following symbols are displayed on the product The symbol meanings are as follows This symbol indicates an electrocution hazard or hazardous voltage hazard There is voltage present inside mast and control box Do not operate mast near electrical lines or during electrical storms Contact with high voltage will result in death or serious injury This symb...

Страница 14: ...PLUS OPERATING INSTRUCTIONS TP 5211901 C JUNE 2021 This symbol indicates an electrical ground connection point This symbol is used to indicate the center of gravity COG of a fully nested mast in a horizontal transport position ...

Страница 15: ...2016 The mast systems are designed to be compliant with the following sections of National Fire Protection Agency NPFA 1901 2016 Edition 22 14 Powered Operated Light Masts 23 13 Power Operated Masts 2 2 CE Declaration of Conformity Refer to the Product page at www willburt com for the latest Declaration of Conformity ...

Страница 16: ...PAGE 14 OF 102 INFLEXION PLUS OPERATING INSTRUCTIONS TP 5211901 C JUNE 2021 ...

Страница 17: ...ith PositionIt PI 35 and Inflexion Plus with PositionIt PI 75 mast systems are roof mounted fold down telescoping masts designed for smaller payloads like broadcast devices They are created for installation on any vehicle The different mast models tilt to vertical and extend upwards for usage and retract and fold down for transport Air pressure required to extend the mast is provided by the vehicl...

Страница 18: ...ne at 28 8 volts the system may draw up to 9 amps Power must be supplied to the Inflexion Plus at 12 or 24 VDC If a high output compressor is used 12 VDC power must be supplied separately to the compressor The source must be protected at 50 amps 3 3 Intended Use The Inflexion Plus Inflexion Plus with PositionIt PI 35 and Inflexion Plus with PositionIt PI 75 are intended for use by professionals in...

Страница 19: ... Controller HHRC refers to the controller used to operate the mast Payload refers to the object or equipment being extended by the mast to an operational height Figure 3 1 System Orientations Inflexion Plus 4 5 Shown Figure 3 2 System Orientations Inflexion Plus 4 5 with PositionIt Shown Top Look Up Light Hidden Bottom Front Right Left Look Up Light Rear Side View from Left Side Overhead View from...

Страница 20: ...nual Stowed is the horizontal position in which the mast is firmly seated in the saddle This position is sometimes referred to as the nested position 90 is the position that the mast electrically goes to from the stowed position At 90 the mast has angled up but no mast sections have risen The mast remains retracted Extended is the partial or full raised position that the mast pneumatically goes af...

Страница 21: ...sition from the stowed position without causing damage This position can be set to the Lights button on the HHRC 3 5 1 Positioner Orientations When operating the positioner directions are given as follows Figure 3 4 PositionIt PI 35 Positioner Directions Figure 3 5 PositionIt PI 75 Positioner Directions Left Right Side Egress Front Left Right Rear Side with Side Egress Rotate Clockwise Towards Rig...

Страница 22: ...Saddle The exact configuration of the Inflexion Plus may vary The general layouts for each model are as follows Models 1 8 and 2 3 Models 3 0 4 5 6 0 and 7 5 For detailed information on the locations of components in your system see the drawings that shipped with the system Figure 3 6 Left Side of Models 1 8 and 2 3 Base Cover Removed Tube Section Collars Mast Look Up Light Magnetic Down Switch 90...

Страница 23: ...oved Figure 3 8 Left Side of Models 3 0 4 5 6 0 and 7 5 Base Cover Removed Safety Valve Air Compressor Actuator 90 Switch Stowed Limit Switch Top Platform Not Shown Top Platform Not Shown Mast Magnetic Down Switch Look Up 90 Switch Rubber Padding Air Valve Base Circuit Board Access Holes Saddle Tube Section Collars Light Cropped View ...

Страница 24: ...uator and the air compressor Magnetic Down Switch The magnetic down switch is activated by a magnet in the mast top tube section The position is factory set to indicate when the mast is fully retracted Once activated the mast is free to tilt back to the stowed position See Section 7 8 4 for optional adjustment Saddle The saddle supports the mast when nested for stable vehicle transit The saddle po...

Страница 25: ...the 90 vertical position The mast is driven into a rubber pad under the mast It is activated by a magnet located on the tilt mechanism The remote control functions are disabled until this 90 limit switch is activated Once activated the remote control functions are active for use The limit switch is adjustable and set at the factory See Section 7 8 2 for optional adjustment procedure Stowed Limit S...

Страница 26: ...ssembly is standard with models 3 0 4 5 6 0 and 7 5 Air Compressor The air compressor supplies air to raise the mast when the operator presses the Mast Up button on the controller after the mast electrically reaches the 90 position There is no mast fully extended switch Once full extension is reached if the Mast Up button is not released the maximum air pressure is reached and the blow off valve o...

Страница 27: ... 12 Is made of die cast aluminum casing Uses stainless steel fasteners Has weather and dust proofing to an IP68 rating Is designed to minimize backlash Is configured to run on RS485 data using Pelco D protocol Figure 3 12 PositionIt PI 35 Payload Platform Pan and Tilt Head Base Removable Plug on Side Egress Mounting Pedestal Bottom Egress Hidden on Underside of Mounting Pedestal ...

Страница 28: ...esigned to minimize backlash Is configured to run on RS485 data using Pelco D protocol Figure 3 13 PositionIt PI 75 3 7 3 PositionIt Saddle The PositionIt saddle is attached to the Inflexion Plus and is used to support the weight of the positioner and payload during transportation Figure 3 14 PositionIt Saddle PositionIt PI 35 Shown Payload Platform Removable Plug on Side Egress Mounting Pedestal ...

Страница 29: ...unts to a panel and has LED display 3 Wireless Hand Held Remote Control WHHRC This option comes with a separate control box that contains the transceiver This control box is mounted separately from the mast A HHRC can be plugged into the wireless control box and used with the wireless control Refer to operating instructions TP 5543301 for installation and operation for the optional WHHRC Figure 3 ...

Страница 30: ...PAGE 28 OF 102 INFLEXION PLUS OPERATING INSTRUCTIONS TP 5211901 C JUNE 2021 ...

Страница 31: ...2 to 149 F 30 to 65 C System Storage Temperature 40 to 149 F 40 to 65 C Maximum Deployment Angle 10 17 6 Grade 5 9 Grade Deployment Wind Speed mph km h 40 max 64 max Altitude Above Sea Level ft m 15 000 4572 Max Survival Wind Speed mph km h 140 225 140 225 124 199 94 151 76 122 64 102 Auto Deploy and Auto Stow Yes D TEC Option Available Yes Airborn Noise Emissions Per EN ISO 3744 2010 equivalent A...

Страница 32: ... 20 to 50 C 4 to 122 F 20 to 50 C Pan Degrees and Rotation 200 200 Tilt Degrees and Rotation 90 90 Pan Speed Proportional 2 s to 12 s 6 5 s Tilt Speed Proportional 2 s to 12 s 5 5 s Backlash 0 15 0 15 Repeatability 0 3 0 3 Maximum Continuous Power 44 W 44 W Maximum Continous Current 24 VDC 1 85 A 1 85 A Input Voltage 24 VDC 24 VDC Protocol Pelco D used Pelco P available Pelco D used Pelco P availa...

Страница 33: ... at the factory based on a level surface If the system is not level these switches may need adjusted as described in Section 7 8 3 3 Be sure to mount the system out of reach of anyone who may be near the vehicle to allow the mast to be safely raised and lowered The installed elevation of the bottom of the mast base shall be at least 2 7 meters 8 8 feet above ground level to prevent reach of upper ...

Страница 34: ...lation Tools Materials Tools and Materials Safety Glasses Safety Gloves Safety Shoes Hard Hat or Helmet Hearing Protection Crimping Tool or Solder Set Wrenches Screwdrivers Multimeter to verify power is turned off Torque Wrench Drill Knife or Scissors to Cut Crate Band Wire Cutter Stripper RTV Silicone 1 2 inch or M12 Mounting Hardware 6 each Shop Rags Hoist minimum 500 lb 227 kg capacity Thread L...

Страница 35: ...pping crate or carton Remove any banding fixing the mast 6 Using a hoist lift the unit from the shipping container by the mast tube at the labeled center of gravity symbol Figure 5 2 position Lifting from locations other than those indicated could result in equipment damage Use two point contact for slings to keep the load stable while moving Figure 5 2 Center of Gravity Symbol Table 5 2 Component...

Страница 36: ...s steel or stronger bolts are recommended It is up to the installer to ensure proper thread locking methods are used to keep the bolts from backing out due to vehicle vibration Attach the base to the mounting surface in four locations using 9 16 inch bolts washers Torque all hardware as appropriate for its material and size The two saddle bolts can be attached later when power is available since t...

Страница 37: ...e base in order to mount the system to the vehicle When installing the mast should be tilted to the vertical position Once the base is installed it may be necessary to lower the mast and adjust the PositionIt saddle height before installing the payload It is the responsibility of the customer to properly secure the payload for vehicle travel The positioner must also be supported in addition to the...

Страница 38: ...h a inch or equivalent metric inside diameter air hose The unit is supplied with 20 feet 6 m of air hose labeled EXHAUST to designate its use to route exhausted air to a location where it will not expel air or water onto personnel or equipment sensitive to moisture The different size hose with the labeled intention of the hose is designed to prevent pressurized air to be routed into the EXHAUST of...

Страница 39: ...l the connection point for the HHRC at the operator control location The operator station should be located where the operator has line of sight to the mast operating space The bulkhead and HHRC should be located in a protected dry location the HHRC is IP54 To attach the bulkhead 1 Drill clearance holes for 1 4 20 screws located per Figure 5 5 Either two hole pattern can be selected according to t...

Страница 40: ... nut bolt or sheet metal screw or other selected 2 The mounting screws are provided by the installer based on the method of attaching selected The recommended screw size is M4 flat head to sit flush with the surface after installation Use the proper installation torque for the screw selected and use thread locking techniques to prevent the screws from backing out due to vibration Mount the holder ...

Страница 41: ...ocated where the operator has line of sight to the mast operating space The PMRC should be located in a protected dry location the PMRC is IP54 To attach the PMRC 1 Cut the panel according to the dimensions shown in Figure 5 7 2 The screws are provided by the installer 10 stainless steel screws are recommended with an installation torque of 20 24 in lb 2 2 2 7 Nm 3 Place the PMRC through the panel...

Страница 42: ...or and attach the connector to the back of the PMRC To wire the PMRC connector 1 See the Wiring Diagrams provided in the Appendix 2 Ensure power is properly disconnected from the system 3 Connect the wires from the Control Cable to the supplied PMRC plug according to the wiring diagram 4 Plug the cable into the back of the PMRC 5 6 3 Wireless Hand Held Remote Control WHHRC Refer to TP 5543301 for ...

Страница 43: ...d remove the cover a For models 1 8 and 2 3 run the Bulkhead Cable from the HHRC connected to the bulkhead or the PMRC Control Cable into the bottom of the base Figure 5 8 Models 1 8 and 2 3 Access Holes b For models 4 5 6 0 and 7 5 run all power data cables connected to the bulkhead into the interface panel Figure 5 9 Figure 5 9 Models 4 5 6 0 and 7 5 Interface Panel Only interface panel shown Ac...

Страница 44: ...e or PMRC Control Cable connects the bulkhead Remote Control and Base Board 3 Connect the wires from the Bulkhead Cable or PMRC Control Cable to the green J4 connector located on the top left of the Base Board ensuring the wires match the color strip on the J4 connector Figure 5 10 Connect the J4 connector to the Base Board Figure 5 10 Wiring J4 ...

Страница 45: ...s a 20 Amp fuse to protect the mast control circuits from over current events The installer is responsible for providing the means to remove isolate power from the mast and permit the operator to follow proper lock out tag out procedures for maintenance or troubleshooting Power cables for the mast controls are provided by the installer The cables must Be type SJOOW or equivalent Be 10 AWG or 6mm2 ...

Страница 46: ...gements are possible Figure 5 11 Example Vehicle Safety Interconnect Circuit The contact output is set at the factory to be OPEN when the mast is active not stowed by setting the S2 1 dip switch to the OFF OPEN position To change the contact output to be CLOSED when the mast is active set the S2 1 dip switch to the ON CLOSED position Mast power needs to be cycled for this change to take effect 5 7...

Страница 47: ...ayload To attach the payload 1 Ensure power to the system is off while installing the payload 2 Reference Figure 5 12 or Figure 5 13 for the mounting hole pattern for the payload Note that the four countersink holes in the corners of the payload platform are used for the Inflexion Plus nesting brackets and are not used for mounting the payload 3 Position the payload on the mounting plate 4 Connect...

Страница 48: ...PAGE 46 OF 102 INFLEXION PLUS OPERATING INSTRUCTIONS TP 5211901 C JUNE 2021 Figure 5 13 PositionIt PI 75 Payload Mounting Hole Pattern ...

Страница 49: ...ht buttons one at a time 7 Only applies to models with PositionIt Press and hold the Mast Up button When the mast is fully extended and the blow off valve opens release the Mast Up button 8 To ensure that the mast is properly sealed while the mast is fully extended watch for any type of mast lowering 9 Press and hold the Mast Down button until the mast has completely stowed and then release the bu...

Страница 50: ...PAGE 48 OF 102 INFLEXION PLUS OPERATING INSTRUCTIONS TP 5211901 C JUNE 2021 ...

Страница 51: ...remove any objects which might obstruct motion of the mast cause binding or hinder mast function 4 Ensure the operator has full view of the system during use 5 Ensure the system area is free of personnel 6 When using a vehicle the vehicle is not moving and the parking brake is engaged The system and payload are properly installed 7 The payload must be tethered to the top of the mast to prevent it ...

Страница 52: ... button on the HHRC The stowed position is the position the positioner goes to before the system is stowed to ensure that the payload is properly oriented for stowing and transportation Programing of the stowed position is done at the factory To program a stowed position 1 Pan and tilt the positioner to the desired position 2 Press and hold the Pan Left and Pan Right buttons simultaneously Figure ...

Страница 53: ... the unstowed position 1 Raise the mast to 90 2 Pan and tilt the positioner to the desired position 3 Press and hold the Pan Left and Pan Right buttons simultaneously Figure 6 2 4 Press the Light button Figure 6 2 The unstowed position is now set Figure 6 2 Setting the Preset Unstowed Position Pan Left Pan Right Lights Hold the Pan Left and Pan Right Buttons Simultaneously Press the Lights Button ...

Страница 54: ...il the button is released or the positioner reaches one of its limits Note that the positioner motor and gearbox assemblies are designed to be stalled when they hit an obstruction but that continued abuse will cause damage The positioner can also go to the preset stow and unstow positions The stow positions ships from the factory set to a default position The optional unstow position does not ship...

Страница 55: ...p button if needed Then press NFPA Start to power up the mast 4 Raise the mast to 90 by performing one of the following steps Quickly press Mast Up twice Auto Up feature to move mast to 90 To abort the Auto Up feature press any controller button Press and hold Mast Up to raise the mast Only the controller buttons that have a lit LED are active 5 If desired raise the mast further by pressing Mast U...

Страница 56: ...orizontal position upon initiation 6 7 Raising the Mast to 90 The mast uses a DC powered actuator to drive the mast from stow to 90 When at 90 a proximity sensor detects the actuator then drives the actuator a bit further Driving the actuator a bit further causes the mast to seat firmly into the rubber mast pad Do not overdrive the actuator or damage to the system could occur Once the mast is at 9...

Страница 57: ...ed position and begins moving toward 90 takes about 2 seconds the controller Mast Down and Mast Up LEDs will light To raise the mast to 90 using the Auto Up feature press the Mast Up button twice quickly in successive depressions two depressions within a second The mast will raise to 90 The mast will not extend upward by itself but will await further operator input from the controller 6 7 2 Using ...

Страница 58: ...brief over current condition is met when the mast is driven into the saddle The mast can be stowed by using Auto Stow Mast Down Emergency Stow With Power Emergency Stow Without Power All power is automatically removed after the mast contacts the saddle and the current limit is reached To operate the mast again the system must be re initiated This is a safety feature that prevents the mast from bei...

Страница 59: ...road Once stowed the Mast Stowed Safety Interlock Contact signals it is safe to move the vehicle 3 Store Remote Controls if used so they will not be damaged during transportation 6 10 2 Using the Mast Down Button Another method used to stow the mast is to press and hold Mast Down on the controller This method is not as reliable as using the Auto Stow feature Care must be taken to ensure that the o...

Страница 60: ...ts nested position Once the mast has lowered to its nested position pressing and holding S4 will drive the tilt actuator to stow the mast The mast will continue to tilt and drive in the saddle until S4 is released Do not over drive the actuator into the saddle To stow the mast using the emergency stow button 1 Remove the left side cover the side with the look up light as viewed from the back of th...

Страница 61: ... place the payload in the stow position Ensure that the payload will not make contact with the saddle or mounting surface when the mast stows 3 Remove the base right side cover to access the actuator 4 Remove the 6 mm hex head bolt on the end of the actuator cover Figure 6 3 This bolt acts as a cap seal and when removed exposes the manual actuation shaft in the actuator 5 Place a long 6 mm hex hea...

Страница 62: ...PAGE 60 OF 102 INFLEXION PLUS OPERATING INSTRUCTIONS TP 5211901 C JUNE 2021 ...

Страница 63: ...nance Check Before performing maintenance procedures ensure The payload is removed prior to performing maintenance on the system The system is level and secure 7 2 Maintenance Tools Table 7 1 lists recommended tools and materials for maintenance Table 7 1 Tools and Materials Recommended for Maintenance Tools and Materials Safety Glasses Safety Gloves Safety Shoes Hard Hat or Helmet Hearing Protect...

Страница 64: ...dure once maintenance is complete 7 4 Cleaning and Lubricating the System The Will Burt Company s pneumatic telescoping masts from come from the factory pre lubricated and require no scheduled lubrication under normal operating conditions for the life of the product In extremely harsh environmental conditions cleaning and lubrication of the mast might be required Signs that cleaning and lubricatio...

Страница 65: ... the cleaning fluid or solvent to run down inside the collar 3 Inject approximately oz of TMD Mast Lubricant into the weep hole drain of the exposed mast section The weep holes are located approximately 10 below the collar on each tube except the top tube 4 Repeat steps 1 3 for the next larger mast section Do not lubricate the exterior of the mast This will cause the lubricant to attract dust and ...

Страница 66: ...after at regular six month intervals Inspect to ensure cables are undamaged and properly terminated Cabling of the correct type as specified by national and local standards should be used Cables should be checked for wear at six month intervals and replaced as necessary Ensure no water can enter the positioner particularly through the connectors Water can cause extreme problems with the positioner...

Страница 67: ... move smoothly and do not cause excessive impact loads when each tube fully extends or retracts Clean and lubricate the mast per the procedure in section 7 4 If the condition remains after lubrication cease all mast use and contact Will Burt Service immediately Monthly Inspect for any damage to electric cables and pneumatic tubes Replace cables tubes as required Monthly Test the Vehicle Interconne...

Страница 68: ...ght fixtures The RCP housing should not have any mechanical play allowing it to bounce when being transported on a vehicle If mechanical play is observed adjust the mast stowed limit switch position to allow the RCP to drive tightly into the saddle according to Section 7 8 3 Every 6 Months Extend the mast to the 90 position and make sure the mast is rigidly driven into the rubber pad below the mas...

Страница 69: ... stowed position is shown in Figure 7 1 These diagnostic LEDs can be used to help determine if an adjustment is necessary for example if D7 D8 shows Yellow when the mast is supposed to be stowed They are also useful in assisting to determine when the switches have been properly adjusted Figure 7 1 Diagnostic LEDs stowed position example Table 7 3 Mast Positions Shown by Diagnostic LEDs Mast Positi...

Страница 70: ...t the base is level 2 Remove the left base cover to access the Limit Switches and Base Board 3 Loosen the lock nuts to adjust the switch position in the slot 4 Raise the mast to 90 by holding the Mast Up button until the mast is at 90 Do not use the Auto Up feature to raise the mast to 90 5 Check that the mast is at 90 by using a level ensuring that the mast is square to the sheet metal side plate...

Страница 71: ...01 C JUNE 2021 9 Replace the base cover Figure 7 2 Models 1 8 and 2 3 Mast Stowed and 90 Switch Figure 7 3 Models 3 0 4 5 6 0 and 7 5 Mast Stowed and Mast 90 Limit Switch Locations Cover Removed Mast Stowed Switch 90 Mast Switch Mast Stowed Mast 90 Switch Switch ...

Страница 72: ...to the Mast Stowed Switch 4 Loosen the lock nuts to adjust the switch position in the slot 5 Lower the mast to the stowed position by holding the Mast Down button until the mast is stowed Immediately release the Mast Down button when the mast is stowed If you drive the mast too far into the saddle you may receive a 1 04 error excessive amp draw during actuator decline Do not use the Auto Stow feat...

Страница 73: ...n Switch and lower the clamp to the bottom of the mast 3 Remove the left base cover to expose the base PC Board diagnostic LEDs see Figure 7 1 4 Ensure the mast is fully nested no gaps between collars While observing the Base Board diagnostic Mast Down LED slowly move the band clamp up until the Mast Down LED turns green 5 To test a Initiate the mast b Press the Mast Down button on the controller ...

Страница 74: ...PAGE 72 OF 102 INFLEXION PLUS OPERATING INSTRUCTIONS TP 5211901 C JUNE 2021 7 9 System Disposal Dispose of the Mast in accordance with the national environmental regulations ...

Страница 75: ... is a Profiler unit and if the system stows before or while lowering For additional information on the DIP Switches and their settings see the wiring diagram in the Appendix Note The controls check the status of the DIP switches only during initialization After flipping a DIP switch the system will need restarted for the change to take effect 8 2 D TEC Sensor The D TEC Sensor is an optional access...

Страница 76: ...on to be false they may clear it in either of two ways momentarily initiating an Auto Stow function or lowering the mast to the bottom of the 90 position for fold down models This will clear the alarm and allow the operator another chance to raise the mast to its full extension The following messages may be displayed on the Remote Control s The following table contains possible D TEC messages Tabl...

Страница 77: ...ccurs 5 03 SPI Fault A communications bus internal to the D TEC Sensor has failed during self test Defective Sensor 5 07 Unrecoverable Communication Error No successful communication for 250ms Check connection data lines ground for continuity This error may also be displayed on systems without a D TEC if the Base Board is missing the 4710801 DIP Switch Shunt Board 5 09 E Field Fault E Field portio...

Страница 78: ...are 1 2 inch 12 7 mm inside diameter of the conduit with the outside diameter of the coil being 8 inches 203 2 mm 3 4 inch 19 1 mm inside diameter of the conduit with the outside diameter of the coil being 13 inch 330 2 mm Consult engineering on specific applications for other Nycoil sizes Note Nycoil is a registered trademark of the Nycoil company 5 16 Supply Voltage Fault The power supply sectio...

Страница 79: ...PAGE 77 OF 102 INFLEXION PLUS OPERATING INSTRUCTIONS TP 5211901 C JUNE 2021 8 4 The Will Burt Company Mast Oil Safety Data Sheet ...

Страница 80: ...PAGE 78 OF 102 INFLEXION PLUS OPERATING INSTRUCTIONS TP 5211901 C JUNE 2021 ...

Страница 81: ...PAGE 79 OF 102 INFLEXION PLUS OPERATING INSTRUCTIONS TP 5211901 C JUNE 2021 ...

Страница 82: ...PAGE 80 OF 102 INFLEXION PLUS OPERATING INSTRUCTIONS TP 5211901 C JUNE 2021 ...

Страница 83: ...splay errors and warnings will typically be shown there Table 9 1 Error and Warning Codes for Base Board Message Meaning Root Issue Potential Cause WRN 1 04 Look Up Light is burned out The control circuit is not sensing the Look Up Light current Look up Light is burned out or disconnected WRN 1 05 Well cover switches indicate closed when they should be open This stops all vertical movement of the ...

Страница 84: ...ast at 90 1 04 Excessive amp draw during actuator decline Current sensor indicating it has exceeded 12v systems 10A for 100ms 24v systems 6 0 amps AND less than 10 amps for 100 msec If mast stops at 70 and issues error replace Base Board Current sense circuit has failed If error occurs during nesting check LED D7 MAST STOWED near 0 Once the sensor sees the magnet it allows 0 5 sec to see the nesti...

Страница 85: ...box Note if the unit is in Non NFPA mode and connected to an NFPA junction box the unit will look normal UP led on HHRC on but will not respond to the HHRC The software is expecting to see the init signal always on No error message is generated 2 Wiring short in the control cable or defective switch wiring 1 10 Memory Error Memory Error Memory Error 1 11 Actuator current has unexpectedly stopped D...

Страница 86: ...or indicates it did not move after 8 seconds v7 2 or 15 seconds v7 3 3 Sensor is not seeing magnet when mast is fully retracted 1 There may be a wiring problem or a defective magnetic sensor or 2 Defective magnetic sensor air supply inadequate or external magnet affecting sensor 3 Sensor not seeing magnet sensor needs to be re aligned 1 15 At 90 Actuator Sensor State Error Checked at power up afte...

Страница 87: ...tial Cause WRN 2 04 Single tilt Tilt Stuck Dual tilt Left Tilt Stuck Checked only when moving out of a limit position The software indicates the state of the left tilt photo sensor has not changed even though the motor has been told to move for more than 1 2 second Something is preventing movement of left tilt mechanism the motor is defective or the RCP board is defective WRN 2 05 Right Tilt Stuck...

Страница 88: ...or the P T drive board is defective 2 04 Positioner Only PAN pot stuck 2 07 Communication Timeout The RCP or P T Drive board has not sent out communications recently Bad board or connection in communications link 2 08 Microprocessor error The RCP board has sent an invalid message Indicates a software problem 2 09 RCP Only Left Tilt Up wrap around The software indicates the same photo sensor was ma...

Страница 89: ... Pan Left wrap around 2 15 Left Tilt Limit Overlap The software indicates both tilt photo sensors appear to be blocked simultaneously Foreign material in one of the photo sensors or faulty photo sensor 2 16 Right Tilt Limit Overlap Table 9 3 Error and Warning Codes for HHRC Message Meaning Root Issue Potential Cause WRN 3 02 Dual HHRC simultaneous inputs Two HHRCs are sending commands simultaneous...

Страница 90: ... DC power cable connector to the HHRC connector Refer to System schematic Also check that the shield in the junction box has a good electrical connection to the electronics common at one end or the other but not both 3 08 Microprocessor Error Internal firmware detected error Replace HHRC or HHRC Display pcb 3 09 RF module Error Wireless Transmitter Receiver did not properly initialize Return HHRC ...

Страница 91: ...it 8 System can have a panel mount remote and an HHRC or 2 HHRCs but never 3 remote units Negotiation happens every time the Base unit is powered up Wireless HHRC is not plugged in during power up 8 12 In system reprogramming failed Dip switch activated in system reprogramming of attached devices was not able to successfully complete Table 9 5 Mechanical Symptoms and Troubleshooting Sequence Sympt...

Страница 92: ... Replace motor Mast fails to fully nest in saddle and disconnects power Binding of actuator software fault or control erroneously sensed an increase in current 1 Check that Base Board has software version 2 6 or later Contact Will Burt if update is required 2 Check actuator or mast for binding Replace actuator if binding or remove source of binding Mast will not begin to lower from 90 position fol...

Страница 93: ...ctronic limit stops Positioner does not pan or tilt in multiple directions The system is not receiving power Check the schematics The power supply is wrong Check the schematics System settings are incorrect Reset the factory defaults The controller is in a menu Exit the menu The system wiring is incorrect Check the schematics Wires are broken or improperly terminated Check the wires and connection...

Страница 94: ...PAGE 92 OF 102 INFLEXION PLUS OPERATING INSTRUCTIONS TP 5211901 C JUNE 2021 ...

Страница 95: ...t Revision Date Change Details Changes Backward Compatible with Previous Manual Version TP 5211901 00 May 2015 Initial Release TP 5211901 A Apr 2016 General Update Yes TP 5211901 B Nov 2016 Updated Section 4 5 1 Yes TP 5211901 C June 2021 Updated to CE format Added information about the PositionIt PI 35 and the PositionIt PI 75 Yes ...

Страница 96: ...PAGE 94 OF 102 INFLEXION PLUS OPERATING INSTRUCTIONS TP 5211901 C JUNE 2021 ...

Страница 97: ...s for the system 11 1 Installing a Wired HHRC with J Box To electrically connect a wired HHRC with a J Box follow the instructions in Section 5 for Wiring the Base Board and use the following schematic Figure 11 1 Figure 11 1 Alternate Wiring Using J Boxes 11 2 System Wiring Diagram The system wiring diagrams are as follows ...

Страница 98: ...E AROUND THE FERRITE ONE TIME SECURE WIRES AT BOTH ENDS OF THE FERRITE CORE WITH WIRE TIES 1 1 1 M DC OPTIONAL DC EXTREME COMPRESSOR WIRING FOR DC BOARD POWER AND COMPRESSOR POWER MUST BE SEPARATE RUNS TO AVOID VOLTAGE SAG AT COMPRESSOR START DC 10 GA VENT VALVE BLK RED BLK BLK BRN RED 10 GA BLK BLK BRN RED RED J5 5 J5 6 TB3 4 TB3 3 SOLENOID INSTALLER WIRING FROM NOM 12V SOURCE PROTECTED AT 50A BL...

Страница 99: ... L N L 3 5 7 8 RED BLK 86 85 87 30 BLK 13 VIO 12 GRY 11 RED 14 N L CAMERA VOLTAGE DIFFERENT THAN SYSTEM VOLTAGE OPTIONAL CAMERA AND ISOLATION RELAY RELAY COIL MUST MATCH SYSTEM VOLTAGE CAMERA VOLTAGE SAME AS SYSTEM VOLTAGE WIRING FOR 12VDC LIGHT KITS 20A SIDE SOLENOID ASM 4965101 3 4 GRY 5 6 PNK 9 10 ORG 7 8 VIO DC DC LIGHT POWER SOLENOID 18 GA BLK 2 10 GA RED 10 GA RED DC DC 10 GA RED 18 GA RED 1...

Страница 100: ...PAGE 98 OF 102 INFLEXION PLUS OPERATING INSTRUCTIONS TP 5211901 C JUNE 2021 ...

Страница 101: ...7 7 5 77 1 3 50 66 21 2 7 857 203 1 6 352 7 5 1 0 7 5 81 66 27 5 6 63 0 16 216 5 1 1 6 7 51 7 81 76 1 00 33529 6 7 35235 7 5 1 21 17 7 5 1 352 7 21 31 3352 7 OEPDVV 53549 A B 86720 5 5 1 5354901 DZDVVRQ 7 6 1625 02 8 2 6 121 0 16 216 1 3 5 250 1 3 5 0 7 56 5 3529 25 5 5 1 21 1 5 68 7 72 1 7 287 127 78 6 7 127 6 7 0 67 1 6 25 67 2 1 6 237 216 6 1 6 63 7 21 7 7 857 20 N A 22 83 7 P P 25 17 7 21 211 ...

Страница 102: ...PAGE 100 OF 102 INFLEXION PLUS OPERATING INSTRUCTIONS TP 5211901 C JUNE 2021 11 2 2 PositionIt PI 35 ...

Страница 103: ...AWING NOT TO SCALE NOTES PAN TILT OUTPUT TORQUE 47 4 Nm 35 ft lbs PAN DEGREES OF ROTATION 200 TILT DEGREES OF ROTATION 90 BACKLASH 0 15 REPEATABILITY 0 3 IP68 RATED FOR DUST AND WATER INTRUSION TEMPERATURE RANGE 20 TO 50 C 24 VDC POWER INPUT ALTERNATE UNITS ARE MILLIMETERS CABLE AND CONTROLLER SOLD SEPARATELY SEE OPERATING MANUAL FOR INSTALLATION WIRING DIAGRAM ALL DIMENSIONS AND PARAMETERS ARE FO...

Страница 104: ... 7 21 7 7 326 7 21 5 9 6 7 B9DXOW QYHQWRU LGZ MUHDPHU ON ALL MACHINED SURFACES 127 6 3 1 5 2 63 0 3 5 6 21 7 7 5 2 63 0 3 5 6 21 3 1 7 7 287387 72548 1P IW OEV 3 1 5 6 2 527 7 21 7 7 5 6 2 527 7 21 6 5 3 7 7 3 5 7 25 867 1 7 5 17586 21 7 03 5 785 5 1 72 9 32 5 1387 7 51 7 81 76 5 0 0 7 56 1 21752 5 62 6 3 5 7 6 23 5 7 1 0 18 25 167 7 21 5 1 5 0 0 16 216 21 6 7 5 25 5 5 1 21 237 21 3 8 2 7 21 6 0 1...

Отзывы: