700 SERIES LAWN TRACTORS
15
8.5.
Release the parking brake.
8.6.
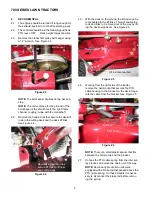
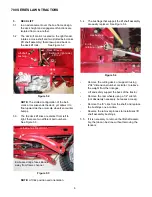
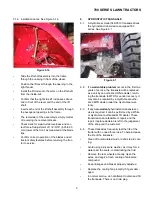
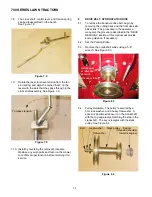
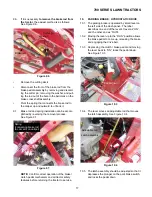
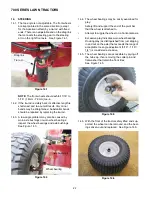
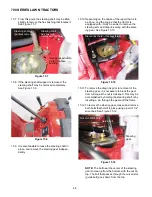
Loosen, but do not remove the nut that secures
the drive belt tensioning pulley to the tensioner
bracket using two 9/16” wrenches.
See Figure 8.6.
8.7.
With the pulley loosened slightly, the belt will slip
off between the lip of the pulley and the belt
keeper.
8.8.
Disconnect the battery, and remove it from the
tractor.
8.9.
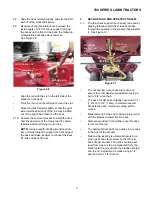
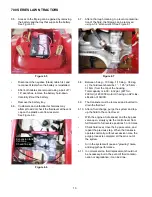
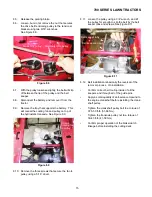
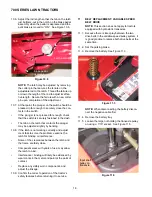
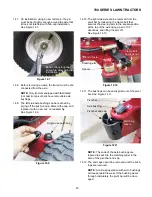
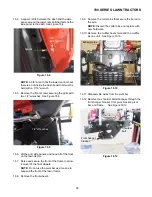
Remove the tray that supports the battery. This
will reveal the cooling fan and pulley on top of
the hydrostatic transaxle. See Figure 8.9.
8.10. Remove the three screws that secure the fan to
pulley using a 5/16” driver.
Figure 8.6
Stationary idler pulley
Tensioning pulley
Figure 8.9
Screws
holding fan
to pulley
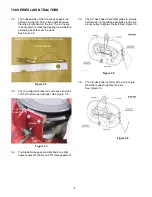
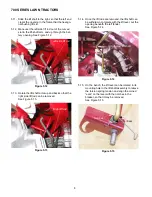
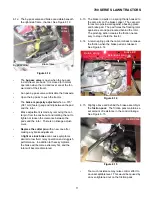
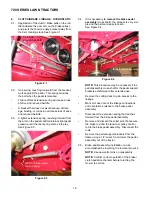
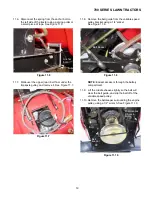
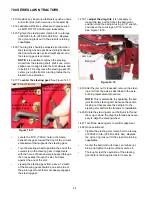
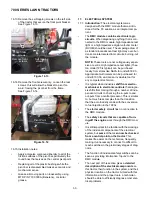
8.11. Loosen the pulley using a 3/4” wrench, and lift
the pulley far enough to slip the belt by the belt
keeper tabs and screws. See Figure 8.11.
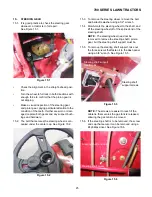
8.12. Belt installation is basically the reversal of the
removal process. On installation:
•
Confirm correct belt routing inside of all the
keepers and through all of the guide pins.
•
Apply a small quantity of anti-seize compound to
the engine crankshaft before installing the crank-
shaft pulley.
•
Tighten the crankshaft pulley bolt to a torque of
37.5-50 ft-lb (51-68 Nm).
•
Tighten the transaxle pulley nut to a torque of
30-43 ft-lb (41-59 Nm).
•
Confirm proper operation of the brake/clutch
linkage before installing the cutting deck.
Figure 8.11
Belt keeper tabs
Belt keeper screws
Содержание 700 Series
Страница 2: ......
Страница 4: ......
Страница 50: ...700 SERIES LAWN TRACTORS 46 ...
Страница 52: ...700 SERIES LAWN TRACTORS 48 ...

