


43
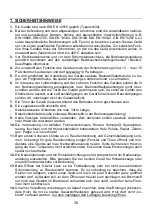
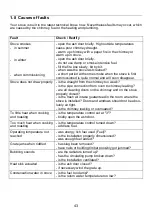
1.8 Causes of faults
Your stove is built to the latest technical know- how. Nevertheless faults may occur, which
are caused by the chimney, fuel or the heating and plumbing.
Fault
Check / Rectify
Stove smokes
- in summer
- in winter
- when commissioning
- open the ash door briefly. High outside temperatures
cause poor chimney draught.
- warm up chimney with a paper fire in the chimney or
warm up in stove.
- open the ash door briefly.
- do not use damp or smoke intensive fuel.
- fill the fire box slowly, bit by bit.
- when was the stove last cleaned?
- a short period with some smoke when the stove is first
commissioned is quite normal and will soon disappear.
Stove does not draw properly - is the draught from the chimney too weak?
- is the pipe connection from oven to chimney leaking?
- are all cleaning doors on the chimney and on the stove
properly closed?
- is the fresh air intake guaranteed in the room where the
stove is installed? Doors and windows should not be abso-
lutely air tight.
- is the chimney leaking or overloaded?
To little heat when cooking
and roasting
- is the temperature control set at "3"?
- briefly open the ash door.
Too much heat when cooking
and roasting
- is the temperature control turned down?
- add less fuel.
Operating temperature not
reached
- was energy rich fuel used (Fuel)?
- is the installation properly dimensioned?
- was enough fuel added?
Grate jams when riddled
- has slag been removed?
- have nails or building timber possibly got jammed?
Bubbling sounds
- are the radiators turned up?
- has the circulating pump broken down?
- is the installation ventilated?
Heat sink actuated
- is the ash door closed?
- if necessary wind the grate up.
Condensation water in stove
- is the fuel too damp?
- is the return water temperature too low?
Содержание K158
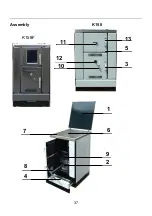
Страница 4: ...4 Geräteaufbau 1 9 2 6 4 8 7 13 5 3 10 12 11 K158F K158 ...
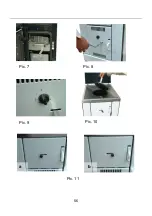
Страница 25: ...25 Bild 8 Bild 7 Bild 9 Bild 10 a b Bild 11 ...
Страница 26: ...26 Bild 12 Bild 13 Bild 14 Bild 15 Bild 16 Bild 17 ...
Страница 27: ...27 Bild 19 Bild 18 Bild 20 ...
Страница 29: ...29 Bild 29 Bild 30 Bild 33 Bild 31 Bild 32 Bild 35 Bild 36 Bild 34 ...
Страница 32: ...32 ...
Страница 33: ...33 ...
Страница 34: ...34 ...
Страница 37: ...37 Assembly K158 1 9 2 6 4 8 7 13 5 3 10 12 11 K158F ...
Страница 56: ...56 Pic 8 Pic 7 Pic 9 Pic 10 a b Pic 11 ...
Страница 57: ...____________________________________________________________ 57 Pic 12 Pic 13 Pic 14 Pic 15 Pic 16 Pic 17 ...
Страница 58: ...____________________________________________________________ 58 Pic 19 Pic 18 Pic 20 ...
Страница 59: ...59 Pic 23 Pic 24 Pic 25 Pic 26 Pic 27 Pic 28 ...
Страница 65: ...65 Structure de l appareil K158 K158F 1 9 2 6 4 8 7 13 5 3 10 12 11 ...
Страница 81: ...81 fig 8 fig 7 fig 9 fig 10 a b fig 11 ...
Страница 82: ...82 fig 12 fig 13 fig 14 fig 15 fig 16 fig 17 ...
Страница 83: ...83 fig 19 fig 18 fig 20 ...
Страница 84: ...84 fig 23 fig 24 fig 25 fig 26 fig 27 fig 28 ...
Страница 85: ...85 fig 30 fig 35 fig 36 fig 34 fig 29 fig 33 fig 31 fig 32 ...
Страница 90: ...90 Struttura dell apparecchio K158 K158F 1 9 2 6 4 8 7 13 5 3 10 12 11 ...
Страница 111: ...111 fig 8 fig 7 fig 9 fig 10 a b fig 11 ...
Страница 112: ...112 fig 12 fig 13 fig 14 fig 15 fig 16 fig 17 ...
Страница 113: ...113 fig 19 fig 18 fig 20 ...
Страница 114: ...114 fig 23 fig 24 fig 25 fig 26 fig 27 fig 28 ...
Страница 115: ...115 fig 33 fig 35 fig 36 fig 34 fig 29 fig 30 fig 31 fig 32 ...
Страница 118: ......
Страница 119: ...119 ...


