


E
MBROIDERY
E
DIT
7:7
EDIT STITCH PROGRAM
If you touch the Edit Stitch Program icon, a window will open so you can
edit a stitch program that you have created. You can insert new stitches or
delete stitches. If you have programmed stitches in Embroidery Mode, you
can save the stitches as a part of a design, and they can only be stitched in
embroidery mode.
To Save a Stitch Program in Embroidery Mode
Touch the Start Menu, touch the Stitch Menu. Program your stitch and
touch OK in the lower right corner of the screen. You will now go back
to Embroidery Edit. Touch the Save to My Designs icon to save the stitch
program in My Designs. A stitch program made in Embroidery Mode will not
be able to open in the sewing mode.
Read more about how to program a stitch in chapter 5.
SAVE EDITED DESIGN
Touch the Save to My Designs icon to save your edited design or design
combination. In the window that opens, select where you want to save the
design. Select My Designs, My Files or an external device. Designs saved in
My Designs are available through the Designs menu on the Extended Toolbar.
PARK POSITION
Touch the Park Position icon to move the embroidery arm to Park Position
for storing the embroidery unit.
MOVE TO HOOP
Touch Move to Hoop to move any design that is outside the hoop area into
the hoop area. The design will be placed at the outer most edge of the hoop.
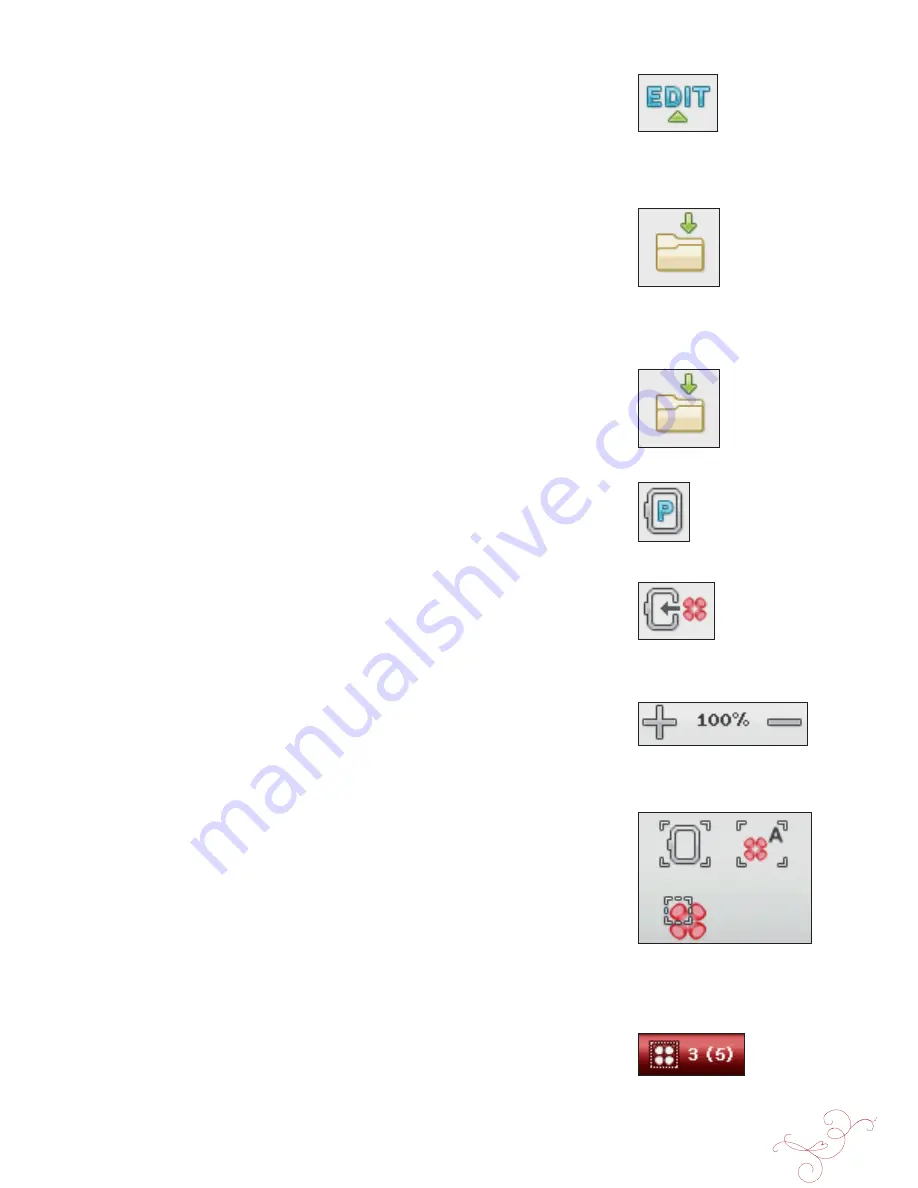
ZOOM
Zoom in/Zoom out
Zoom in or out of the embroidery
À
eld. Use Zoom In (+) to get a close-up
of an area within the embroidery design. Use (-) to Zoom Out.
Zoom to Hoop
Zoom to Hoop will adjust the embroidery
À
eld to
À
t the selected hoop.
Zoom to All
Zoom to All will show all the design(s) in the embroidery combination.
Zoom to Box
Touch and drag your stylus in the embroidery
À
eld on the screen to create a
box. The screen zooms to show that speci
À
c area.
Note: As you Zoom In your design gets very large. To locate a speci
À
c part of your design
touch Pan. Touch and drag or use the control arrows to
À
nd the part you wish to work with.
STITCH-OUT ORDER OF SELECTED DESIGN
Designs are stitched out in the order they are loaded to Embroidery edit.
When working with several designs at a time it can be useful to know in which
order they will be stitched out. Select a design by touching it to see which
stitch out number it has. 3 (5) for example means that the selected design is
the third out of
À
ve designs to be stitched out.
Zoom to
Hoop
Zoom to
All
Zoom to
Box
Содержание Designer Ruby
Страница 1: ...User s Guide KEEPING THE WORLD SEWING...
Страница 5: ...1GETTING TO KNOWYOUR MACHINE...
Страница 18: ...1 18 Script Alphabet Cyrillic Alphabet Hiragana Alphabet...
Страница 19: ...SET UP 2...
Страница 31: ...SETTINGS FUNCTIONS 3...
Страница 43: ...SEWING 4...
Страница 63: ...PROGRAM 5...
Страница 69: ...EMBROIDERY SET UP 6...
Страница 75: ...7EMBROIDERY EDIT...
Страница 87: ...EMBROIDERY STITCH OUT 8...
Страница 99: ...FILE MANAGER 9...
Страница 105: ...MAINTENANCE 10...


