47
User Manual
Visit the ViewZ USA website at https://www.viewzusa.com
CONFIG. /INTELLIGENT ANALYSIS
3. Double Virtual Fence
Deployment Area Settings
Drawing a line:
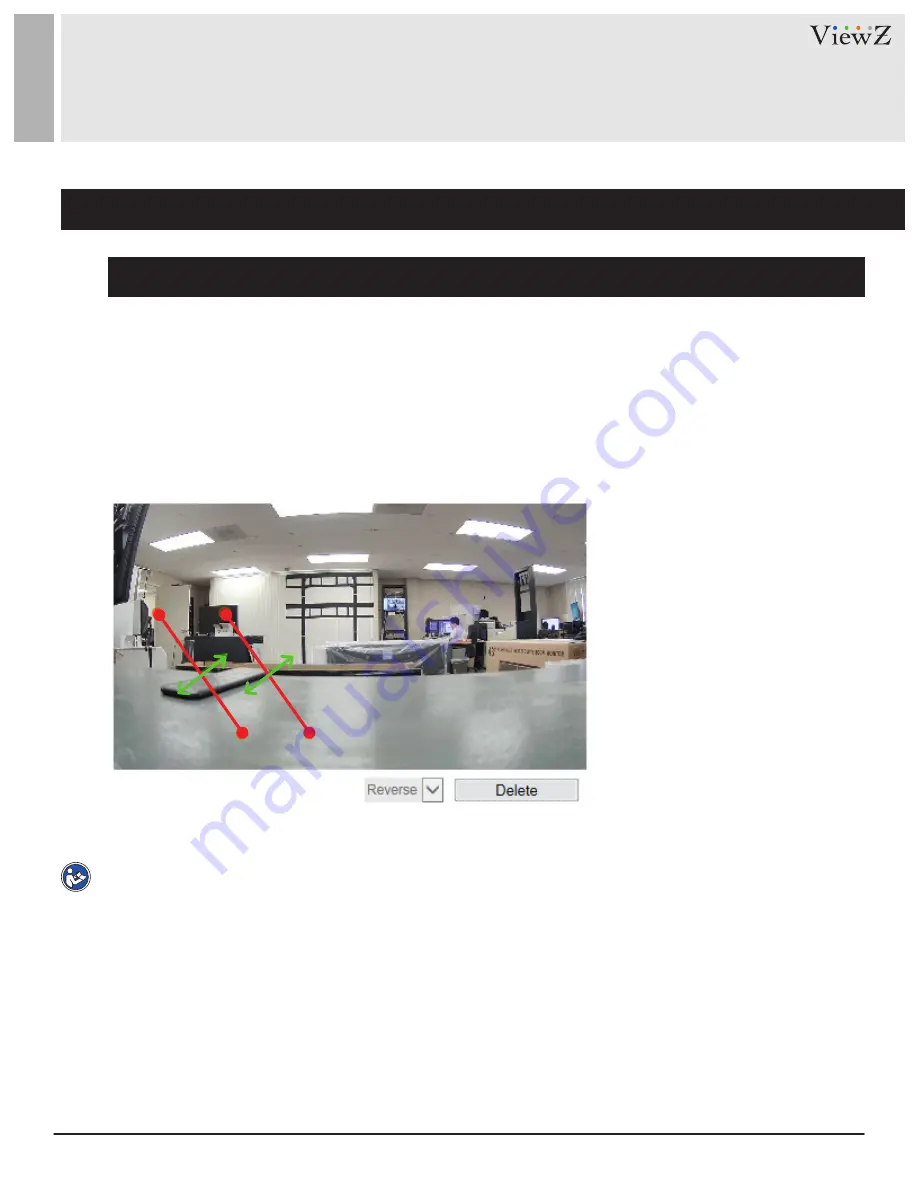
Move the cursor to the drawing interface, hold down the left mouse button, and move the
cursor to draw a line. When you release the left mouse button, two virtual fences are generated. Choose one
to set the direction to Positve or Reverse.
Setting double virtual fence:
Click one of the double virtual fences (and the virtual fence turns red) to select
this virtual fence and set the direction to Positive or Reverse, or delte the selected line. You can also press
and hold left mouse button at the endpoint of a virtual fence and move the mouse to modify the position and
length of the virtual fence. You can do right-click to delete the double virtual fences as shown in Figure 6-9
Figure 6-9 Deployment Area Setting Interface
Note
•
The two virtual fences are in sequential order. An alarm is generated only when a target crosses virtual
fence 1 and then virtual fence 2 within the set maximum passing time.
•
The double virtual fences are not within any deployment area, therefore, when an alarm is generated, the
trace always exists. Only when the target object moves out of the field of view, the trace disappears.
•
Try to draw double virtual fences in the middle, because the recognition of a target takes time after target
appearance on the screen and an alarm is generated only when the object is recognized to have crossed
the double virtual fences.
•
The double virtual fences which detect human shapes as the recognition target cannot be too short,
because short double virtual fences tend to miss targets.


