CHAPTER 4: ADDING EFFECTS AND TITLES 127
In Video Editor, you can choose from six distinct moving paths:
2D Basic
,
2D
Advanced
,
3D
,
Cylinder
,
Sphere
and
Picture in Picture
(you can also
customize your own paths in the custom folder). You can access Moving Path
controls in two different places within the program. Either right-click on the clip
and choose
Moving Path
from the pop-up menu or click
to open the Effects
Manager. Selecting the clip in the timeline then clicking on the
Moving Path
will
open up the controls.
You can set the motion parameters in the
Effects Manager
or create an animated
motion path interactively in the Preview Window.
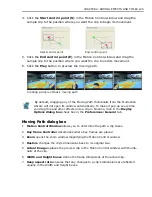
• The
Motion Control window
allows you to determine the path of a clip by
adjusting various control points. When you first open a Moving Path dialog
box, the Start control point (S) is active and appears at the center of a
sample of the clip. By dragging the start control point, you can reposition the
clip. To reposition the End control point (E), click it to make it active and then
drag it to a new location. If you use the Key frame Controller, you can add
additional control points (+) which give you more options for controlling the
direction of the path. Beneath the sample clip is a fixed frame which
represents the frame size of the video project. If your moving path does not
appear within this frame, then it will not be seen in the resulting video
sequence.
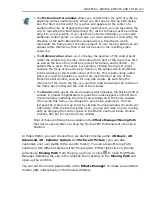
• The
Reference box
allows you to change the position of the control point
within the sample clip, thereby controlling which part of the clip moves first,
as well as the axis of any rotations (except for Sphere and Cylinder) – by
default this is set to the center. For example, clicking the top left corner
changes the focus of the active key frame on the sample clip in the Motion
Control window to the top left corner of the clip. This is particularly useful
when you need to reposition a clip but are restricted by the size of the
Motion Control window, such as for long title credits. By switching the
reference of the clip to the top, you can then drag the sample clip outside of
the frame box and beyond the area of the window.
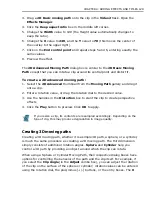
• The
Zoom
button opens the Zoom window which displays the Motion Control
window in greater magnification. A green frame also appears in the Motion
Control window indicating the current area displayed in the Zoom window.
(By moving this frame, you change the area being examined.) You can
increase the zoom level (up to 4x) by clicking the Zoom window (to zoom out
right-click). With the Zoom window open, you can still work on your moving
path by dragging the control points in the Motion Control window. Double-
click the title bar to close the Zoom window.
Most of these controls will be available in the
Effects Manager:Moving Path
that will be opened after you drag the Moving Path thumbnail onto the clip in
timeline.
Содержание MEDIASTUDIO PRO 8
Страница 1: ...User Guide Ulead Systems Inc September 2005 P N C22 180 110 0A0001 ...
Страница 17: ...PART I VIDEO EDITOR ...
Страница 44: ...44 VIDEO EDITOR ...
Страница 94: ...94 VIDEO EDITOR ...
Страница 138: ...138 VIDEO EDITOR ...
Страница 172: ...172 VIDEO EDITOR ...
Страница 193: ...PART II VIDEO CAPTURE ...
Страница 200: ...200 VIDEO CAPTURE DV mode MPEG 2 mode ...
Страница 234: ...234 VIDEO CAPTURE ...
Страница 235: ...PART III AUDIO EDITOR ...
Страница 246: ...246 AUDIO EDITOR ...
Страница 267: ...PART IV MORE PROGRAMS ...
Страница 296: ...296 MORE PROGRAMS ...
Страница 297: ...INDEX ...
Страница 308: ...308 ULEAD MEDIASTUDIO PRO X X Axis unit 245 Z Zooming 240 Zooming in out 54 ...


