TRUST 1210K POWERC@M OPTICAL ZOOM
1.
Use the Down button
to select
Date Type
and then press the Right
button
to enter this menu.
2. Choose
Year/Month/Day
(Y/M/D),
Month/Day/Year
(M/D/Y) or
Day/Month/Year
(D/M/Y) as the display style for the date.
U K
3.
When the settings are correct, press the
OK
button
to save the changes and
return to main menu.
4. Select
Date Setup
and press the Right button
to enter this menu.
5. Use
the
/
buttons to move through the date and time fields.
6.
Use the Up and Down buttons
/
to set the time / date values.
7.
When finished press the
OK
button
to save the changes and return to main
menu.
Note:
If you make a mistake and need to go back, use the Left
button
.
6.2
Taking pictures and video clips
This chapter describes how to take pictures, the function of the macro button during
taking pictures and how to record video clips.
6.2.1
How to take pictures
Note
:
To save the batteries, the camera will turn off automatically after a
couple of minutes depending on the settings. See chapter 10.1 how to
set this option.
1.
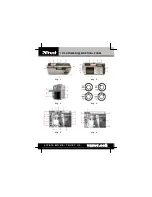
Turn the camera on using the ON/OFF button (fig. 12).
2.
Rotate the mode dial (1, fig. 1) in the STILL IMAGE mode (3, fig. 4).
3.
Use the viewfinder (13, fig. 2) or use the LCD screen to get a good image of
the subject. You can turn on/off the LCD screen by pressing the LCD button
(12, fig. 2). See chapter 5.2.1 for the LCD button options.
4.
To take short distance pictures (6 – 80 cm), press the MACRO button
(10,
fig.2). Macro icon (16, fig. 5) will appear on the LCD screen. Press this button
again to turn off Macro mode.
5. Use
the
Zoom
In or Zoom Out
buttons to narrow or widen the
lens’ field of view. Use the LCD display to preview the effects of the zoom
function.
6.
Press the SHUTTER button (2, fig. 1) half way and keep it in this position. The
camera will adjust itself to the surrounding light conditions.
7.
Fully press the SHUTTER button. The photograph will now be taken. The
image on the LCD screen will disappear for a short period and the auto focus
led (2, fig. 2) will flash.
8.
The next photograph can be taken when the auto focus led no longer flashes.
The photograph has been saved in the camera’s memory.
7


