Operation
SeaKing & SeaPrince Imaging Sonars
0374-SOM-00001, Issue: 08
18
© Tritech International Ltd.
5.2. Operating the SeaKing & SeaPrince in Seanet Pro
Note
These instructions detail the use of the Seaking and the Seaprince imaging
sonars with the Seanet Pro software.
Please refer to the relevant software and quick start guides for the use of the
sonars with the Genesis software suite.
5.2.1. Main Screen
The Seanet Pro application can be run from the
Programs
group in the Windows
Start
menu or from the desktop by double clicking on the shortcut icon.
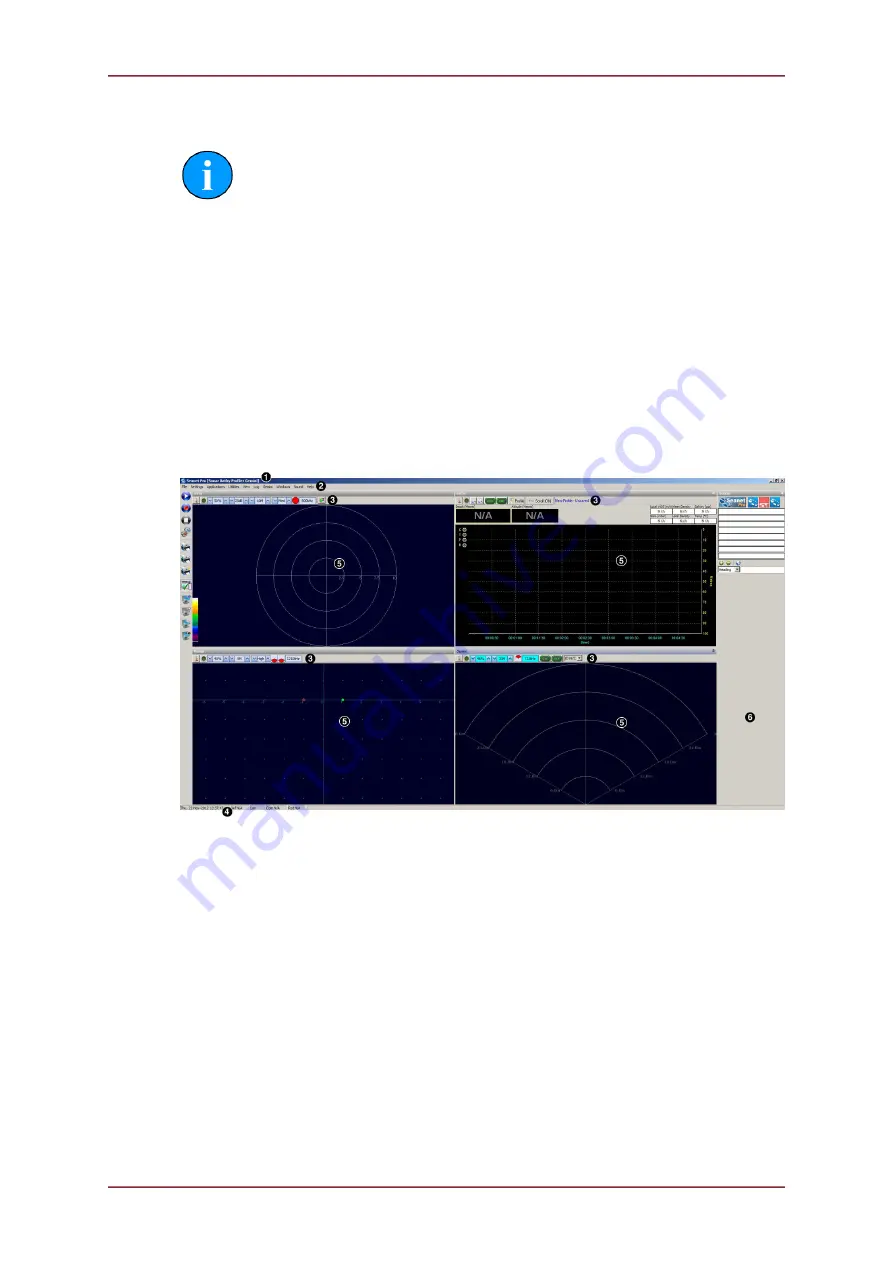
The Seanet Pro screen display shown below is a Gemini, SeaKing & Bathymetric application,
although the view will vary depending on the applications chosen, each application will have
a similar layout.
Figure 5.1.
The main areas of the display are:
1.
Display Header
This part of the screen is used for system/software identification.
2.
Menu Bar
This is where system set-up functions can be accessed. Printing, Application
selection, Colour Scheme setup and Logging are some of the features that can be
accessed in this screen area.
3.
Settings Bar
This is where the Sensor can be controlled and configured. The Settings
bar is on top of every display window for each device that is connected to the system. It
includes a Tools Setup button, Led indicator (Pause/Go) and RAT dials and buttons
4.
Status Bar
This part of the screen is used to display system status information, typically
the AIF card interface status, Logging status/progress and Job specific information.
5.
Sensor Display Area
This part of the screen is where the main Sensor data
is displayed. Other pertinent data such as Range Scale, Cursor and status messages

