


23
6. KVM Operation
(continued)
6.6.6 Remote Control Panel
(continued)
The table describes each of the settings in the Video Settings screen:
Setting
Description
Screen Position
Adjust the horizontal and vertical position of the remote computer window by clicking the arrow buttons.
Auto-Sync
Click the
Auto-Sync
button to automatically synchronize the remote screen with the local screen.
Note: Upon performing an Auto-Sync, the local and remote mouse pointers are automatically synced as well.
RGB
Drag the slider bars to adjust the RGB (Red, Green, Blue) values. If the
Set to grayscale
checkbox is checked, the remote
video is displayed in black and white. Setting the video to grayscale will decrease the amount of information traveling over the
network and can help improve keyboard and mouse response time.
Gamma
This setting allows you to adjust the video display’s gamma level. (See the
Gamma Adjustment
Section for details.)
Video Quality
Drag the slider bar to adjust the overall video quality of the remote screen. A higher video quality setting may slow down the
keyboard and mouse response time.
Enable Refresh
The KVM switch can be set to redraw the screen every 1 to 99 seconds, eliminating unwanted artifacts from the screen. Check
the
Enable refresh
checkbox and enter in a number from 1 to 99 to have the KVM refresh at the desired time intervals. By
default, this feature is disabled, and the
Enable refresh
checkbox is unchecked.
Transparency
This setting adjusts the transparency of the remote OSD toolbar.
Color Depth Control
This setting adjusts the amount of color information that is being sent over the network. To enable this setting, check the
Enabled
check box. A higher setting will provide more color, which may slow down keyboard and mouse response time. A lower setting will
reduce the amount of information being sent over the network, and may improve keyboard and mouse response time.
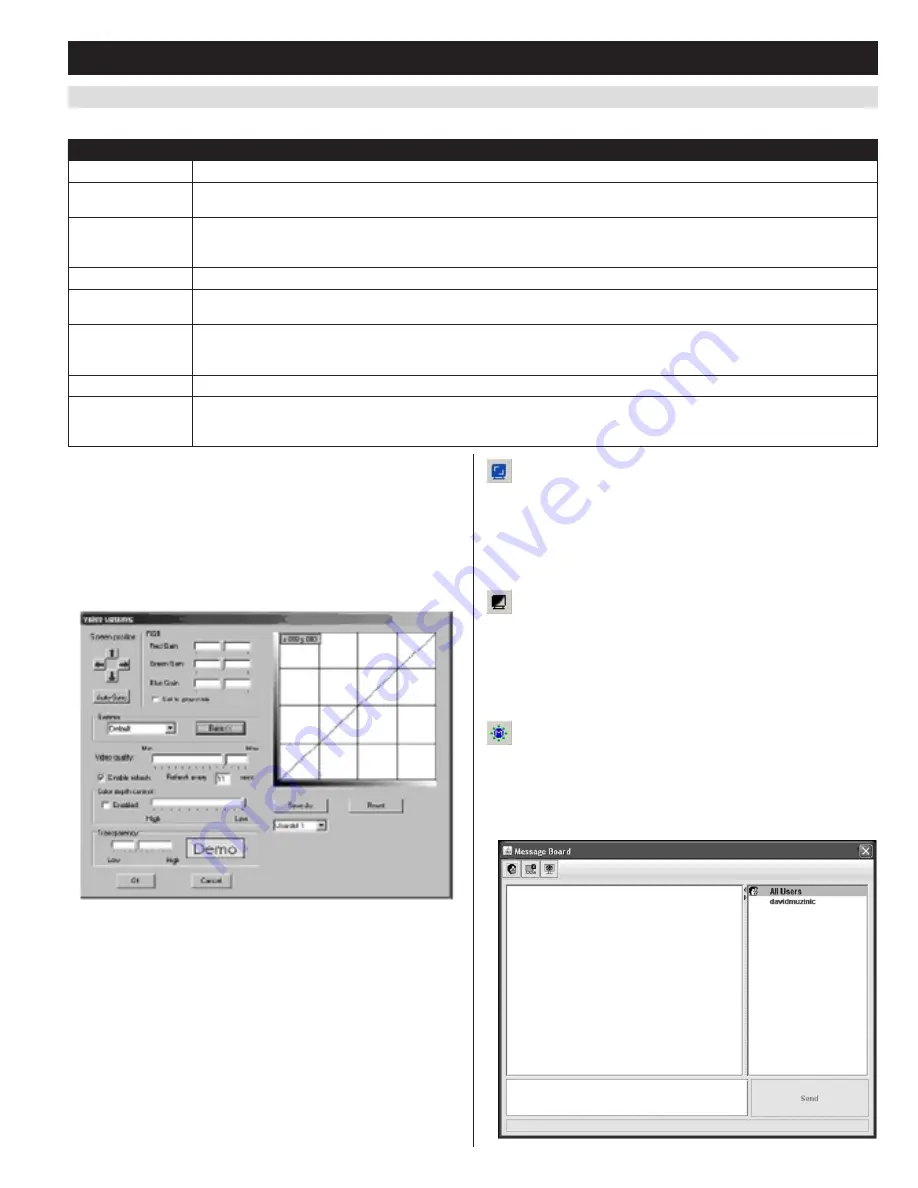
Gamma Adjustment
If it is necessary to correct the gamma level for the remote video
display, use the Gamma function in the
Video Settings
screen.
• Under Basic configuration, there are ten preset and four user-defined
levels to choose from. Go through the options in the drop-down list
box to find a setting that works for you.
• For greater control, clicking the
Advanced
button brings up the
following dialog box:
• Click and drag the diagonal line at as many points as you wish to
achieve the display output you desire.
• Click
Save As
to save up to four user-defined configurations derived
from this method. Saved configurations can be recalled from the list
box at a future time.
• Click
Reset
to abandon any changes and return the gamma line to its
original diagonal position.
• Click
OK
to save your changes and close the dialog box.
• Click
Cancel
to abandon your changes and close the dialog box.
Note: For best results, change the gamma while viewing a remote
computer.
Video Auto Sync
Clicking the
Video Auto Sync
icon on the control panel will perform
a
Video Auto Sync
. This is the same action that is performed when
connecting to a remote computer, or when clicking the
Auto-Sync
button
in the
Video Settings
screen.
Gray Scale
Clicking the
Gray Scale
icon on the control panel will display the
remote screen in black and white. This is the same action that is
performed by checking the
Set to grayscale
checkbox in the
Video
Settings
screen.
Message Board
This KVM Switch supports multiple user logins, which can possibly
give rise to access conflicts. To alleviate this problem, a message board
feature has been provided, allowing users to communicate with each
other:


