


Installing the Rack Rails
Determine where you want to place the 1U bruAPP in the rack (see Rack Mounting Considerations
below). Position the chassis rail guides at the desired location in the rack, keeping the sliding rail guide
facing the inside of the rack. Screw the assembly securely to the rack using the brackets provided.
Attach the other assembly to the other side of the rack, making sure that both are at the exact same
height and with the rail guides facing inward.
Installing the 1U/3U bruAPP into the Rack
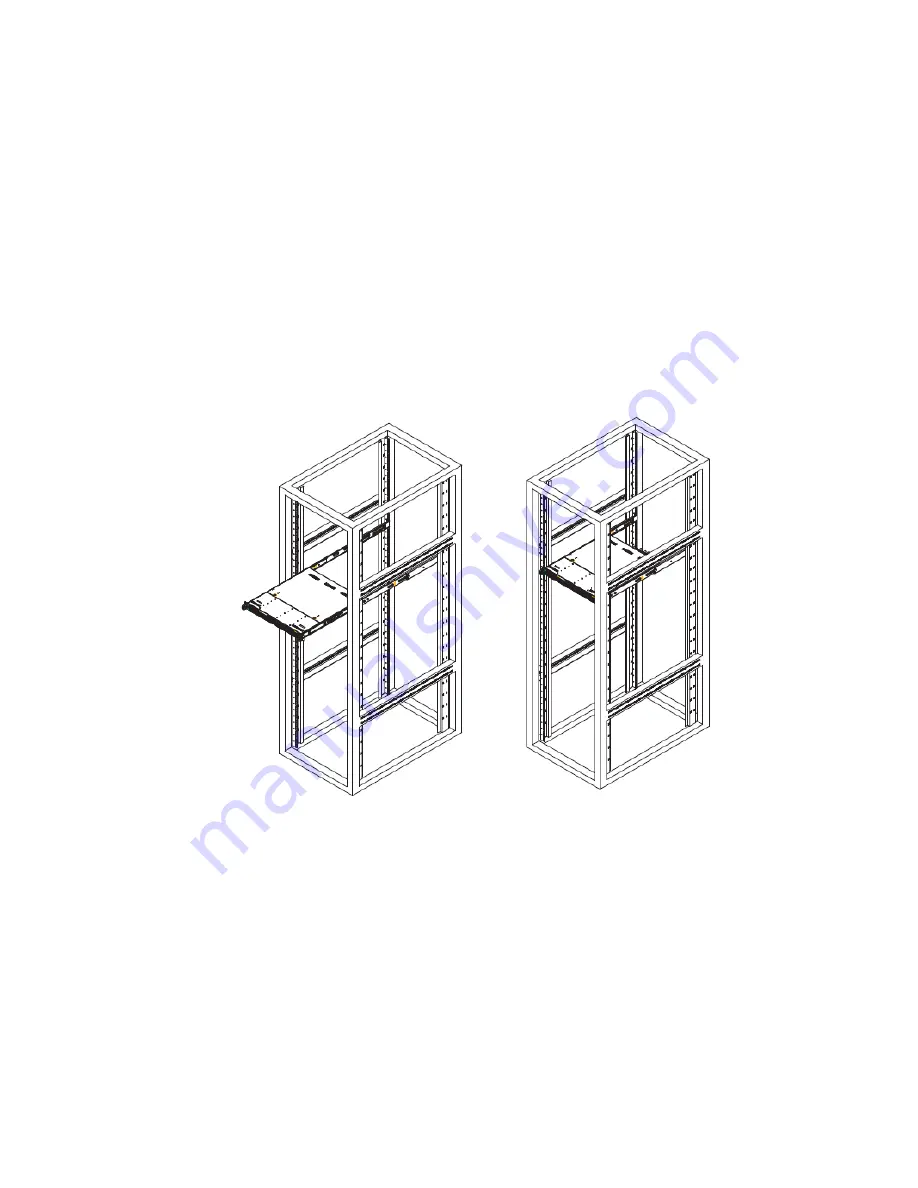
You should now have rails attached to both the chassis and the rack unit. The next step is to install the
server into the rack. If the hard drives have been installed into the chassis, you
ʼ
ll need to remove them
prior to attempting to lift the chassis into the rack (see the warning at the start of this chapter). Do this
by lining up the rear of the chassis rails with the front of the rack rails. Slide the chassis rails into the
rack rails, keeping the pressure even on both sides (you may have to depress the locking tabs when
inserting). See Figure 5.2.
When the server has been pushed completely into the rack, you should hear the locking tabs "click".
Figure 5.2
―
Installing the rails into a server rack.
Installing the 1U bruAPP into a Telco Rack
To install the 1U bruAPP into a Telco type rack, use two L-shaped brackets on either side of the chassis
(four total). First, determine how far the server will extend out the front of the rack. Larger chassis
should be positioned to balance the weight between front and back. If a bezel is included on your
server, remove it. Then attach the two front brackets to each side of the chassis, then the two rear
brackets positioned with just enough space to accommodate the width of the rack. See Figure 5.3.
Finish by sliding the chassis into the rack and tightening the brackets to the rack.
15


