


SS-OCT System Base Unit
Chapter 4: System Operation
Rev A, December 17, 2018
Page 33
4.3.3. Reflecting Surfaces and Interfaces
Reflecting surfaces and interfaces might lead to a saturation of the detector and in turn lead to artifacts described
in more detail in chapter 5.1. The influence of the artifacts can be decreased by tilting the probe or the sample.
By doing that, the reflections from the sample are directed back at a different angle than the incident beam and
are not collected by the objective lens.
4.3.4. Rough Surfaces
Rough interfaces between two layers with different refractive indices will lead to reduced sensitivity. The reason
is that the sample light is scattered at the interface and directed in various directions. Here, it is often helpful to
use an immersion gel and a flat surface (e.g. a glass slide) to reduce scattering.
Thorlabs offers sample z-spacers that provide a glass plate at a fixed distance to reduce scattering effects and
to keep the sample in focus, please contact Thorlabs for more information.
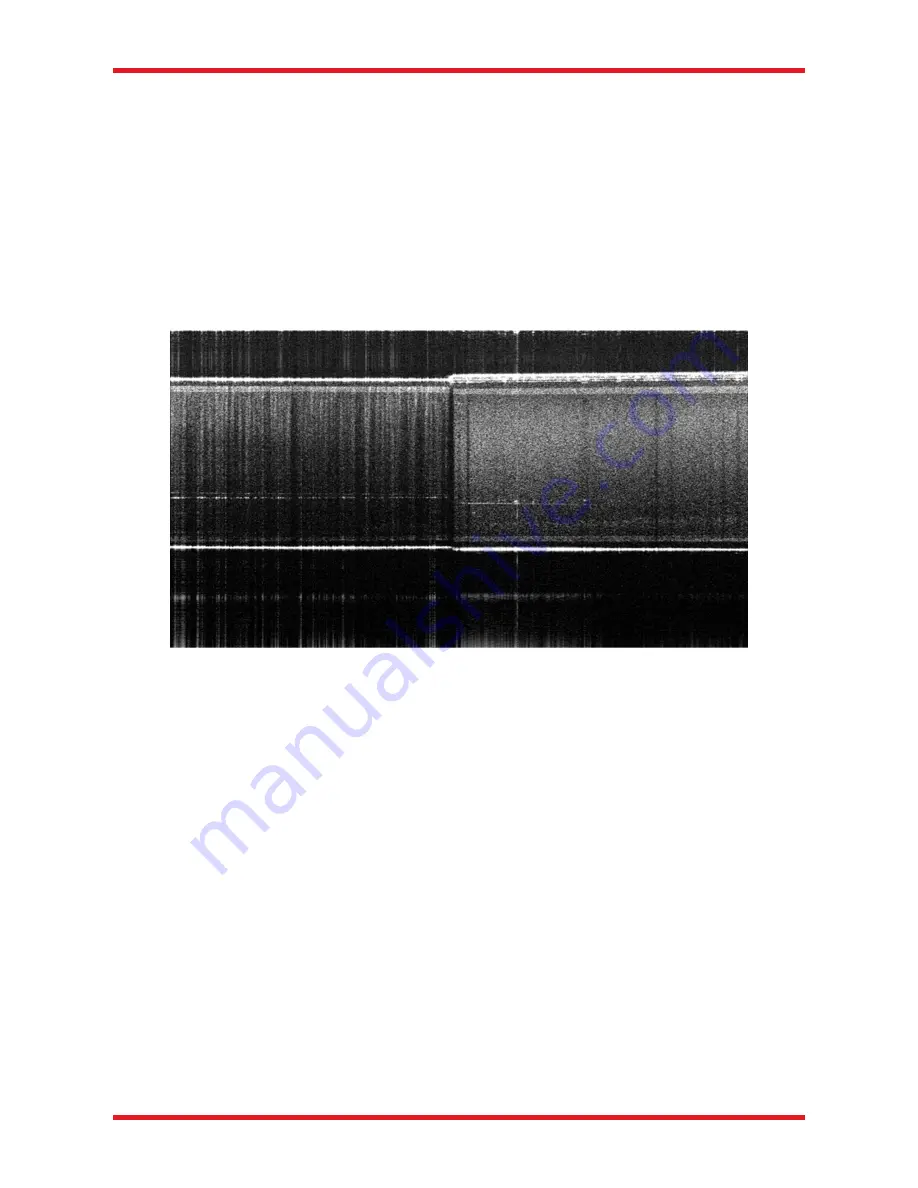
Figure 41
Plastic with Matte Surface, Partially Covered with Clear Adhesive Tape
Figure 41 shows a B-scan of a plastic substrate with a matte surface. The right part of the surface was covered
with a strip of adhesive tape to make the rough surface smoother. Due to this smooth surface, the OCT image
is much more consistent and the contrast in deeper layers is much better compared to the plain matte surface
that is shown on the left. This is the same effect that can be seen when looking through a transparent material
with a matte surface. As an example, frosted glass becomes more transparent with water.
4.4.
Shutting Down the System
The following steps should be followed when shutting down the system:
1) Save any important data.
2) Stop imaging by ceasing the scan. Close the ThorImageOCT software. The indicator LEDs “Laser ON”
and “Sys OK” should turn off when the software is closed.
3) Press the power button at the front panel to disable the system. The power button should turn from
green to red indicating that the system is in standby.
4) You can leave the Base Unit in the standby mode (the power consumption is minimal), or
5) you can turn off the Base Unit completely using the main power switch at the back panel.
6) Shut down the PC.


