28
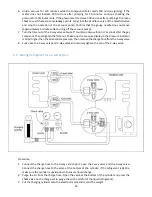
6.7.2 Refrigerant Charging
Procedure:
1.
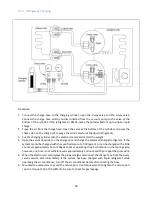
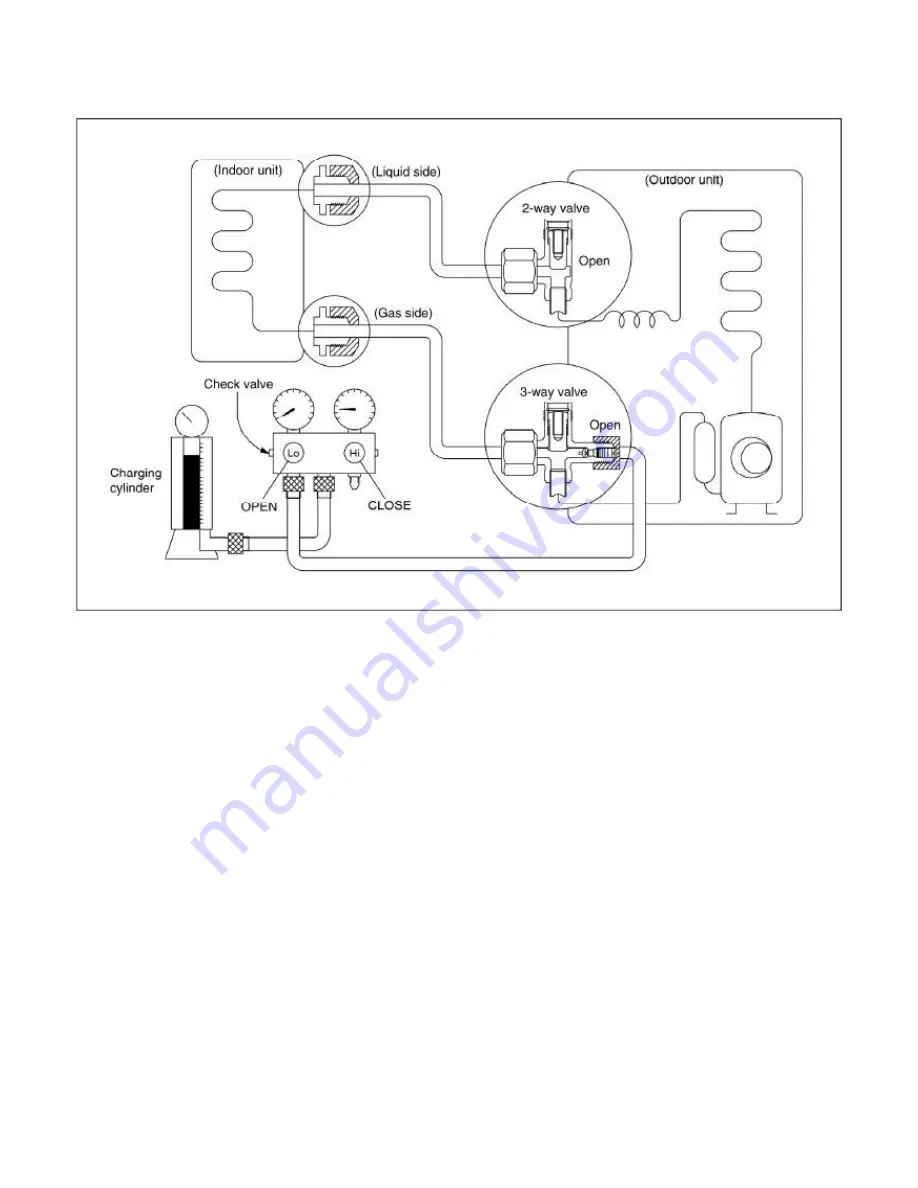
Connect the charge hose to the charging cylinder, open the 2-way valve and the 3-way valve.
Connect the charge hose which you disconnected from the vacuum pump to the valve at the
bottom of the cylinder. If the refrigerant is R410a, make the cylinder bottom up to ensure liquid
charge.
2.
Purge the air from the charge hose. Open the valve at the bottom of the cylinder and press the
check valve on the charge set to purge the air (be careful of the liquid refrigerant).
3.
Put the charging cylinder onto the electronic scale and record the weight.
4.
Open the valves (low side) on the charge set and charge the system with liquid refrigerant. If the
system cannot be charged with the specified amount of refrigerant, or can be charged with a little
at a time (approximately 5oz or 150g each time), operating the air conditioner in the cooling cycle;
however, one time is not sufficient, wait approximately 1 minute and then repeat the procedure.
5.
When the electronic scale displays the proper weight, disconnect the charge hose from the 3-way
valve’s service port immediately. If the system has been charged with liquid refrigerant while
operating the air conditioner, turn off the air conditioner before disconnecting the hose.
6.
Mounted the valve stem caps and the service port. Use torque wrench to tighten the service port
cap to a torque of 13.3ft·lb (18N·m). Be sure to check for gas leakage.
Содержание 12H47YIMI
Страница 10: ...10 1080 mm 226 mm 335 mm 30H48ZIMI 49 57 1259 mm 11 1 282 mm 14 25 362 mm 36H46ZIMI...
Страница 19: ...19 Model Voltage V Capacity BTU Type 12H47ZOMI 230 12 000 HEAT PUMP...
Страница 20: ...20 Model Voltage V Capacity BTU Type 18H47ZOMI 230 18 000 HEAT PUMP 24H46ZOMI 230 24 000 HEAT PUMP...
Страница 21: ...21 Model Voltage V Capacity BTU Type 30H48ZIMI 230 30 000 HEAT PUMP 36H46ZIMI 230 36 000 HEAT PUMP...
Страница 55: ...55 Note The pictures below are only for reference they may be not same as the ones on your unit P U P V...
Страница 56: ...56 P W N U...
Страница 57: ...57 N V N W...
Страница 82: ...82 7 Then lift the PCB assembly off the unit NOTE All wires are still connected...

