Getting Started
Network Installation
39
PRISM MPI2-10-MPX2-10 User Manual
1.
On the PRISM monitor, select the Settings icon (
) to display the Settings menu.
2.
Select Network to open the Network submenu.
3.
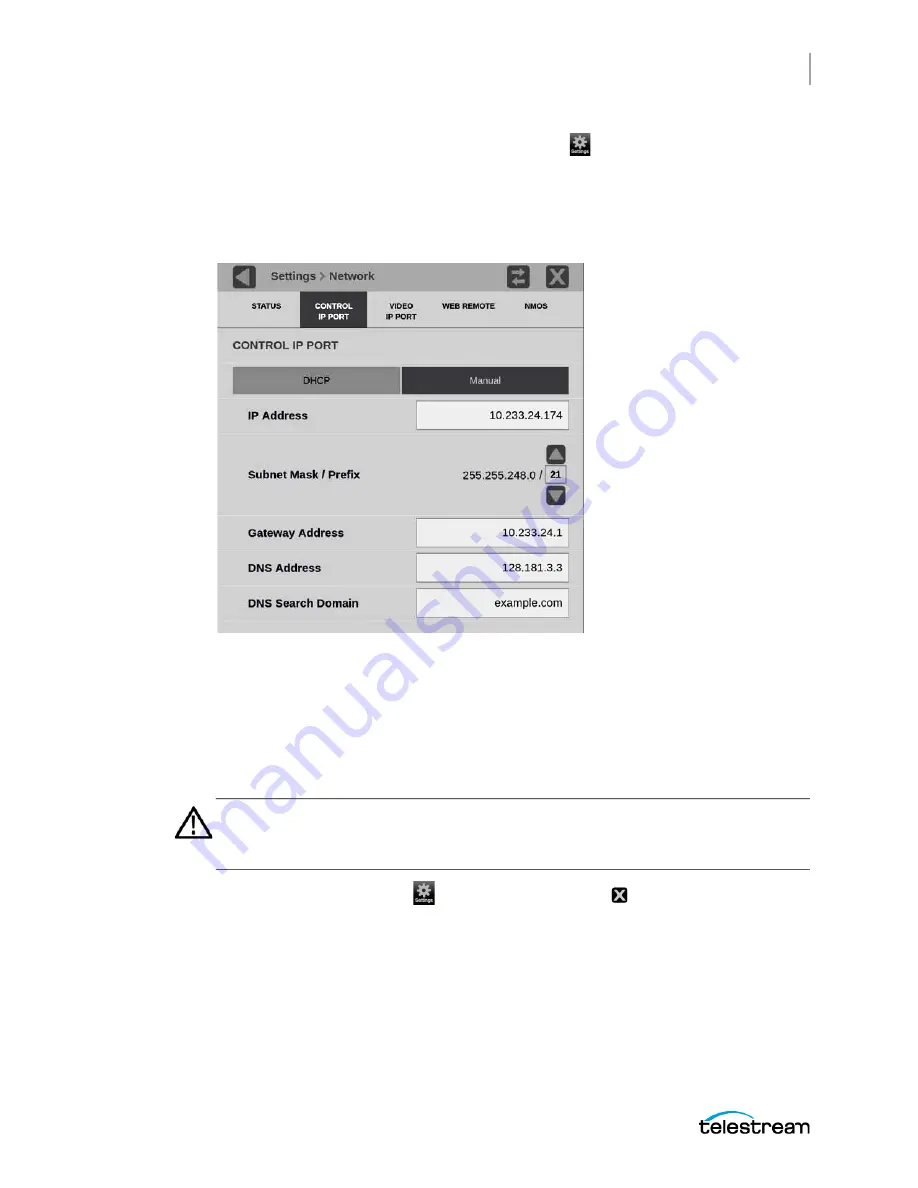
Select CONTROL IP PORT to open the Control IP Port submenu.
4.
Depending on your local network requirements, select DHCP or Manual to select
the method for selecting an IP address.
5.
If you cannot use DHCP and you selected Manual, use the Manual submenu to set
the IP address, subnet mask, gateway address, DNS address, and DNS Search
Domain parameters you obtained from your LAN administrator. (Be sure to use
compatible addresses between the PC and the instrument.)
6.
Select an address box to open the address editing tool. Use the editing box as
described for editing an IP input address.
Caution: Do not configure your control or your Video IP ports to addresses on
the same subnet. This may cause a non-deterministic operation, such as IGMP
leaves failing or other network connectivity issues.
7.
Select the Settings icon (
) or select the Close icon ( ) to close the Settings
menu.
Содержание PRISM MPI2-10
Страница 1: ...PRISM MPI2 10 and MPX2 10 SDI IP Waveform Monitor User Manual April 2021 D00010021C...
Страница 6: ...6 PRISM MPI2 10 MPX2 10 User Manual...
Страница 52: ...Getting Started Activity Center PRISM MPI2 10 MPX2 10 User Manual 54...
Страница 74: ...Methods of Operation Remote Control through API Commands PRISM MPI2 10 MPX2 10 User Manual 76...
Страница 302: ...PTP Operational Overview Compensating for Causes of Asymmetric Delay PRISM MPI2 10 MPX2 10 User Manual 304...


