


Maintenance, Service, and Repair
Batteries
Page 10
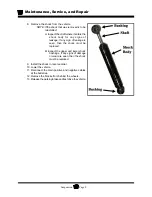
6. Fill all battery cells with electrolyte to the proper
level.
7. Thoroughly clean any spilled electrolyte from the
batteries or the ground. Refer to
Cleaning the
Batteries
for information on cleaning the
batteries.
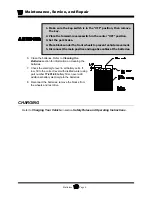
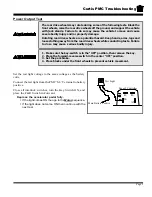
8. Reconnect the battery cables, connect the batteries
to the charger and allow the charger to complete
one charging cycle.
9. Remove the blocks from the wheels and test drive.
The batteries are now ready to be put into service.
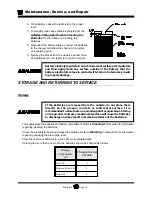
If the batteries are removed from the vehicle, do not place them
directly on the ground, concrete or solid metal surface. It is
recommended to store them on a wooden pallet or equivalent. Storing
on the ground, concrete or solid metal surface will cause the batteries
to discharge and may result in premature failure of the batteries.
Storage
Temperature
(F)
Charging Interval
(months)
Over 60
1
Between 40 and 60
2
Below 40
6
Battery electrolyte will stain and corrode most surfaces. Immediately
and thoroughly clean any surface outside of the battery that the
battery electrolyte comes in contact with. Failure to clean may result
in property damage.
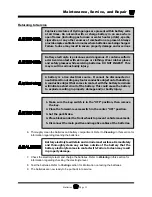
STORAGE AND RETURNING TO SERVICE
Storage
Thoroughly clean the batteries and battery compartment. Refer to
Cleaning
in this section for information
regarding cleaning the batteries.
Check the electrolyte level and charge the batteries. Refer to
Watering
in this section for information
regarding checking the electrolyte level.
Store the vehicle or batteries in a cool, dry, well ventilated area.
If storing for more than one month, the batteries should be charged as follows:
Содержание B 1-50
Страница 2: ......
Страница 6: ...TAYLOR DUNN ...
Страница 14: ...Model B 1 00 ...
Страница 30: ...TAYLOR DUNN ...
Страница 36: ...TAYLOR DUNN ...
Страница 52: ...TAYLOR DUNN ...
Страница 66: ...Maintenance Service and Repair Steering Page 14 Exploded View of Steering Gear ...
Страница 90: ...TAYLOR DUNN ...
Страница 124: ...TAYLOR DUNN ...
Страница 130: ...TAYLOR DUNN ...
Страница 161: ...Wire Diagrams ...
Страница 192: ...Illustrated Parts PARTS PAGE 8 Steering Gear 5 4 2 1 6 See steering linkage 7 10 15 17 3 11 12 13 14 16 ...
Страница 194: ...Illustrated Parts PARTS PAGE 10 Front Suspension 4 3 2 1 5 10 6 8 9 7 11 12 ...
Страница 200: ...Illustrated Parts PARTS PAGE 16 Rear Suspension 5 7 8 3 4 Ref Frame 2 6 4 1 Ref Transmission axle tube ...
Страница 202: ...Illustrated Parts PARTS PAGE 18 Motor 2 3 5 6 4 7 8 1 9 10 Armature 9 ...
Страница 206: ...Illustrated Parts PARTS PAGE 22 Wheels and Tires Ref wheel hub 1 2 5 assembly 4 3 6 7 8 9 ...
Страница 208: ...Illustrated Parts PARTS PAGE 24 Instrument Panel dash ...
Страница 214: ...Illustrated Parts PARTS PAGE 30 Charger Lestronic 1 2 3 4 8 7 5 6 11 BI_CHARGER W INTERLOCK DWG Charger Identification ...
Страница 217: ...Illustrated Parts PARTS PAGE 33 This page intentionaly left blank ...
Страница 220: ...Illustrated Parts PARTS PAGE 36 Seat Cushions Deck and Lights B 1 50 ...
Страница 222: ...Illustrated Parts PARTS PAGE 38 Seat Cushions Deck and Lights MX 1600 ...
Страница 224: ...Illustrated Parts PARTS PAGE 40 Decals B 1 50 VIEW FROM INSIDE OF COWL 1 2 3 4 5 6 7 8 9 ...
Страница 230: ...Illustrated Parts PARTS PAGE 46 Stake Sides B 1 50 1 2 3 4 5 6 7 8 ...


