


Electrical Troubleshooting
Charger Troubleshooting
Page 8
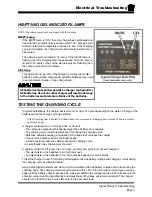
TROUBLESHOOTING FOR PORTABLE CHARGER
Disconnect the charger from the AC outlet and the batteries.
1. Test the voltage from the positive terminal on the vehicles DC receptacle to main
battery negative. This voltage should be equal to the battery voltage. If the voltage
is less than the battery voltage then this wire is broken or has a bad connection.
Stop here and repair the problem.
2. Test the voltage from the positive terminal on the DC receptacle to the negative
terminal on the DC receptacle. This voltage should be equal to the battery voltage.
If the voltage is less than the battery voltage, then the wire on the negative terminal
of the DC receptacle is broken or has a bad connection.
Stop here and repair the
problem.
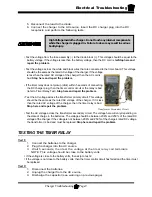
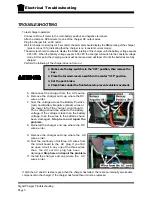
Remove the charger cover and perform the following tests:
1. Inspect the internal wiring of the charger and repair as required.
2. Check the continuity of both fuse links and replace if bad.
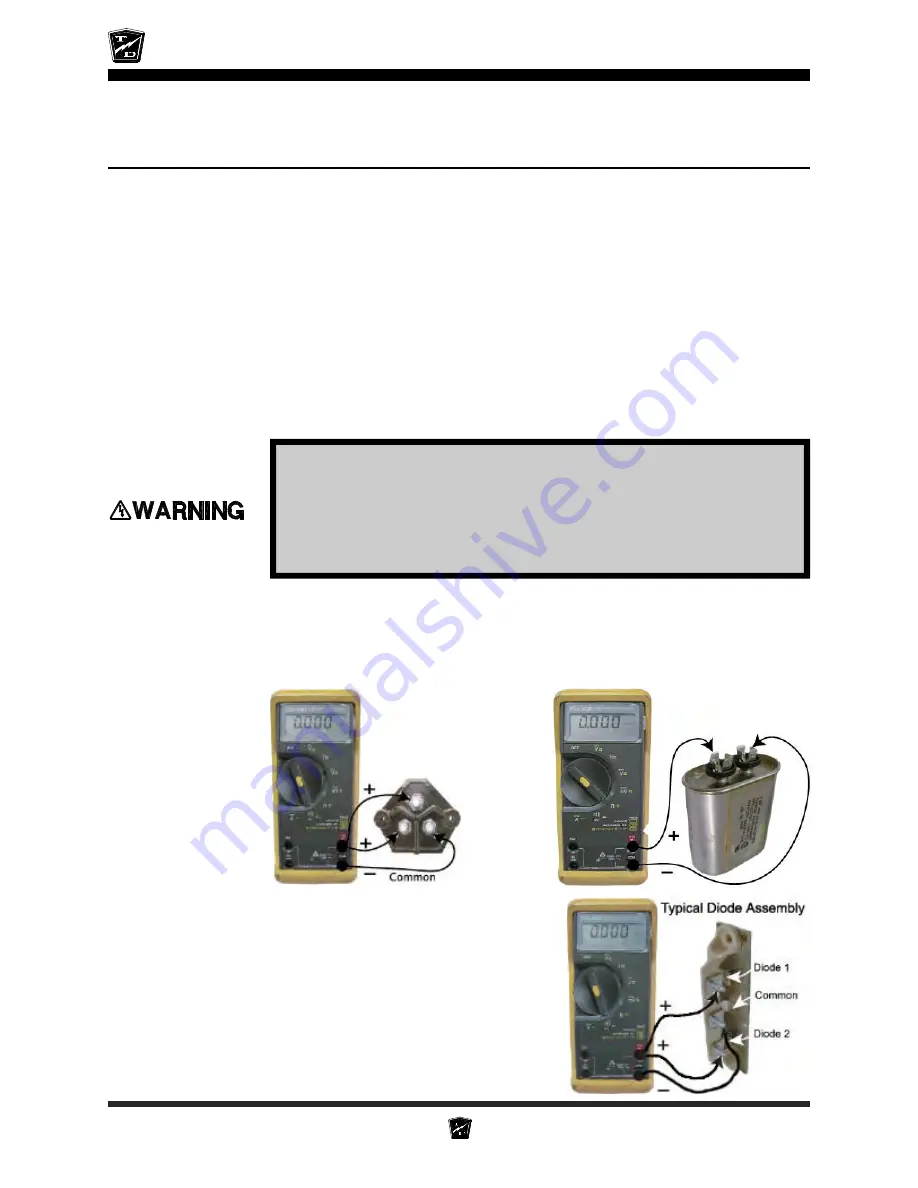
3. Disconnect one lead from the capacitor. Test the capacitor using the capacitor
test function on the meter. If the capacitor is bad, it must be replaced.
Stop here
and repair the problem.
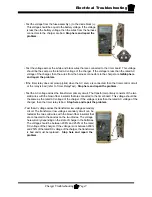
4. Reconnect the lead to the capacitor and
disconnect one transformer lead from one of
the diodes. Test each of the diodes using the
diode test function on the meter. If either one of
the diodes are bad, replace the diode
assembly.
Stop here and repair the problem.
Fuse Links
Capacitor Test
HIGH VOLTAGE may be stored in the capacitor. Discharge the capacitor
before continuing. Connect a 2k ohm resistor across the capacitor
terminals for 10 seconds. Do not touch the capacitor terminals with
your hands. The resistor should be held with a pair of insulated pliers.
Failure to do so may cause serious bodily injury
Содержание AN 171
Страница 2: ......
Страница 12: ...TAYLOR DUNN...
Страница 26: ...TAYLOR DUNN...
Страница 42: ...TAYLOR DUNN...
Страница 50: ...TAYLOR DUNN...
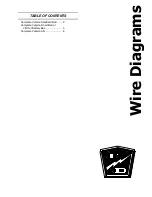
Страница 51: ...TABLE OF CONTENTS Throttle Linkage Adjustments 2 Throttle Linkage...
Страница 60: ...TAYLOR DUNN...
Страница 79: ...Transmission Transmission Page 19...
Страница 80: ...Transmission Transmission Page 20 EXPLODED VIEW...
Страница 94: ...TAYLOR DUNN...
Страница 150: ...TAYLOR DUNN...
Страница 152: ...Illustrated Parts Parts Page 2 Front Axle...
Страница 154: ...Illustrated Parts Parts Page 4 Front Tire...
Страница 156: ...Illustrated Parts Parts Page 6 Front Fork 7 10 Fork Collar in frame 1 2 4 5 5 4 3 6...
Страница 158: ...Illustrated Parts Parts Page 8 Steering Linkage SC...
Страница 159: ......
Страница 160: ...Illustrated Parts Parts Page 10 Steering Linkage AN...
Страница 164: ...Illustrated Parts Parts Page 14 Throttle Linkage 3 1 2 4 5 6 6 6 7 8 8 9 10 9 10...
Страница 172: ...Illustrated Parts Parts Page 22 Motors 9 12 13 9 5 3 4 2 1 14 10 11 7 16 17 6 8 15 Typical GE Motor...
Страница 174: ...Illustrated Parts Parts Page 24 Power Traction...
Страница 176: ...Illustrated Parts Parts Page 26 Differential...
Страница 178: ...Illustrated Parts Parts Page 28 Brake...
Страница 180: ...Illustrated Parts Parts Page 30 Rear Axle...
Страница 182: ...Illustrated Parts Parts Page 32 Rear Tires 10 Ref wheel hub 1 2 5 assembly 4 3 6 7 8 9...
Страница 184: ...Illustrated Parts Parts Page 34 Control Panel standard...
Страница 186: ...Illustrated Parts Parts Page 36 Control Panel 40 bed...
Страница 188: ...Illustrated Parts Parts Page 38 Instruments Gauges Model SC VKRZQ Model SC VKRZQ...
Страница 190: ...Illustrated Parts Parts Page 40 Batteries Main positive Main negative 1 1 1 2 2 3 3 3 4 5 6 7...
Страница 192: ...Illustrated Parts Parts Page 42 Decals...
Страница 194: ...Illustrated Parts Parts Page 44 Miscellaneous Frame and Body SC 5 1 2 3 14 6 17 18 19 4 7 15 16...
Страница 196: ...Illustrated Parts Parts Page 46 Miscellaneous Frame and Body AN...
Страница 198: ...TAYLOR DUNN...


