18
TASCAM DA-6400/DA-6400dp
3 – Preparation
NOTE
During installation, be careful not to tighten the screw too
much.
Connecting and disconnecting USB
flash drives
You can connect and disconnect USB flash drives whether the
unit is on or off.
CAUTION
Do not disconnect a USB flash drive when it is being
accessed in one of the following manners.
Doing so could damage data or the USB flash drive.
Moreover, disconnecting the USB flash drive during the
execution of a firmware update could result in the unit
becoming unable to start up or operate properly.
i
During execution of the
FACTORY PRESET
function
i
During execution of a
SYSTEM BACKUP
IMPORT or
EXPORT
i
During execution of a firmware update
i
When the
BROWSE
screen is open and the USB flash
drive is being accessed
Installing I/O cards (sold separately)
CAUTION
Before installing or removing an I/O card (sold separately),
disconnect the power cord from the outlet or the unit.
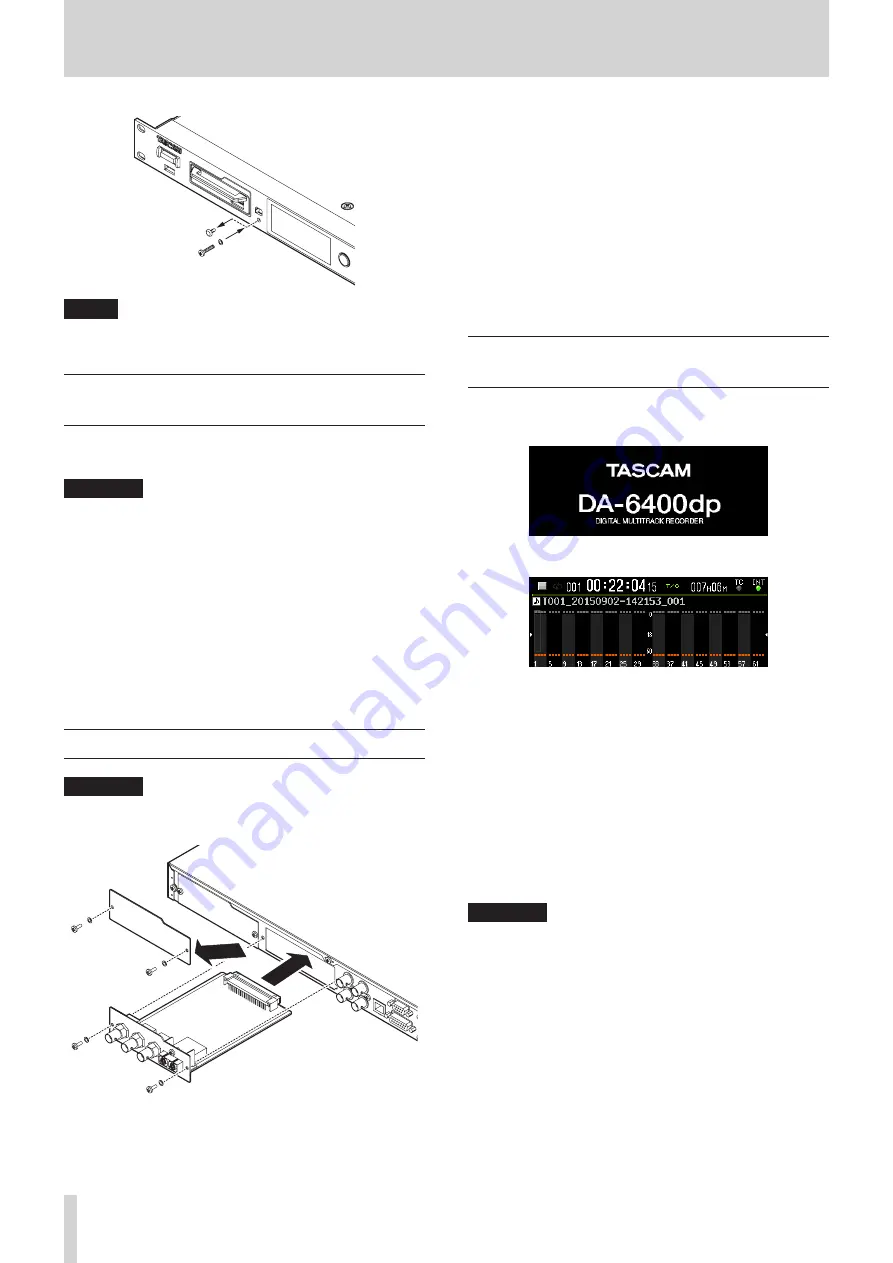
1. Remove the two screws from the plain panel and remove
the panel itself. (If a different card is already installed,
remove it.)
2. Insert the I/O card into the card slot. Align the edges of the
I/O card with the white guides inside the slot and insert it
securely. Push the I/O card in until its backplate reaches the
back panel of the unit, leaving no gap, and clicks into place.
Do not force the card into the slot. If you cannot insert the
card properly, remove it once and try reinserting it.
3. Use the two removed screws to secure the I/O card in place.
4. Turn the unit on, and check the
VERSION INFOR-
MATION
screen to confirm that it has recognized the
inserted I/O card. (See “Checking the firmware version” on
page 51.)
If “SLOT1 : ---- (None)” or something similar appears, the card
might not be inserted correctly or the screws might not be
tightened securely. Insert the I/O card securely into the unit
again.
Turning the unit on and off (putting it
in standby)
When the unit is off, press the
STANDBY/ON
switch on the front
of the unit to turn it on.
DA-6400dp startup screen
Home Screen
After the unit starts and the startup screen is shown, the Home
Screen will open.
If no SSD/HDD is loaded in the slot or there are no audio files in
the current folder, the take number and time will not be shown
on the Home Screen.
8
Turning the unit off:
Press and hold the
STANDBY/ON
switch to open a pop-up
message.
When the confirmation pop-up is open, press and hold the
MULTI JOG
dial to turn the unit off.
CAUTION
•
Do not turn the unit off (put it into standby) during
recording, playback or at other times when data on the
SSD/HDD is being accessed. The SSD/HDD case indicator
blinks orange at such times. Doing so could cause proper
recording to fail, recorded data to be lost, and sudden loud
noises from monitoring equipment, which might damage
the equipment or harm hearing.
•
When the unit is started up for the first time (or when the
built-in clock is reset after being left unused without power
for a long time), the
CLOCK ADJUST
screen appears
after the start-up screen to allow the date and time of the
built-in clock to be set. (See “Setting the built-in clock date


