General Use
71
3.10.3 Camera
Presets
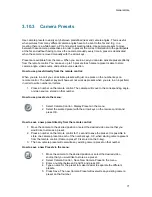
Use camera presets to easily vary between predefined near end camera angles. This is useful
when pictures from many different camera angles have to be sent to the far end. E.g. in a
meeting there is a white board, a PC and a small meeting table. Use camera presets to move
between these camera perspectives in order to present the correct information to the participants
at the far end without having to move the camera manually every time. A preset is deactivated
when the camera is moved manually with the arrow keys.
Presets are available from the menu. When you are in a call you can also activate presets directly
from the remote control. You can save up to 15 presets. Each camera preset is able to store
camera angle, video source and audio source selection.
How to use preset directly from the remote control:
When you are in a call you can activate presets with just one press on the number keys on
remote control. The number keys will however not work as presets when you are in an input field,
in order to write numbers or letters.
1. Press a number on the remote control. The camera will move to the corresponding angle,
or video source, stored on that number.
How to use presets via the menu:
1. Select Camera Control - Display Presets in the menu.
2. Select the wanted preset with the arrow keys on the remote control and
press OK.
How to save a new preset directly from the remote control:
1. Move the camera to the desired position or select the desired video source that you
would like to store as a preset.
2. Press a number on the remote control for 1 second to save the preset. It is possible to
store one camera preset on each of the number keys, 0-9, when storing camera presets
from the remote control. (Camera preset 10 is stored on the 0-key).
3. The new camera preset will overwrite any existing camera preset on that number.
How to save a new Preset via the menu:
1. Move the camera to the desired position or select the desired video
source that you would like to store as a preset.
2. Select Camera Control - Save New Camera Preset in the menu.
3. Enter a number between 0 and 14 and press OK.
4. Type a name for the preset to make it easier to separate the different
presets.
5. Press Save. The new Camera Preset will overwrite any existing camera
preset on that number.
Содержание 6000 MXP Profile
Страница 14: ......
Страница 30: ...TANDBERG 6000 MXP 16 2 3 Monitor Configuration The monitor is pre configured and only needs to be switched on ...
Страница 145: ...General Use 131 PC Presentation shown in Wide stretched mode ...
Страница 205: ...General Use 191 Voice Switched mode ...
Страница 207: ...General Use 193 5 7 Security Security contains the settings Encryption Encryption Mode Passwords Camera Standby mode ...
Страница 255: ...Peripheral Equipment 241 All signals are electrically according to RS232 Cable length max 5 meter X21 ...
Страница 268: ...TANDBERG 6000 MXP 254 ...
Страница 293: ...Appendices 279 ...
Страница 297: ...Appendices 283 Top view ...
Страница 300: ...TANDBERG 6000 MXP 286 Dimensions Front view Side view Rear view Underside view ...
Страница 314: ...TANDBERG 6000 MXP 300 Appendix 17 Dimensions Dimensions with the Precision HD Camera ...
Страница 315: ...Appendices 301 ...
Страница 316: ...TANDBERG 6000 MXP 302 Dimensions with the WAVE II Camera Front view 50 monitor Top view with base ...
Страница 317: ...Appendices 303 Top view 50 monitor ...
Страница 318: ...TANDBERG 6000 MXP 304 Codec ...
Страница 320: ...TANDBERG 6000 MXP 306 ...

