


Clearing Media Jams
71
Clearing Media Jams
n
To avoid damage, always remove jammed media gently, without tearing it.
Any pieces of media left in the printer, whether large or small, can obstruct
the paper path and cause further jams.
n
To avoid damage to rollers, always remove jammed media gently.
n
Do not reload media that has jammed.
Attention
The image is not fixed on the media before the fusing process. If you
touch the printed surface, the toner may stick to your hands, so be
careful not to touch the print face when removing the jammed media.
Make sure not to spill any toner inside the printer.
Unfused toner can dirty your hands, clothes, or anything else it gets on.
If you accidentally get toner on your clothes, lightly dust them off as much as
possible. If some toner remains on your clothes, use cool, not hot water, to
rinse the toner off, provided your clothing is washable. If toner gets on your
skin, wash it off with water or a neutral detergent.
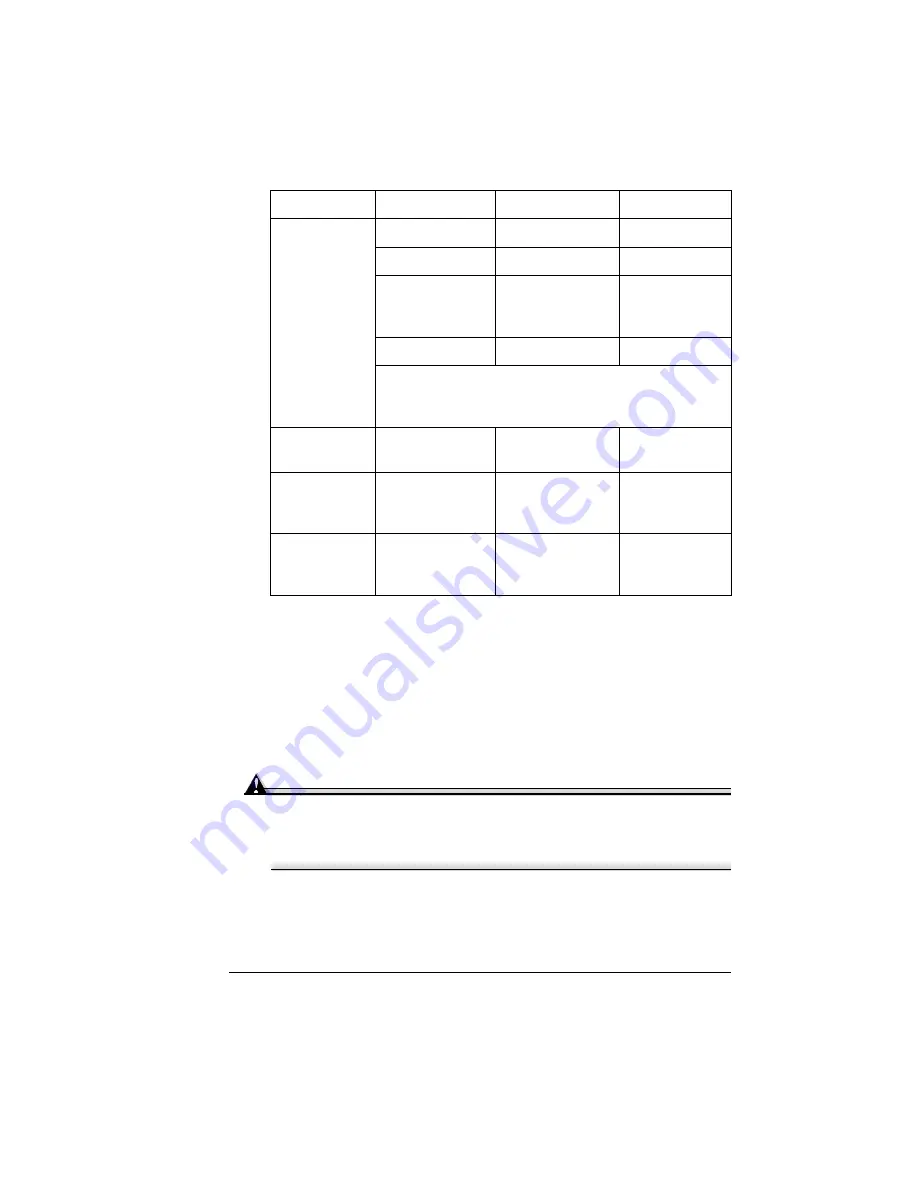
MEDIA JAM
FEED
Multipurpose tray
Multipurpose tray
page 73
Tray 1
Upper media tray
page 74
(Optional) Tray 2
or Tray 3
High Capacity
Input Feeder
(HCIF)
page 75
Output tray
Output tray
page 76
A misfeed jam may be as simple as a sheet of media not
being picked, or it may be that the media was picked but
not fed properly.
MEDIA JAM
FUSER
Near fuser unit
Button A
page 77
MEDIA JAM
REGISTRATION
The registration
rollers below the
imaging unit
Button A
page 77
MISMATCH JAM
Near the
transparency
sensor
Button A
page 80
Message
Location of Jam
Access
Page Reference
Содержание Xpress T8016
Страница 1: ...User Guide Xpress T8016 Color Laser Printer TALLY May 2004 ...
Страница 6: ...Contents iv ...
Страница 7: ...1 Printer Overview ...
Страница 13: ...2 Replacing Consumables ...
Страница 33: ...3 Using Media ...
Страница 62: ...Duplexing 56 ...
Страница 63: ...4 Maintaining the Printer ...
Страница 70: ...Cleaning 64 7 Close the cover 8 Turn on the printer ...
Страница 71: ...5 Troubleshooting ...
Страница 114: ...Additional Assistance 108 ...
Страница 115: ...6 Installing Other Accessories ...
Страница 128: ...Tray Cover 122 4 Attach the tray cover back onto the upper media tray ...
Страница 129: ...7 Color Printing ...
Страница 132: ...Color Registration 126 ...
Страница 133: ...8 Storage Deinstallation Shipping and Packing ...
Страница 146: ...Packing the Printer 140 ...
Страница 147: ...A Technical Specifications ...
Страница 174: ...Index 168 ...


