


Remote Access
If you have already configured your network as detailed opposite, then the PC-DVR should be accessible via the local
network and the Internet. The procedure for remote access can be summarized as:
Connecting to the PC-DVR remotely: this involves using an Internet browser to act as a communication interface.
1.
You may need to alter the security settings (ActiveX controls) in Internet Explorer - see below.
2.
Logging into the PC-DVR.
3.
Open an Internet browser window. For best results, use
•
Internet Explorer version 6 or higher. Other browsers may
work, but this is by no means guaranteed.
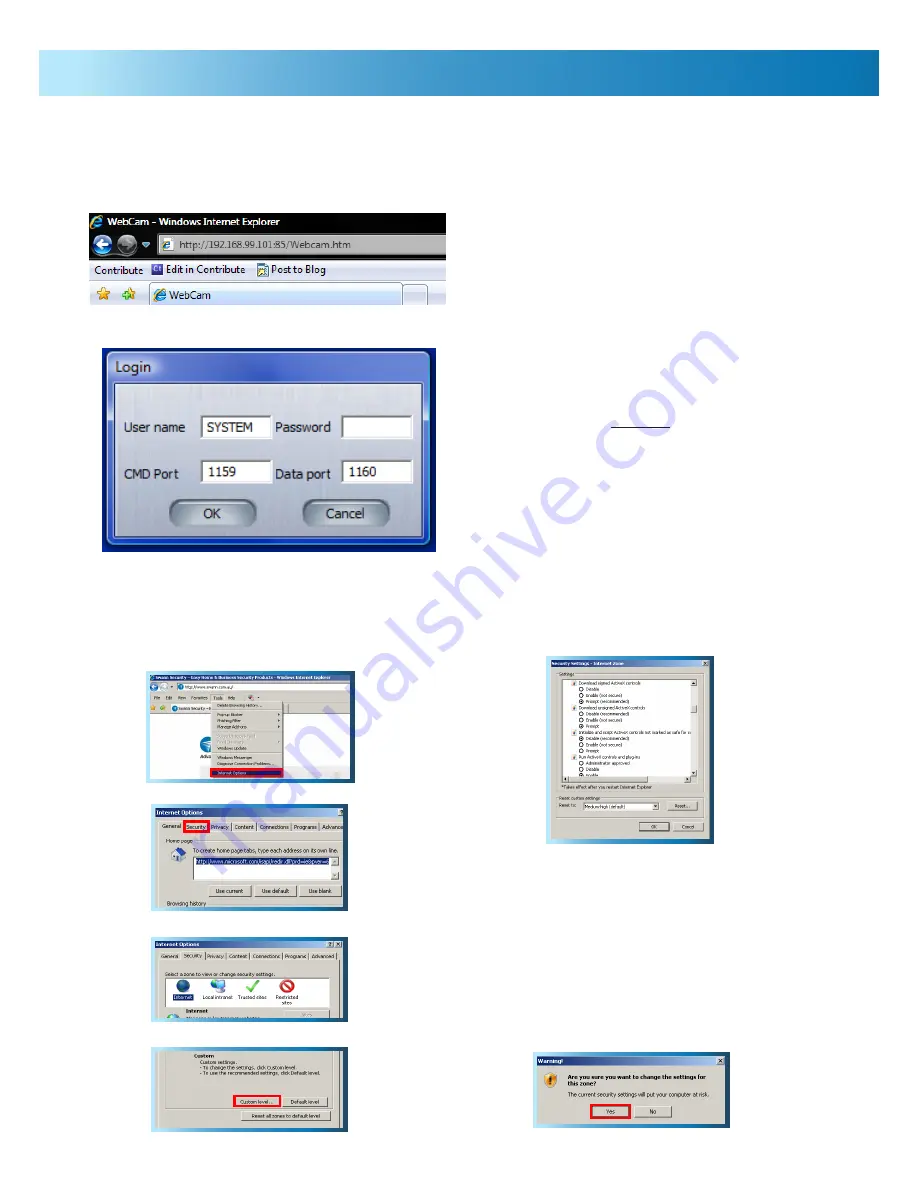
In the address bar, enter the IP Address of the DVR and the
•
web port number, preceeded by “http://” and followed by
“/Webcam.htm”, as shown below.
http://IPADDRESS:PORT/Webcam.htm
If you are accessing the PC-DVR from a computer on the same
LAN
as the computer with the PC-DVR installed, then use the
Local IP Address
, and the
Web Port
. If you’re accessing the
PC-DVR via the
Internet
, use the
Public IP Address
, and the
Web Port.
Examples:
“http://192.168.0.1:85/Webcam.htm” (local)
“http://243.175.244.65:85/Webcam.htm” (via Internet)
You’ll be presented with the Login screen, shown to the left.
Here, you’ll need to enter a valid username and password
combination.
If you’ve changed the
Command (CMD) Port
and/or
Data
Port
values, update them to match your settings.
21
Adjusting the Security Settings in
Internet Explorer
Open
1.
Internet Explorer
.
Click
2.
Tools
-->
Internet Options
.
In
3.
Internet Options
click on the
Security
tab at the top.
Select the INTERNET zone option.
4.
Click on the CUSTOM LEVEL button.
5.
You will now see the list below (or similar, depending on the
6.
version of IE you are running).
Set
7.
Download signed ActiveX controls
to
Prompt
.
Set
8.
Download unsigned ActiveX controls
to
Prompt
.
Set
9.
Initialize and script ActiveX controls not marked as
safe for scripting
to
Prompt
.
Set
10.
Run ActiveX controls and plug-ins
to
Enabled
.
Set
11.
Script ActiveX controls marked safe for scripting
to
Enabled
.
After you have made these changes, click
12.
Okay
.
You will be asked to confirm your changes. Choose
13.
Yes
.


