


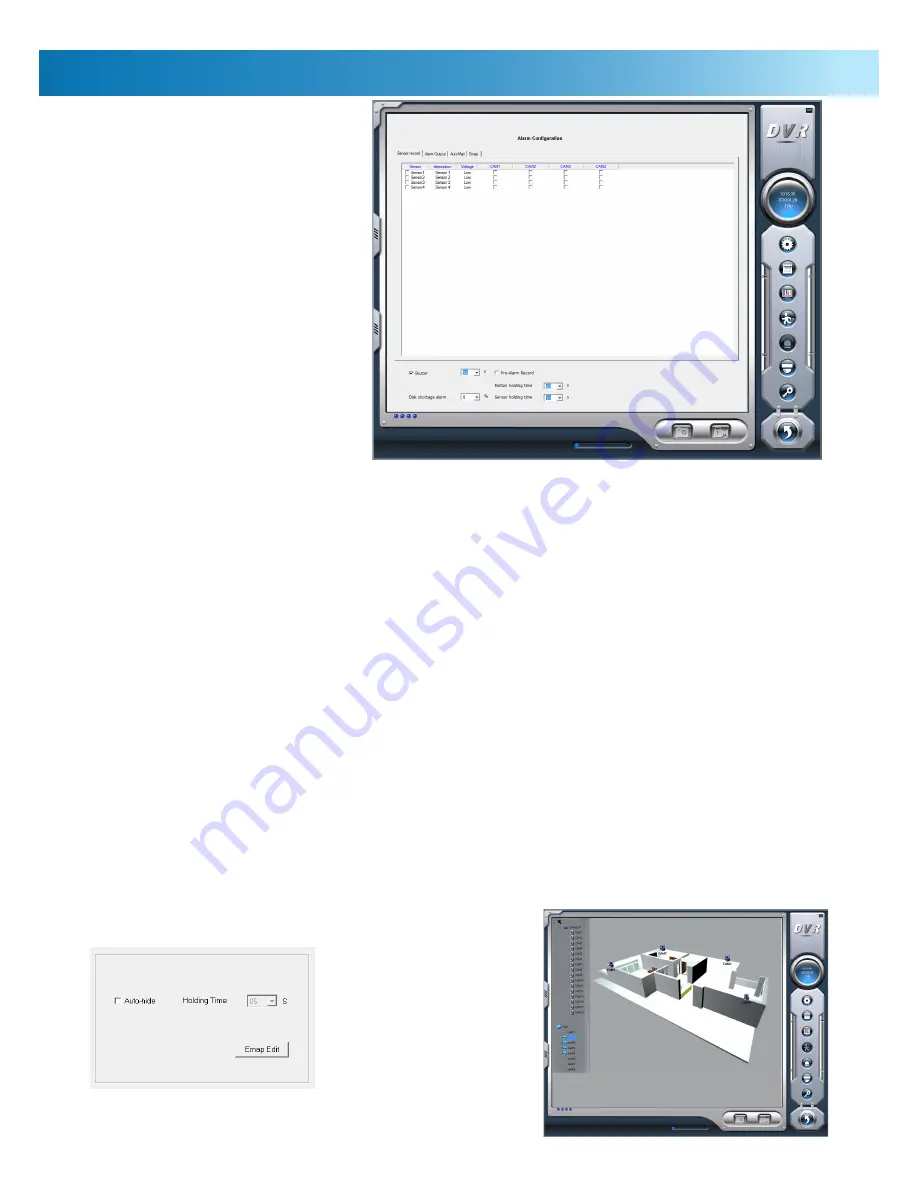
Alarm / Sensor Configuration
14
Left:
The EMAP configuration window.
Here you can choose how long you’d like
the map to be displayed for during an
alarm event. This is also where you access
the EMAP definition screen, shown to the
right.
Right:
The EMAP definition screen. This
is where you’ll be able to import a map
of your home or office, and place your
cameras on this map. You can define up
to eight maps - this is useful for large or
multi-story buildings, or for representing
a separate area of surveillance, like a car
park.
Events monitored by the PC-DVR (such as
detecting motion or losing a video signal) can
trigger an alarm.
The alarm is typically sound based, and
generated by the PC that the card is installed
in (and thus produced by the same speaker
system attached to the computer).
There is also the option of routing the alarm
signal to an external device via the alarm
output port. This is an advanced feature of the
DVR, and something we suggest only those
with experience building and maintaining
computer systems attempt.
For most purposes - should remote notification
of alarm events be required - we suggest that
the Auto-Mail feature is more applicable.
Buzzer:
Turns the auditory alarm emitted by the PC with
the PC-DVR attached on and off. Without the buzzer (or
the Remote Alarm) turned on, only an dialog box on the PC
screen will alert you to an alarm event occurring.
Motion Holding Time:
The amount of time an alarm will
last after detecting a motion event. The alarm will occur
continuously whilst motion is occurring - the Motion Holding
Time will determine how long the alarm will continue for
after the motion event has ended.
Sensor Holding Time:
Works in a very similar way to the
Motion Holding Time - the primary difference is that this
setting determines how long an alarm event lasts after the
external sensors cease triggering the PC-DVR.
Disk Shortage Alarm:
Will cause an alarm event when the
hard drive(s) used to record footage to are about to run out
of space. If you have the
Recycle
function turned on, then this
alarm is not as important, as the PC-DVR will automatically
delete old footage to ensure there is always space for new
events to be recorded.
Alarm Out 1:
You can turn the remote alarm setting on and
off here.
The EMAP function
allows you to import a map or plan
of your home or office. You can then place icons which
represent your cameras on the EMAP, effectively creating a
very user-friendly map of your immediate environment and
the cameras therein.
In the event of an alarm event, the EMAP will be displayed
for a short time, indicating exactly where the alarm event has
been detected (turn this feature ON or OFF using the EMAP
button on the main interface, and checking or unchecking
the “
Auto Show
” box).
If you want to use an Emap, first you’ll need to create or
load a map of your environment, saving it as either a .
BMP
or .
JPG
file.
Importing your EMAP:
Click EMAP edit.
•
Once you’ve opened the EMAP, select a map number
•
from the list on the left.
Then, right-click on the default map image and choose
•
“Load Picture”.
To defining your camera placement, simply grab a
•
camera from the device list on the upper left-hand side
of the display. Then, drag it onto the Emap, and place it
as appropriate.
Right click and choose “Save” to retain your Emap.
•


