background image

HMP100 User Guide v2.1


21 

o


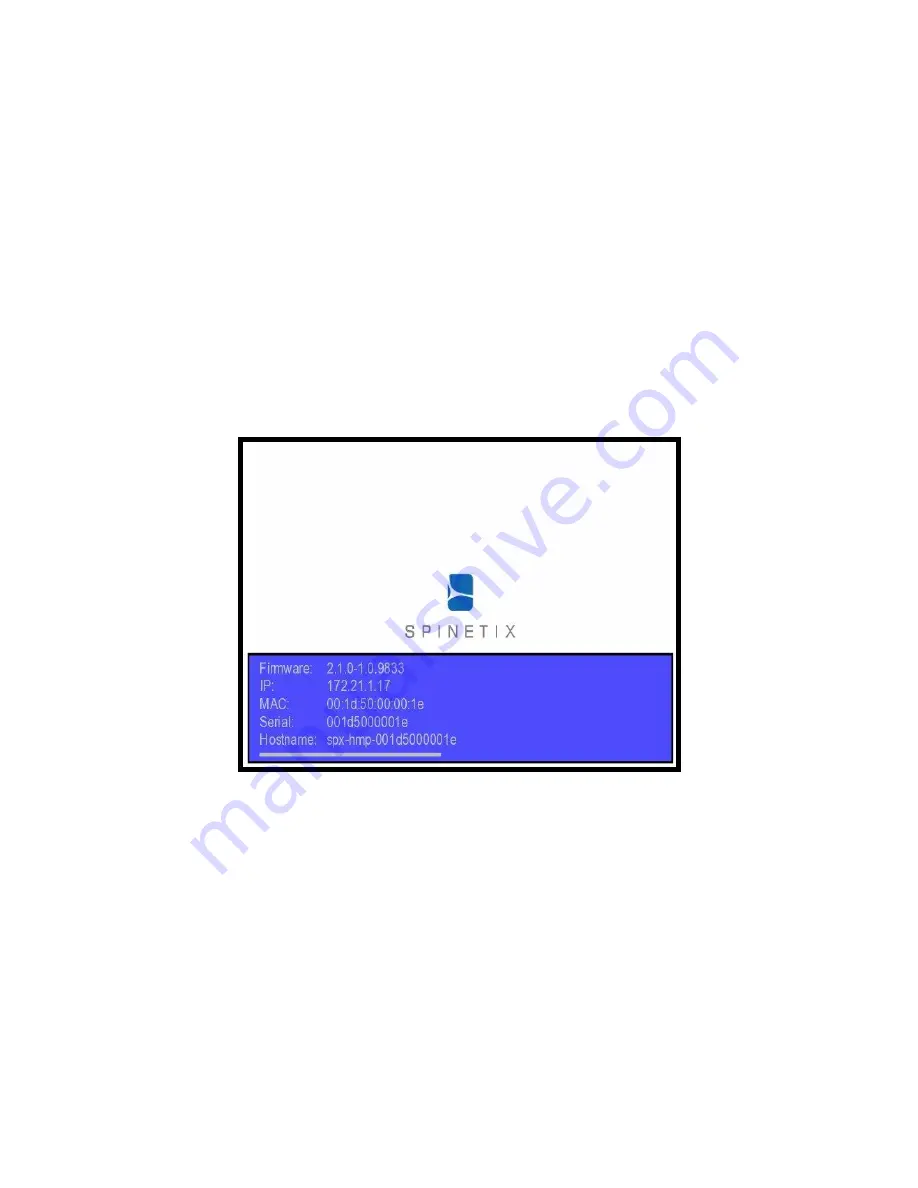
The screen should display the SpinetiX logo or any other content being 
uploaded to the HMP100 unit. 

Guide

1.


Connect the Screen

, through the VGA, HDMI or DVI cable to the HMP100. 

2.


Check

 that some content are displaying on the screen. If your HMP100 has never 

been used before you should see a moving SpinetiX logo on the screen. 

3.


Press

 the HMP100 button briefly. 

4.


Check

 the screen. The HMP100 will display the following information on the 

screen during 10s: 

1.


Firmware version 

2.


IP Address 

3.


MAC Address 

4.


Serial number 

5.


Hostname: You can reach the unit using 

http://[hostname].local

 from 

any PC  


Troubleshooting 

If  you  cannot  display  the  HMP100  information,  please  check  the  following  before 
contacting [email protected] 

1.


The screen displays nothing: 

a.


Check the cables connecting the HMP100 to the screen.  

b.


If  the  LED  of  the  HMP100  is  not  blinking,  the  HMP100  might  be 
malfunctioning. 


2.


The screen displays a fix SpinetiX logo with the text "Recovery System".  

Your  HMP100  is  in  recovery  mode.  In  this  case,  unplug  and  power  up  again  the 
HMP100 unit. Wait about 1 minute. If the HMP100 unit remains in recovery mode 
contact support. 

 
3.


The HMP100 displays the SpinetiX logo on a blue background and then the screen 
switch to black. 


Содержание HMP100

Страница 1: ...Hyper Media Player HMP100 User Guide v2 1 Revision 2010 February 24 ...

Страница 2: ...ION THOSE OF MERCHANTABILITY FITNESS FOR A PARTICULAR PURPOSE AND NONINFRINGEMENT OR ARISING FROM A COURSE OF DEALING USAGE OR TRADE PRACTICE IN NO EVENT SHALL SPINETIX OR ITS SUPPLIERS BE LIABLE FOR ANY INDIRECT SPECIAL CONSEQUENTIAL OR INCIDENTAL DAMAGES INCLUDING WITHOUT LIMITATION LOST PROFITS OR LOSS OR DAMAGE TO DATA ARISING OUT OF THE USE OR INABILITY TO USE THIS MANUAL EVEN IF SPINETIX OR ...

Страница 3: ...t is Hyper Media As defined by Wikipedia Hyper Media is used as a logical extension of the term hypertext in which graphics audio video plain text and hyperlinks intertwine to create a generally non linear medium of information A movie or a video clip is a typical linear content you watch it from the beginning to the end The content in a WEB page is a typical example of non linear content multiple...

Страница 4: ... 20 Requirements 20 Guide 21 Troubleshooting 21 Automatic DHCP configuration 22 Troubleshooting 23 Fixed IP configuration 24 Troubleshooting 25 Configure the network connection of your PC 26 HMP100 HTTP server 28 Set Display settings 29 Controlling the display power 30 Controlling the content displayed by the HMP100 30 Use an USB drives with HMP100 31 Using a network server with HMP100 33 The Pull...

Страница 5: ...MP 100 enriches digital signage projects with high quality video audio images animations and text all these media can be retrieved by HMP100 from local or network resources and can be combined and rendered on any type of digital displays following specific graphical layouts and time schedules HMP100 extends the basic functionalities of state of the art media players supporting Hyper Media content ...

Страница 6: ... correct working status is the job of IT specialists and require the on site intervention of technicians This job represents consistent and recurrent expenses that prevent today the wide adoption of distributed network of digital signs HMP100 has been designed to simplify both the installation and the maintenance tasks by offering Plug Play Top reliability Smallest form factor Remote monitoring Up...

Страница 7: ...t aluminum case that reduces the risks of damage when transported and installed Finally HMP100 runs a Linux OS and software applications designed for the HMP100 hardware architecture Smallest form factor HMP100 200g of high technology concentrate HMP100 is the smallest digital signage hyper media player on the market With only 10 5x9x2 5 cm and 200g HMP100 simplifies your logistic and installation...

Страница 8: ...ve so as to drive two monitors without the need of additional splitters HDMI is a digital audio video connector widely adopted by most digital displays VGA is an analogue computer video connector also supported by the majority of digital displays VGA connector does not carry audio information for this reason an analogue audio connector is provided by the HMP100 HMP100 is a high definition ready de...

Страница 9: ...ID input output devices such as the one proposed by U HID A complete description of the supported touch screen controllers can be found at http www spinetix com advancedapplications compatibletouchscreens The HMP100 also supports some 3G USB modems The list of supported modems can be found at http www spinetix com advancedapplications compatible3gmodems When professional displays are connected to ...

Страница 10: ...rs HMP100 exposes several I O connectors identified by small icons In this guide we will only use those required to test that your HMP100 unit is functional HMP100 Front panel connectors RS232 interface the serial port is used in development mode only Ethernet RJ45 plug the Ethernet cable in this socket USB 2 0 supports an USB memory device LEDs The green red LED gives an indication on the state o...

Страница 11: ... video out connector on the front panel of HMP100 and the corresponding video in connector of your display 4 Power up the display Make sure to select the right video input 5 Power up HMP100 Use the cables and the power converter provided in the HMP100 package Simply plug the power converter on one side to a 110 220V outlet and on the other to the back panel DC jack Shortly after power up the scree...

Страница 12: ...logo with the text Recovery System Your HMP100 is in recovery mode In this case unplug and power up again the HMP100 unit Wait about 1 minute If the HMP100 unit remains in recovery mode contact support 6 If the HMP100 displays the SpinetiX logo on a blue background and then the screen switch to black You are probably using a VGA cable and your screen is not detected by the HMP100 Go to the HTTP co...

Страница 13: ...th the update Update failed Check Figure 2 to see how the page looks like in this case The most probable source of this error is that your HMP100 couldn t contact the update server It is recommended to check your internet connection and your network configuration Make sure that a Gateway and a DNS server are configured If the HMP100 is not connected to the internet you need to contact support spin...

Страница 14: ...b browser the new firmware version will be reported under section Current Versions If you click the Check for Update button again the page will report that no updates are available It is possible that the HMP100 performed only a partial update of the firmware In this case you need to update the firmware a second time Automatic update If your HMP100 is configured to use automatic update and has dir...

Страница 15: ...t To reinitialize the HMP100 unit to its factory default settings do the following a Unplug the unit from the power b Push the blue button and keep it pressed c Power up again the HMP100 unit d Wait with the push button pressed at least 8 seconds e Release the push button f The HMP100 unit will now boot in the factory default mode and will have the default IP address ...

Страница 16: ...a switch and 2 Ethernet cables One HMP100 unit o With firmware 2 1 or above Guide If you have an older version of the HMP100 firmware below 2 1 please use the alternate guide described below 1 Connect the PC through the switch depending on the chosen setup to the HMP100 unit following one of the above schemes 2 Power up the PC and switch if applicable 3 Power up the HMP100 unit Note that the HMP10...

Страница 17: ...MP100 to a display you should see the default animated logo b Check that the LED is blinking green once per second If this is not the case go to the troubleshooting section at the end of this guide c Open a Web Browser e g Internet Explorer Firefox and type http spx hmp serial_number_of_the_hmp100 local in the location bar at the top The browser should connect to the HMP100 HTTP server and display...

Страница 18: ...ry mode In this case unplug and power up again the HMP100 unit Wait about 1 minute If the HMP100 unit remains in recovery mode contact support 2 Double check the connectivity in your setup cables connectors switches 3 Check the network configuration of your PC 4 Verify that the web browser does not have a proxy configured 5 If you are using Windows Vista or Windows 7 you can connect to the HMP100 ...

Страница 19: ...etix com Alternate Guide firmware below 2 1 Note that this procedure applies only if you have not modified the default network configuration of the HMP100 unit See Reset to Factory default to make sure that your HMP100 has the default network configuration 1 Connect the PC through the switch depending on the chosen setup to the HMP100 unit following one of the above schemes 2 Power up the PC and s...

Страница 20: ...that the LED is blinking green once per second If this is not the case go to the troubleshooting section at the end of this guide c Open a Web Browser e g Internet Explorer Firefox and type http 192 168 1 10 in the location bar at the top The browser should connect to the HMP100 HTTP server and display the following page Checking the HMP100 configuration This section explains how to use the push b...

Страница 21: ...ddress 4 Serial number 5 Hostname You can reach the unit using http hostname local from any PC Troubleshooting If you cannot display the HMP100 information please check the following before contacting support spinetix com 1 The screen displays nothing a Check the cables connecting the HMP100 to the screen b If the LED of the HMP100 is not blinking the HMP100 might be malfunctioning 2 The screen di...

Страница 22: ...100 unit If you have just received an HMP100 unit see the Get Connected guide to learn how to connect to its HTTP server If the network configuration of your HMP100 unit has already been modified follow the suggestions in Access HTTP server 2 Select the Network configuration page on the left menu under Basic see screenshot below Under Current settings you can read the current network configuration...

Страница 23: ...ED on you HMP100 unit If the LED is blinking once per second in orange color and the red led is bright on then your HMP100 unit has been configured to activate DHCP but no DHCP server has been detected on your network Make sure your DHCP server is working correctly If the green led is blinking fast several times per second then your HMP100 unit is in recovery mode In this case unplug and power up ...

Страница 24: ...cts The right subnet mask The address of the Gateway and the one of the DNS if you want your HMP100 to be able to connect to the Internet 2 Access the HTTP server of your HMP100 unit If you have just received an HMP100 unit see the Get Connected guide to learn how to connect to its HTTP server If the network configuration of your HMP100 unit has already been modified follow the suggestions in Acce...

Страница 25: ... team 1 Check the LED on you HMP100 unit If the LED is blinking once per second in orange color and the red led is bright on then you are in one of the following cases The IP address of your HMP100 unit has already been assigned on the network Check your network configuration and make sure that the address new IP is not taken by another device If the unit is using a firmware 2 1 or above it will u...

Страница 26: ...00 unit has been configured with a wrong IP address and cannot longer be contacted you need to reinitialize the unit to its factory default See Reset to Factory default and restart the configuration procedure Configure the network connection of your PC Under Windows XP Professional you can configure the network connection of your PC so as to connect to a HMP100 unit in its default configuration wi...

Страница 27: ...HMP100 User Guide v2 1 27 3 Select Internet Protocol TCP IP from the list and press the Properties button 4 Configure the Protocol properties as follows 5 Confirm with OK ...

Страница 28: ...ts of the serial number of your unit 4 You know under which name the HMP100 unit has been registered on the DNS server This registration can be done manually by the DNS server administrator and in this case the name of the unit is arbitrary In this case write http DNS name of the unit in the location bar of your web browser 5 You know that the HMP100 unit is configured in DHCP mode and that the DH...

Страница 29: ...lutions For finer settings you need to use the Advanced menu o The aspect ratio of your display will be automatically updated according to the chosen resolution You can modify it by checking the Force aspect ratio check box 3 Choose your display orientation In case you are using a vertical display make sure you select the correct rotation direction 4 If you require audio output you must enable it ...

Страница 30: ...rOff commands at specified times in 24 hours format regardless of the content uploaded on the device It is possible to have a more flexible control of the power mode of the display using schedules and SVG files in the displayed content See the complete documentation about controlling external devices for more information Controlling the content displayed by the HMP100 By default the player display...

Страница 31: ...traints are introduced it may be necessary to request the HMP100 units to retrieve content or publish logs at specific timings In this case the Pull mode must be used Use an USB drives with HMP100 This tutorial explains how to configure USB drive as storage source by your HMP100 unit using its administration HTTP server 1 In the main page of the HTTP server of your unit select in the left menu the...

Страница 32: ...must be formatted by the HMP100 1 Plug your USB storage device to the HMP100 2 Press the Format Now button Warning all content of the USB storage device will be erased Note the USB storage device will no longer be recognized by Windows PCs 3 When the formatting is over unplug the USB storage device from the HMP100 4 Plug the USB storage device to the HMP100 Note you need now to upload content to t...

Страница 33: ...pull mode page 1 In the main page of the HTTP server of your unit select in the left menu the Media Sources item that you find under Administration The current settings will be shown on your browser 2 Change the Primary source to be equal to Network Project 3 Enter the URI of your network project The HMP100 will open the index svg file in the root of the entered URI Note you can use HTTP or HTTPS ...

Страница 34: ...s In this last case an XML files describing the content of the server must be available The Pull mode timings can be configured either directly from the HTTP interface or using iCalendar files There are two ways to configure the Pull mode on a HMP100 unit Using the simple HTTP interface This option is easy to configure but has some limitations For example it forces a daily project publishing at a ...

Страница 35: ...the server if different users are needed for different part of the server o The username o The password o You can specify multiple username and password for the same server but for different realms 3 If you need additional servers press the Add server row button 4 Press Apply to save your changes Note that networks credentials are used by the HMP100 player and by the pull mechanism as described in...

Страница 36: ...t menu the Security item that you find under Administration The current security settings will be shown on your browser 2 Choose the type of access you would like to configure Note it is recommended to always setup a password for the Administrative area By default no password is set and the administrative area is not protected 3 Enter the password and confirm it in the second text area 4 Press App...

Страница 37: ...the following A protocol file for your appliance Testing and debugging your protocol file can be done on a PC using the Serial Port Protocol Studio application The protocol file must be uploaded to the HMP100 and enabled When using the serial port ou need to build or purchase the serial port cable to connect your appliance to the HMP100 Special SpinetiX elements auxCmd need to be included into you...

Страница 38: ...figuring the protocols The drop down menu below shows an HMP100 s configuration where the following protocol files can be selected No protocol files the RS232 interface is disabled disabled A system version of the Sharp Aquos protocol sys sharp_aquos An uploaded protocol file for the LG LF65 screen LG LF65 An uploaded protocol file for the Sharp Aquos monitors sharp_aquos Once a protocol file is s...

Страница 39: ... the HMP100 to send the PowerOn and PowerOff commands at specified times in 24 hours format regardless of the content uploaded on the device In the example below the HMP100 has been configured to use the LG LF65 protocol and automatically turn the screen ON at 8 00 and OFF at 20 00 ...

Страница 40: ...ing the Mac Web Browser Safari 1 Open the Safari web browser 2 Go to the Bookmark menu and select Show All Bookmarks 3 Click on the Bonjour bookmark 4 All available HMP100 on your network will be shown here 5 To configure and HMP100 simply double click the name in the list Connecting to the HMP100 content This section explains how to connect to the HMP100 content using the Mac OS X Finder 1 Click ...

Страница 41: ...onnected network servers and one need not re connect to it using this procedure Accessing copying content from to the HMP100 unit This section explains how to access content from or copy upload content on the HMP100 unit 1 Open a Finder window 2 Select the HMP100 unit on the list of connected servers on the left of the window it appears by the network name or IP address that was typed when the con...

Страница 42: ...resentations BMP TIFF XPM WBMP PNM bitmaps Scripting language PHP5 JavaScript Content scheduling iCalendar RFC2445 Graphic Effects Engine Graphic effects language SVG Tiny 1 2 Vector graphics primitives Rectangles polygons paths with lines elliptical arcs and Bezier curves text areas linear and radial gradients International text support Unicode standard compliant with bidirectional text support F...

Страница 43: ...max input current 0 6A Operating temperature 10ºC to 35ºC 50ºF to 95ºF 10 to 90 RH Storage temperature 25ºC to 45ºC 13ºF to 113ºF 10 to 90 RH Real time clock Min accuracy 1 minute month free running battery backed Serial RS232 up to 115200 bauds mini jack 3 5mm Analog audio output Line level stereo mini jack 3 5mm Warranty Coverage Life time For General Terms and Conditions visit our web site Plea...

Страница 44: ...horization to SpinetiX and always supply proof of purchase indicating name and address of the Reseller date of purchase model and serial number name and address of the Customer and details of symptoms and configuration at time of malfunction including peripheral and software used Otherwise SpinetiX may refuse the guarantee claim Customer must send to SpinetiX defective product properly packed in o...

Страница 45: ...tual property laws and treaties You must not allow copies of the Product or any part of it to be made or distributed to anyone else You may make backup copies of the software for archival purposes only SpinetiX grants to you a non exclusive non sublicensable license to use the Product for your own use only on a single computer The Product in source code form is confidential and SpinetiX protected ...

Страница 46: ...MAGES OF ANY SORT WHATSOEVER WHETHER ARISING IN TORT CONTRACT OR OTHERWISE INCLUDING WITHOUT LIMITATION DAMAGES FOR LOSS OF BUSINESS PROFITS REVENUES OR INFORMATION OR FOR BUSINESS INTERRUPTION RESULTING FROM YOUR USE OF THE PRODUCT OR YOUR INABILITY TO USE THE PRODUCT EVEN IF SPINETIX HAS BEEN INFORMED OF THE POSSIBILITY OF SUCH DAMAGES OR B FOR ANY CLAIM BY ANY PARTY OTHER THAN YOU IN NO EVENT S...

Отзывы: