10.
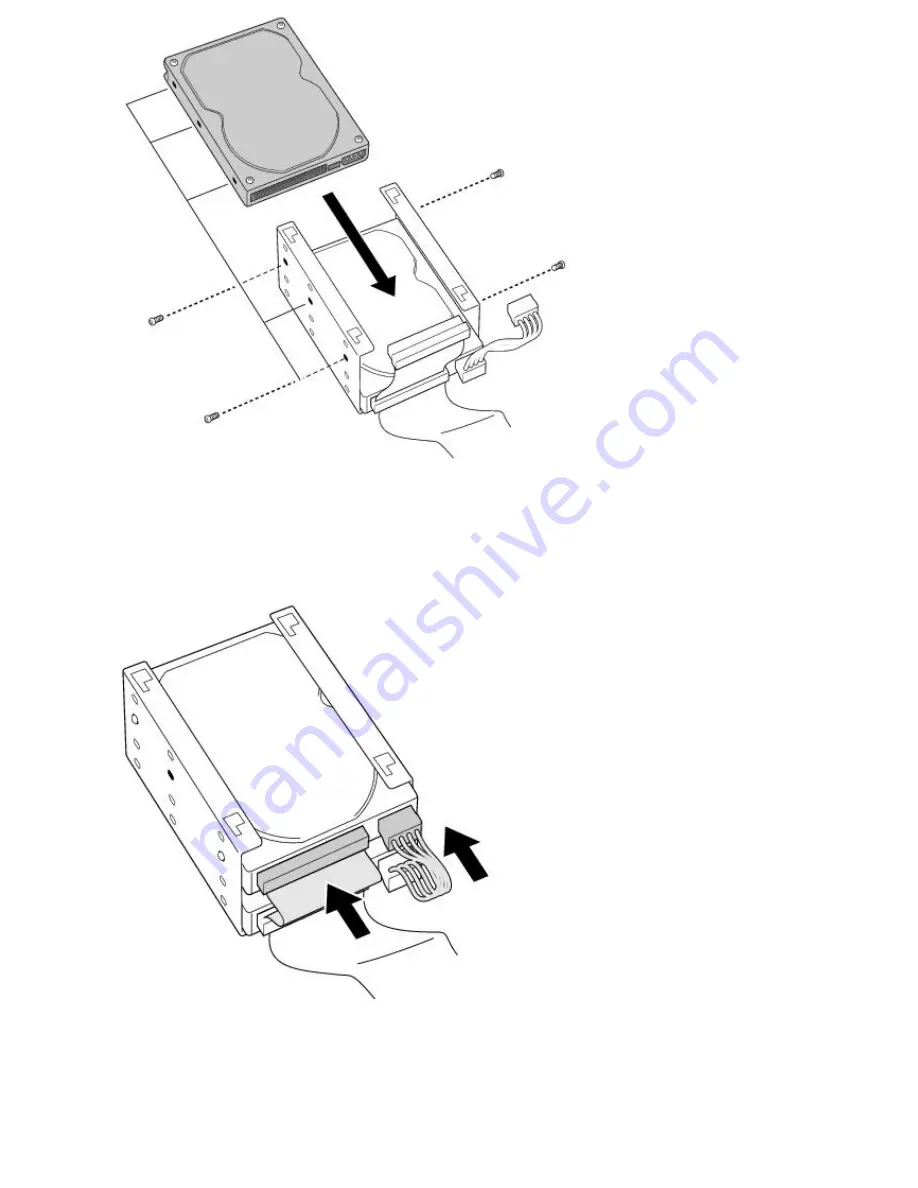
Secure the drive to the drive holder using any two of the three holes on each side of the drive
holder (screws are provided with the new drive). Do not overtighten the screws.
11.
Connect the second drive connector to the new drive.
12.
Connect the second power connector to the new drive.
13.
Place the drive holder against the inside of the front chassis and slide it back. Be sure to align the
slots on the drive holder with the tabs on the inside of the chassis. Be sure to slide the drive holder
back so that the tabs slip into the notch at the bottom of the slot.
Page 641
Содержание PCV-E518DS - Vaio Digital Studio Desktop Computer
Страница 473: ...See the manual that came with your S Link equipped device for more information on setting it up and using it Page 473 ...
Страница 477: ...See the manual that came with your S Link equipped device for more information on setting it up and using it Page 477 ...
Страница 481: ...See the manual that came with your S Link equipped device for more information on setting it up and using it Page 481 ...
Страница 485: ...See the manual that came with your S Link equipped device for more information on setting it up and using it Page 485 ...
Страница 489: ...See the manual that came with your S Link equipped device for more information on setting it up and using it Page 489 ...
Страница 493: ...See the manual that came with your S Link equipped device for more information on setting it up and using it Page 493 ...
Страница 497: ...See the manual that came with your S Link equipped device for more information on setting it up and using it Page 497 ...
Страница 501: ...See the manual that came with your S Link equipped device for more information on setting it up and using it Page 501 ...


