5-7 (E)
Digital Cinema Dual System
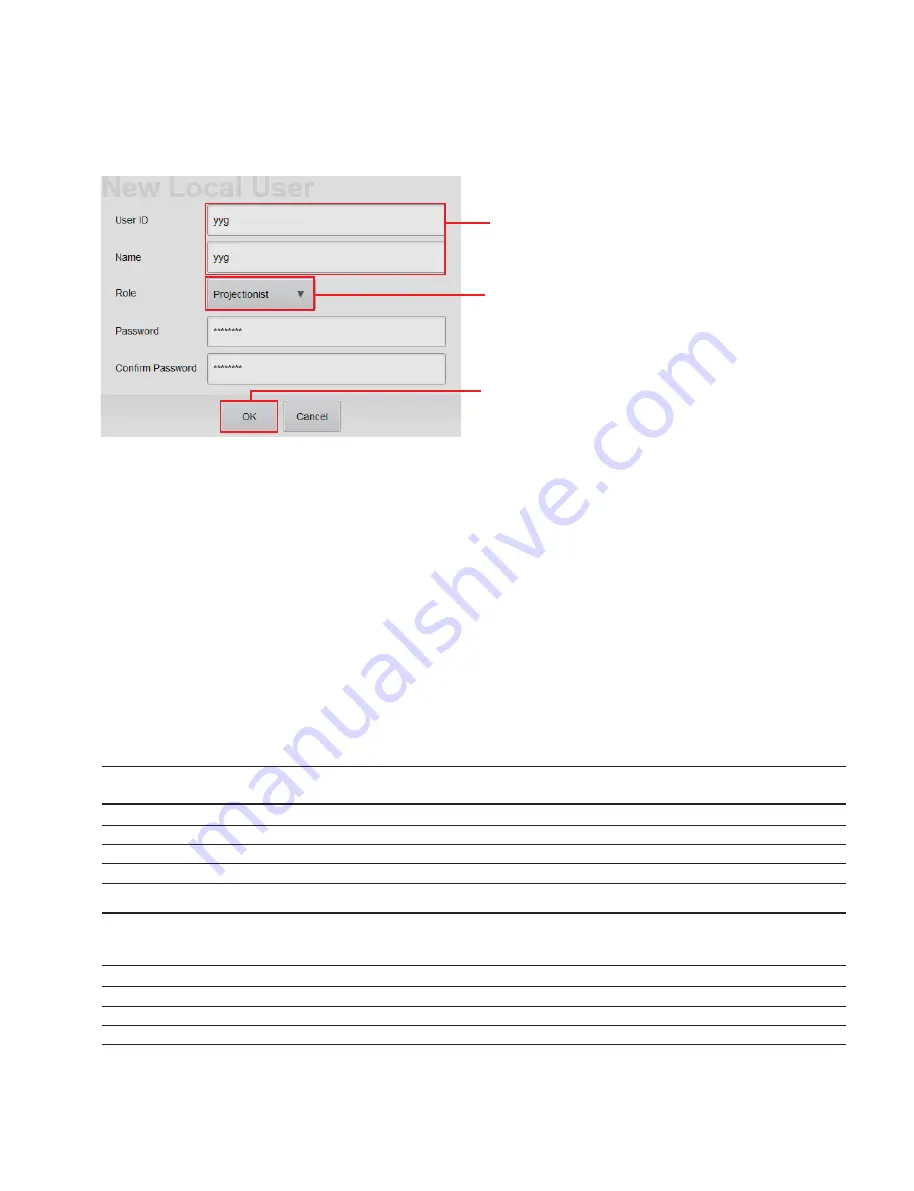
4. Tap
[New]
in the Users pane.
The New Local User screen is displayed.
5. Type the information to be registered in “User ID” and “Name”, and then select “Role” from the
pull-down menu.
You may enter up to 50 characters (only alphanumeric) in “User ID” and “Name” respectively.
(Entering of “Name” is arbitrary.)
In the case of adding “Role”, perform “Addition of Role” described later.
6. Tap
[OK]
on the New Local User screen.
Addition of Role
This system can restrict the operation on the GUI screen for each user. The item that can be operated is
registered as “Role” which is assigned for each user.
The four Roles are provided in advance (“Projectionist”, “ShowManager”, “Administrator” and “Maintenance”).
The items that can be operated in each Role are as follows.
.
Enable: Item that can be operated in the Role
.
Disable: Item that cannot be operated in the Role
Role Operation
item
Content Management
SPL Management
Show Control
Audit Log Report
User Management
Projectionist Disable
Disable
Enable
Disable
Disable
ShowManager Enable
Enable
Enable
Enable
Disable
Administrator Enable
Enable
Enable
Enable
Enable
Maintenance Enable
Enable
Enable
Enable
Enable
Role Operation
item
Role Management
System Setup
Retrieve service
CSS Operations
Projector Tuning
logs/app
logs
Projectionist Disable
Disable
Disable
Disable
Enable
ShowManager Disable
Disable
Disable
Disable
Disable
Administrator Enable
Enable
Disable
Disable
Enable
Maintenance Enable
Enable
Enable
Enable
Enable
Type User ID and Name.
Select Role.
[OK]
Screen example


