


Subject to change | © 2019 SOLARWATT GmbH | AZ-TM-PMS-1339 | Rev 001 | Version: 12/2019
Page 24
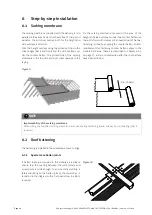
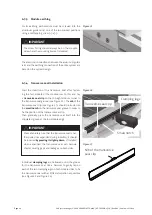
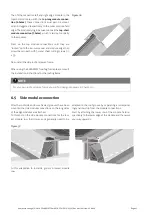
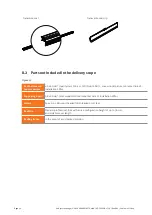
Both seal ends are fully pressed tightly against each other
there and each fastened with a clamping lug.
IMPORTANT
Ensure also that the new seal is
inserted pressed
down
and ensure that at the joining point no new
gap has formed.
Figure 28
Mount seamlessly!
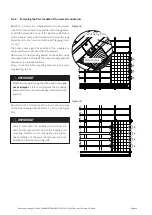
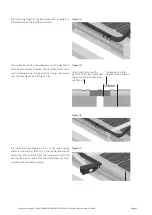
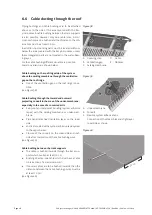
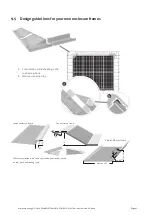
6.3.5 Fastening the second module of the lowest module row
Mount module 2 on the left next to the already installed
module 1 on the same aluminum guide rail and do the
electric wiring.
Then module 2 is pushed into module 1 as far as possible
until it reaches both the affi xed spacers of module 1 (ex-
pansion gap 2 mm).
Module 2 is held on the right side by module 1 and is
fi xed in position with only the 4 mounting brackets on the
left side. The mounting brackets are mounted in the same
way as for module 1.
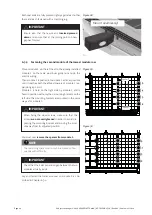
IMPORTANT
When fi xing the wood screws, make sure that the
screws
are not overtightened
in order to avoid dis-
placing the mounting bracket and moving the mod-
ule away from its adjusted position.
You must now
remove the spacers from module 1.
NOTE
The remaining spacers can only be removed subse-
quently with diffi culty.
NOTE
NOTE
NOTE
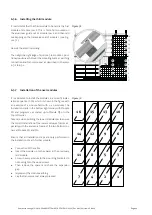
IMPORTANT
Check that the 2 mm expansion gap between the two
modules actually exists.
Lay and fasten the transverse seal on module 2 as de-
scribed in Chapter 6.3.4.
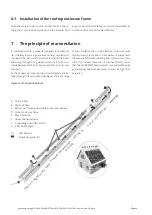
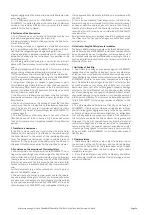
Figure 29
1
2
Spacer
Spacer
2
3
5
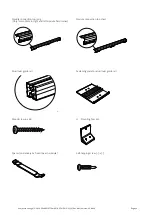
Figure 30
2
3
5
1
2


