


Chapter 5
Changing settings
57
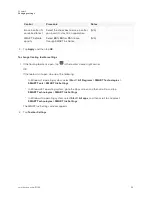
3. Change settings:
Control
Procedure
Notes
Restore Toolbar
Positions
Tap
Reset SMART Ink toolbars to
their default positions
to return
floating toolbars to their original
positions on the screen.
[N/A]
Always show pen
toolbars
Select the check box to always display
the floating toolbars when your
computer is connected to a SMART
interactive product.
Changes to this check box take effect
after you restart SMART Ink.
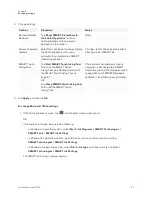
SMART Touch
Inking Tool
Tap
Start SMART Touch Inking Tool
to turn on the SMART Touch
Inking Tool (see
page 8).
OR
Tap
Close SMART Touch Inking Tool
to turn off the SMART Touch
Inking Tool.
This control is available only if your
computer is connected to a SMART
interactive product that supports touch
recognition and if SMART Notebook
software is installed on your computer.
4. Tap
Apply
, and then tap
OK
.
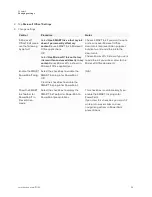
To change Microsoft Office settings
1. If the floating toolbar is open, tap
in the toolbar’s lower-right corner.
OR
If the toolbar isn’t open, do one of the following:
o
In Windows 7 operating system, select
Start > All Programs > SMART Technologies >
SMART Tools > SMART Ink Settings
.
o
In Windows 8.1 operating system, go to the
Apps
screen and then scroll to and tap
SMART Technologies > SMART Ink Settings
.
o
In Windows 10 operating system, select
Start > All apps
, and then scroll to and select
SMART Technologies > SMART Ink Settings
.
The
SMART Ink Settings
window appears.


