SMART Board User’s Guide
10
When Should You Perform an Orientation Procedure?
While orientation is the first task performed after configuring the COM port and installing the
SMART Board software, the interactive whiteboard may be accidentally jostled or deliberately
moved to another location. If this occurs, you’ll need to perform the orientation procedure
again.
Press the SMART Board icon and select
Orient
(for Windows operating system) or
Orient
SMART Board
(for Macintosh computers) and follow the on-screen instructions. You can
also access this feature by pressing the Orient button in the Boards tab of the SMART Board
Control Panel.
Which Orientation Level Should You Choose?
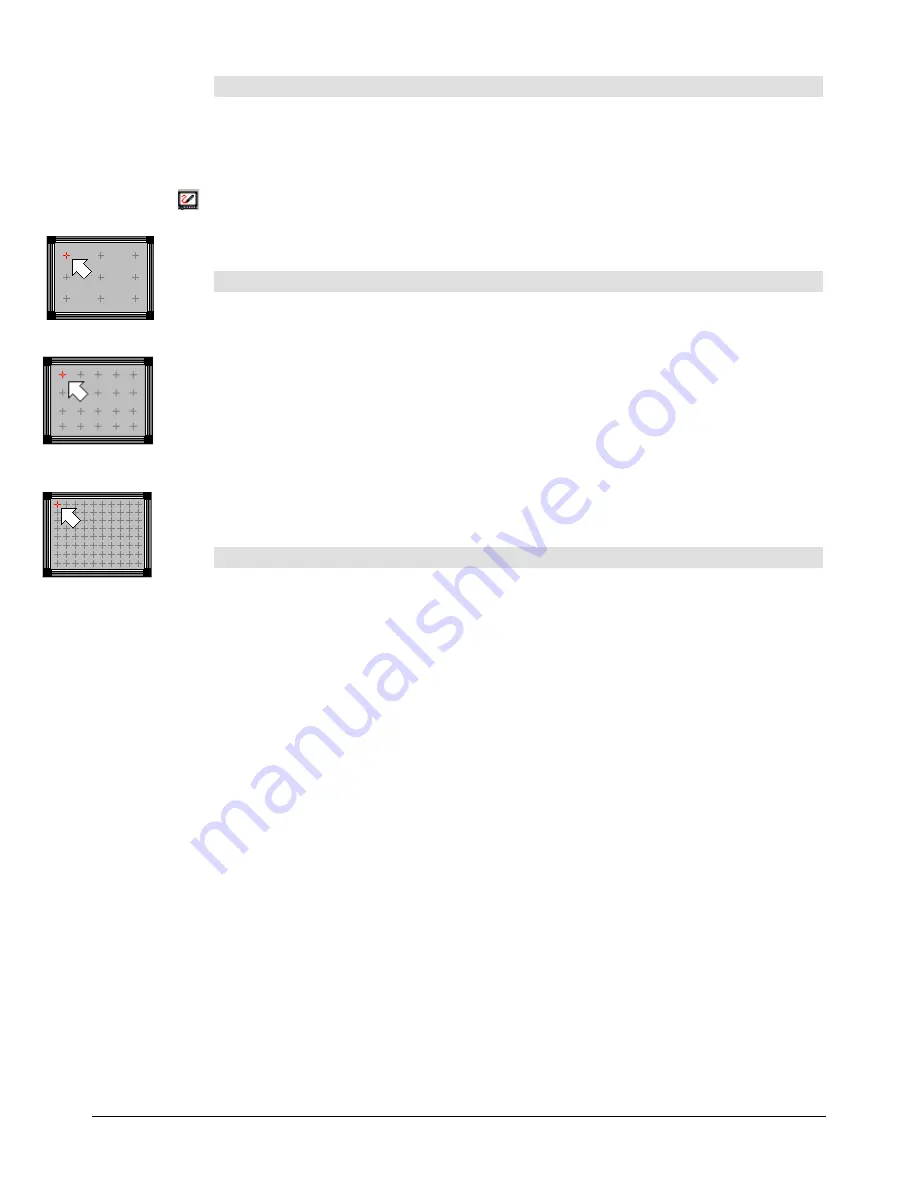
The SMART Board driver offers three orientation levels: Quick (9 points), Standard (20
points) and Fine (80 points). The level you choose should be based on the time you have
available to perform the procedure and the degree of tracking accuracy you require.
•
Quick
orientation requires only nine presses to complete and is well-suited for most
purposes. If your board is accidentally moved or jostled during a presentation, use the
Quick orientation to re-orient quickly and with minimal interruption.
•
Standard
orientation requires 20 presses and provides a slightly higher level of
accuracy suitable for most high resolution systems.
•
Fine
orientation involves pressing on 80 individual crosses.
While the Fine setting is the most time-consuming to complete, it is recommended for
higher-resolution systems that may require a more precise orientation.
To orient the board with extreme precision:
1
Press the SMART Board icon and select
Control Panel
.
2
In the Boards tab, press the Advanced button.
For Mac OS X computers, the
Edit Advanced Settings
dialog box will appear.
For Mac OS 9.x or earlier, the
Pick the Orientation Precision
dialog appears after you click
the Orient button. Proceed to step 4.
For Windows computers, select
Board Settings
from the drop-down menu.
The
Edit Advanced Board Settings
dialog box will appear.
3
Click the Pick the Orientation Precision tab.
4
Once you have determined the Orientation level you prefer, select it.
5
Press Apply, and then OK (or Next for Mac OS 9.x and earlier).
The Boards tab will reappear.
6
Press the Orient button.
7
Press your finger squarely and firmly in the center of each red cross as it appears.
When you’ve pressed on the final red cross, the orientation screen will disappear.
NOTE
: For Windows and Mac OS X users, if you choose to orient with more points than
the default nine-point orientation, this higher-level orientation screen will become the new
default (i.e., the higher-level screen will appear when you next select
Orient
). To restore
the nine-point default, return to the Pick the Orientation Level tab (steps 2 and 3 above)
and select
Quick (9 points)
.
Quick Orientation
Standard Orientation
Fine Orientation


