2
Chapter
Installing the software for your Slingbox • Page 16
Installing the software for your
Slingbox
Now that your Slingbox has been connected to your TV and your home network,
double-check that all the cables are securely fastened, then plug in your Slingbox.
Make sure that everything else is plugged in and powered up. When the lights on the
Slingbox stop blinking, it’s ready to be configured.
This section explains how to install SlingPlayer for the Macintosh and to use the
software to configure your Slingbox.
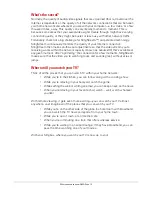
Before you begin installation of the software
Now that you have the cables connected and everything is turned on, there are some
important things you must do before you start installing the software:
•
Take some notes
Look at the cable box, satellite box, VCR, DVD player or DVR (or other
device) that you’ve connected to your Slingbox. Write down the brand and
model number of this device. If you plan on connecting more than one
device, write down the brand and model number for each of them. You’ll
need this information during the setup. Also, write down the brand and
model of your router. You may need it later on.
•
Turn off recording temporarily
If you have a DVR, VCR or DVD recorder connected to your Slingbox, make
sure that it’s not currently recording and that it’s not scheduled to start
recording while you’re installing and setting up your Slingbox. Part of the
setup process involves checking that SlingPlayer can control your device.
This will interrupt recording.
•
Turn off any personal firewall security software
Normally, the assistant and SlingPlayer will automatically find the Slingbox
on your network. Sometimes the Mac OS X firewall or other firewall
security software may block this process. SlingPlayer may then have trouble
communicating with your Slingbox. You may need to modify the settings in
this software before proceeding.
To modify the firewall built in to Mac OS X to allow your Slingbox to be found and used:
1.
Choose
System Preferences
from the Apple menu.
2.
In System Preferences, click
Sharing.
3.
Click the
Firewall
tab. (In order to change the settings here, you may be
required to click the padlock at the bottom of the window and authenticate
with an Administrator's password).
4.
Click
Advanced
and then deselect
Block UDP Traffic
, if it’s selected.
If you have an additional firewall product from another company, see the
documentation that came with it for more information.

