Mounting and dismantling
3.4 Connecting the 3RW5 HMI
SIRIUS 3RW50 soft starter
Manual, 09/2019, A5E35628455002A/RS-AA/001
57
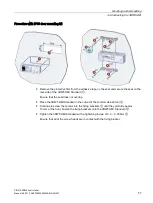
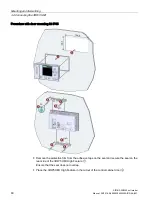
Procedure with IP65 door mounting kit
●
Remove the protective film from the adhesive tape on the seal and secure the seal on the
rear side of the 3RW5 HMI Standard
①
.
Ensure that the seal does not overlap.
●
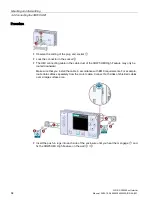
Place the 3RW5 HMI Standard in the cutout of the control cabinet door
②
.
●
Continue to screw the screws into the fixing brackets
③
until they protrude approx.
10 mm at the front. Fasten the fixing brackets onto the 3RW5 HMI Standard
④
.
●
Tighten the 3RW5 HMI Standard with a tightening torque of 0.3 ... 0.35 Nm
⑤
.
Ensure that all of the screw heads are in contact with the fixing bracket.
Содержание SIRIUS 3RW50
Страница 8: ...Table of contents SIRIUS 3RW50 soft starter 8 Manual 09 2019 A5E35628455002A RS AA 001 ...
Страница 38: ...Description 1 13 Support Request SIRIUS 3RW50 soft starter 38 Manual 09 2019 A5E35628455002A RS AA 001 ...
Страница 90: ...Connecting 4 11 COM connection cable SIRIUS 3RW50 soft starter 90 Manual 09 2019 A5E35628455002A RS AA 001 ...
Страница 160: ...Functions 7 12 3RW5 HMI High Feature SIRIUS 3RW50 soft starter 160 Manual 09 2019 A5E35628455002A RS AA 001 ...
Страница 184: ...Messages and diagnosis 8 11 Logbooks SIRIUS 3RW50 soft starter 184 Manual 09 2019 A5E35628455002A RS AA 001 ...
Страница 202: ...Circuit diagrams 12 1 CAx data SIRIUS 3RW50 soft starter 202 Manual 09 2019 A5E35628455002A RS AA 001 ...


