


81
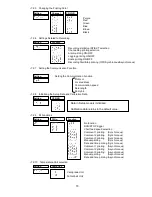
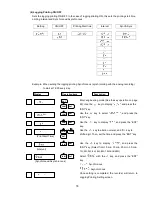
7.2.10 Temperature Unit Selection
Sets the temperature unit.
Example: Setting the temperature unit to Fahrenheit ( ).
Enter engineering mode (See the key operation on page
69). Use the
key to indicate "
", and press
the “ENT” key.
Use the
key to select " ", and press the “ENT” key.
Once setting is completed, the recorder will return to the
Temperature Unit Setting screen.
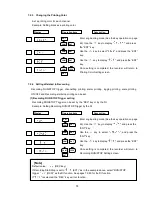
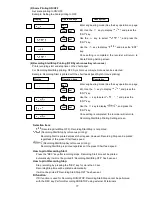
7.2.11 Point Calibration
Calibrates a dot printing position.
: Calibration of the zero point position
: Calibration of the span point position
Example: Calibrating the zero point.
Enter engineering mode (See the key operation on page
69). Use the
key to display "
", and press
the “ENT” key.
Use the
key to select "
", and press the
“ENT” key.
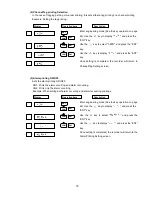
The instrument starts to feed and print the chart paper.
With the
(move left) and
(move right), adjust
the 0 mm position of the chart paper and the recording
position. Press the “ENT” key. Display indicates the
preset counter value.
Once setting is completed, the recorder will return to the
Zero Point Calibration screen.
ENT
ENT
ENT
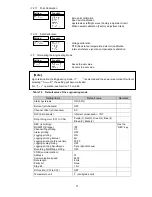
Display
Operation keys
Description
[Note]
Point calibration “
” and ”
” have been set before shipment. Do not change these
values.
Display
Operation keys
Description
ENT
ENT
ENT
ENT
FEED
[Note]
If the temperature unit is changed, all setup data will revert to default values.


