Camera
49
2.
Press
to start Continuous Shoot.
Auto Shoot:
Four pictures are taken in a row.
Manual Shoot: Pictures are taken one by one by
pressing .
The taken pictures are saved automatically.
To stop Continuous Shoot, press [Cancel].
Note
• When “Picture Size” is set to “L (480
∗
640)” or “M
(240
∗
320)”, you cannot use the Continuous Shoot.
• When you select a frame for taking pictures, you
cannot use the Continuous Shoot function.
• Delay timer cannot be used with the Manual Shoot.
Selecting a Frame
You can select the frame from preset patterns. You can
also select a frame in Saved Pictures.
“Camera”
→
“Take Picture”
→
[Options]
→
“Add
Frame”
1.
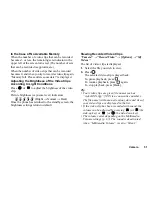
Select “Preset Frames” or “My Pictures”.
2.
Select the desired frame.
The selected frame is confirmed on the display.
3.
Press .
Note
• When “Picture Size” is set to “L (480
∗
640)” or “M
(240
∗
320)”, you cannot use the Frame function.
• When you activate the Continuous Shoot, you cannot
use the Frame function.
• Only images in PNG format can be selected as the frame
if you select “My Pictures” in step 1. However, images
larger than 128[W]
×
160 [H] cannot be used.
Selecting the Shutter Sound
You can select the shutter sound from 3 preset patterns.
“Camera”
→
“Take Picture”
→
[Options]
→
“Shutter Sound”
1.
Press
or
to select the desired shutter sound.
To play back the shutter sound, press [Play].
2.
Press
to select the shutter sound.
Note
• Continuous Shoot uses the specialised shutter sound
that cannot be changed for the above settings.
Содержание GX18
Страница 2: ......
Страница 18: ...16 Table of Contents CAMagic Mobile 101 Troubleshooting 102 Index 105 ...
Страница 106: ...104 Troubleshooting ...
Страница 109: ...http www sharp mobile com ...


