SerVision
Embedded Video Gateway System Guide
Appendix A: Viewing Video on a CCTV Monitor (TV-Out)
228
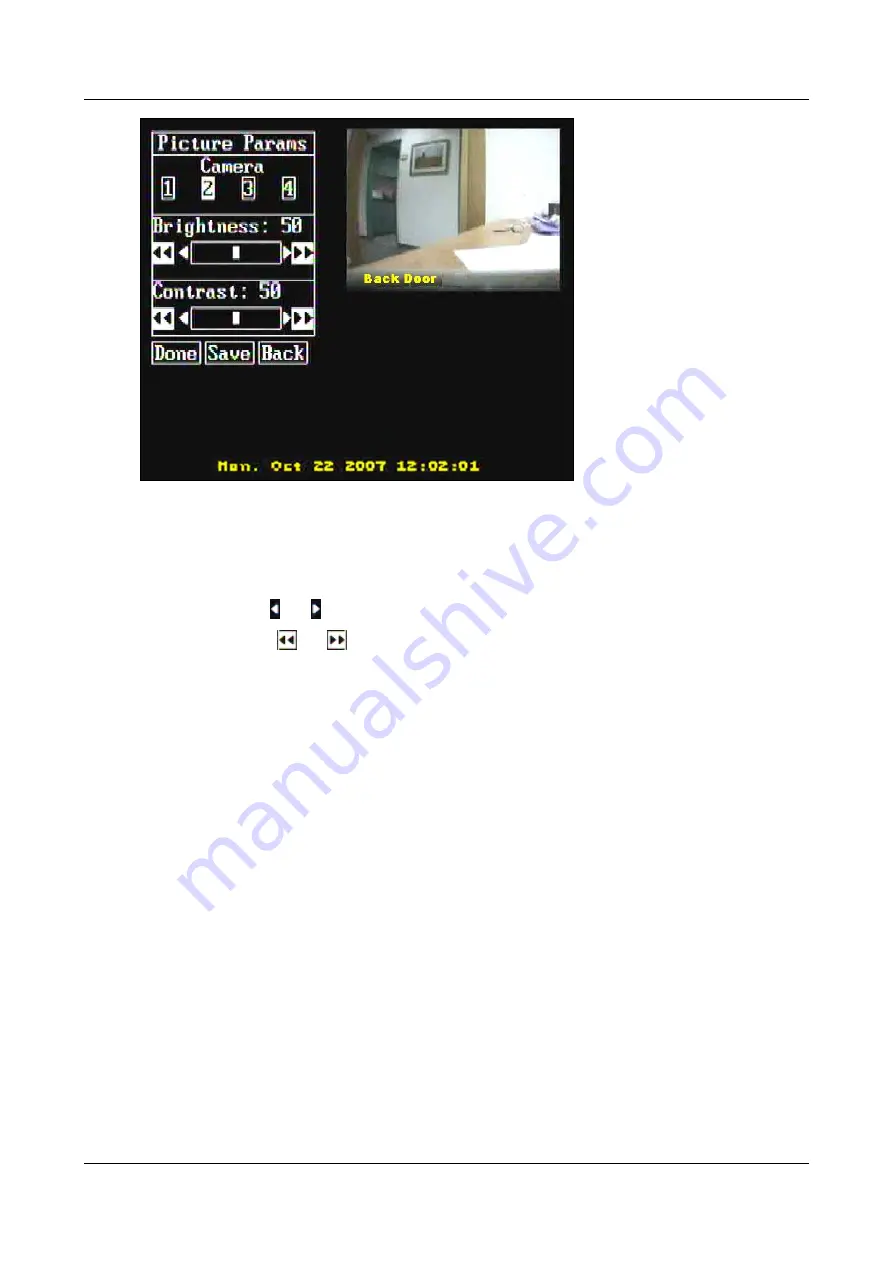
Figure 269: Picture Params screen
2. Under
Camera
, select the number of the camera whose settings you want to modify. Video from this camera
is displayed in the upper-right corner of the screen.
3. Under
Brightness,
select the arrows to the right or left of the slider bar to adjust the brightness, as follows:
Single arrows – and :
Adjust the brightness in small increments.
Double arrows –
and
:
Adjust the brightness in large increments.
The camera settings are changed, and the video displayed in the camera pane in the upper left of the screen
changes accordingly.
4. Under
Contrast
, select the arrows to the right or left of the slider to adjust the contrast, as described in step 3
above.
The camera settings are changed, and the video displayed in the camera pane in the upper left of the screen
changes accordingly.
5. When the brightness and contrast are set as you want them to be, exit the menu by selecting one of the
following buttons:
Done:
Return to live video display. The settings remain in effect until they are manually changed again or
until the Video Gateway restarts. When the unit restarts, the previous settings are implemented again.
Save:
Save the settings on the Video Gateway. The next time the unit restarts, the unit’s configuration is
updated with the new settings. The settings remain in effect until they are manually changed again, either
on the monitor or in the configuration utility.
Back:
Return to the
Config
menu. The settings remain in effect until they are manually changed again or
until the Video Gateway restarts. When the unit restarts, the previous settings are implemented again.
Adjusting Loop Interval and Screen Saver Settings
Initial loop-interval and screen-saver settings are set in the configuration utility (see
(TV-Out), page 25). You can modify these settings on the monitor, and, if you wish, save the new settings to the
unit’s configuration.


