498
Parameter
Function
IP Version
It is to select IP version. IPV4 or IPV6.
You can access the IP address of these two versions.
IP Address
Please use the keyboard to input the corresponding number to modify the IP
address and then set the corresponding subnet mask and the default
gateway.
Preferred DNS
DNS IP address.
Alternate DNS Alternate DNS IP address.
MTU
It is to set MTU value of the network adapter. The value ranges from
1280-7200 bytes. The default setup is 1500 bytes.
The following MTU value is for reference only.
1500: Ethernet information packet max value and it is also the default
value. It is the typical setup when there is no PPPoE or VPN. It is the
default setup of some router, switch or the network adapter.
1492: Recommend value for PPPoE.
1468: Recommend value for DHCP.
1450: Recommended value for VPN.
For the IP address of IPv6 version, default gateway, preferred DNS and alternate DNS,
the input value shall be 128-digit. It shall not be left in blank.
LAN load
System can process the downloaded data first if you enable this function.
The download speed is 1.5X or 2.0X of the normal speed.
5.10.2.2 Connection
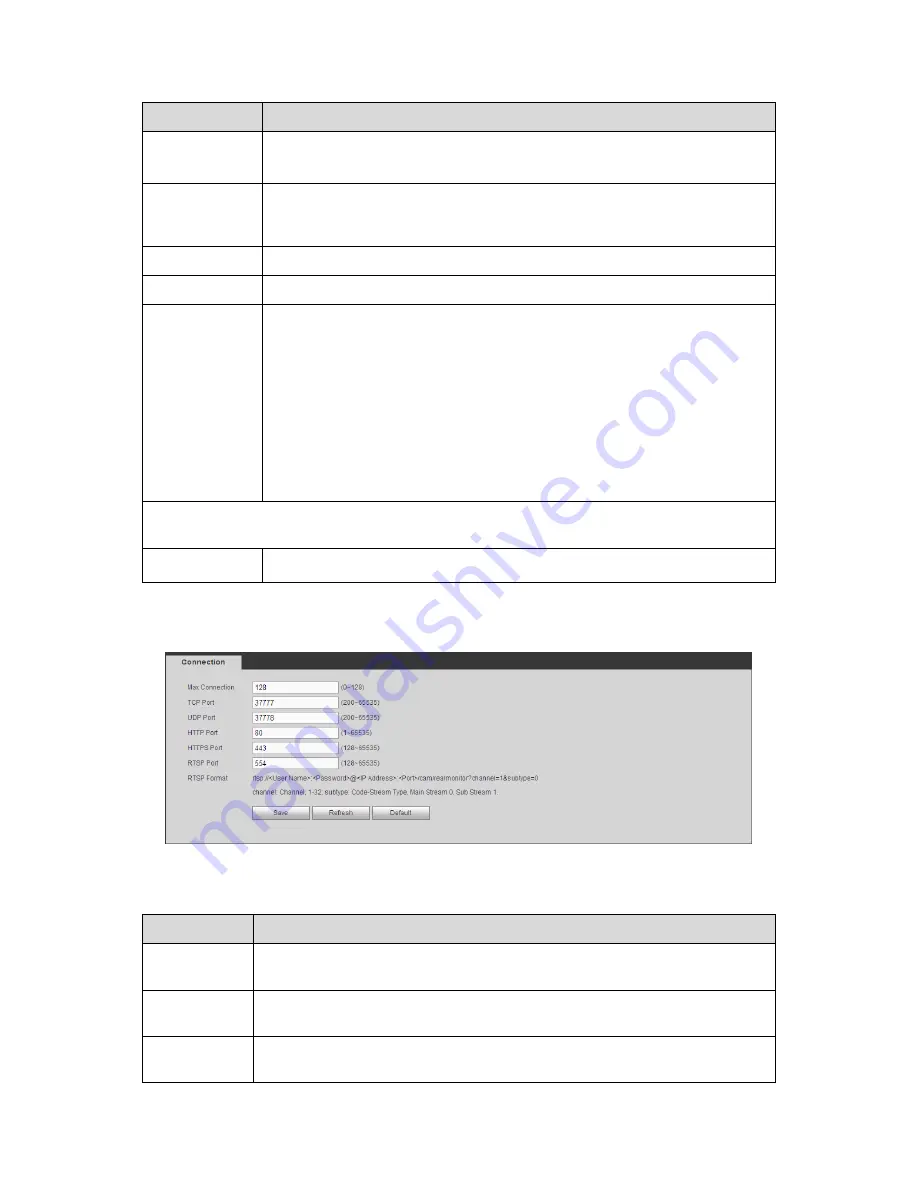
The connection interface is shown as in Figure 5-42.
Figure 5-42
Please refer to the following sheet for detailed information.
Parameter
Function
Max
connection
It is the max Web connection for the same device. The value ranges from 1 to
128. The default setup is 128.
TCP port
The default value is 37777. You can input the actual port number if
necessary.
UDP port
The default value is 37778. You can input the actual port number if
necessary.
Содержание PENDVR-EL16M4K
Страница 1: ...PENDVR EL16M4K ELITE SERIES...
Страница 20: ...247 2 3 Connection Sample...
Страница 128: ...363 restore original status Figure 4 115 Figure 4 116 4 9 1 3 1Upgrade Camera...
Страница 151: ...386 Figure 4 137 Figure 4 138...
Страница 158: ...393 Figure 4 145 Step 2 Draw tripwire 1 Click Draw button to draw the tripwire See Figure 4 146 Figure 4 146...
Страница 162: ...397 Figure 4 149 Step 2 Draw the zone 1 Click draw button to draw the zone See Figure 4 150 Figure 4 150...
Страница 164: ...399 Figure 4 151 Step 2 Draw the zone 1 Click draw button to draw the zone See Figure 4 152 Figure 4 152...
Страница 166: ...401 Figure 4 153 Step 2 Draw the zone 1 Click Draw button to draw a zone See Figure 4 154...
Страница 172: ...407 Figure 4 157 Figure 4 158...
Страница 173: ...408 Figure 4 159 Figure 4 160...
Страница 174: ...409 Figure 4 161 Figure 4 162...
Страница 177: ...412 Figure 4 165 Figure 4 166...
Страница 178: ...413 Figure 4 167 Figure 4 168...
Страница 184: ...419 Figure 4 177 Figure 4 178 4 9 4 1 2 2 Trigger Snapshot...
Страница 186: ...421 Figure 4 180 Figure 4 181 4 9 4 1 2 3 Priority...
Страница 192: ...427 Figure 4 186 Figure 4 187...
Страница 197: ...432 Figure 4 193 Figure 4 194...
Страница 210: ...445 Figure 4 209 For digital channel the interface is shown as below See Figure 4 210 Figure 4 210...
Страница 217: ...452 Figure 4 218 Step 2 Click Add user button in Figure 4 218 The interface is shown as in Figure 4 219 Figure 4 219...
Страница 283: ...518 Figure 5 69 Figure 5 70...
Страница 299: ...534 device Figure 5 86 Figure 5 87...
Страница 305: ...540 Figure 5 94 Figure 5 95...
Страница 306: ...541 Figure 5 96 Figure 5 97 Please refer to the following sheet for detailed information...
Страница 310: ...545 Figure 5 101 Figure 5 102 Figure 5 103 Please refer to the following sheet for detailed information...
Страница 333: ...568 Figure 5 136 Note For admin you can change the email information See Figure 5 137...
Страница 363: ...598 448K 196M 512K 225M 640K 281M 768K 337M 896K 393M 1024K 450M 1280K 562M 1536K 675M 1792K 787M 2048K 900M...


