390
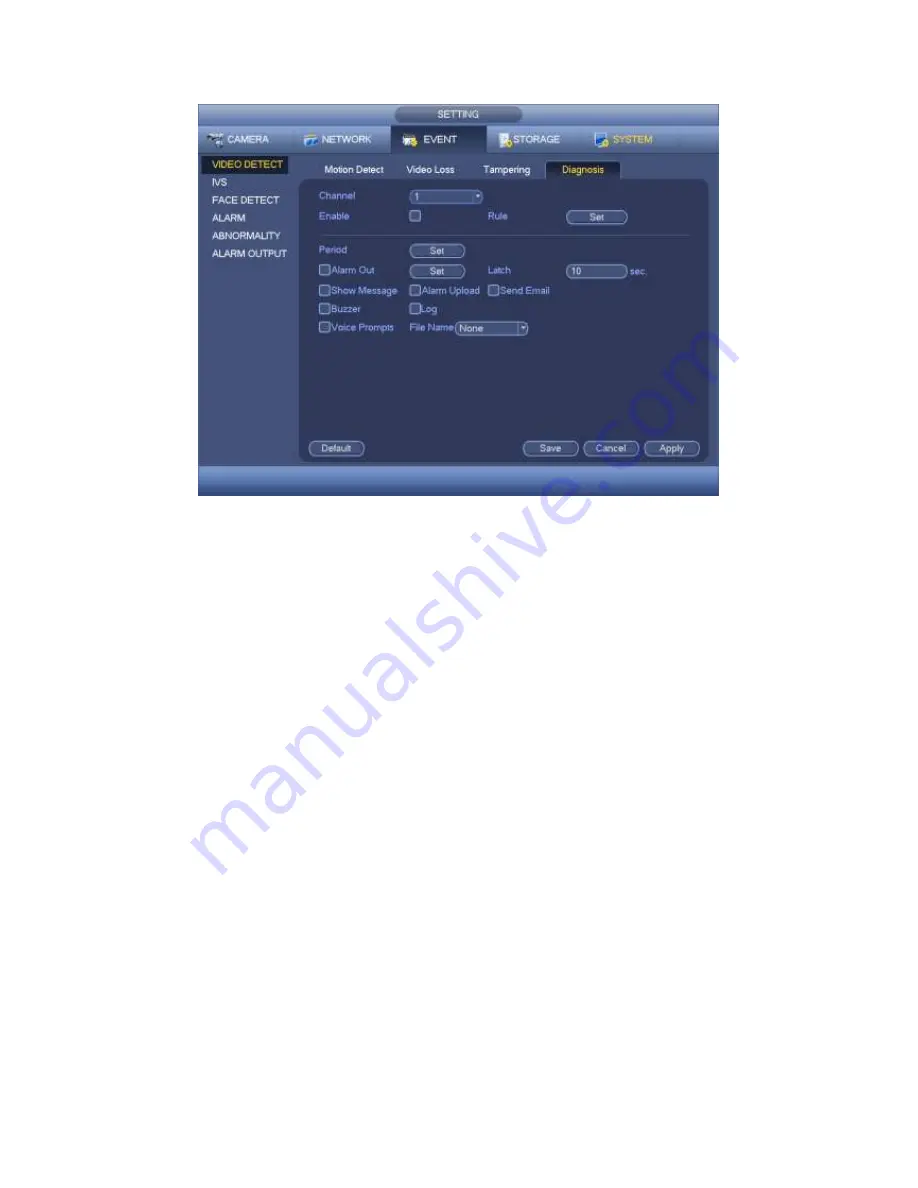
Figure 4-142
This function allows you to be informed when video is blurry, over exposure or color
cast occurs. You can enable alarm output channel and then enable show message
function. Click the Rule Set button, or move the cursor to Set button and then click the
Enter button on the front panel, the interface is shown as below. See Figure 4-143.
You can check corresponding type and then input alarm threshold.
Stripe: The strip occurs when the device is old or there is electronic interference.
There may be cross strip, vertical strip, slanting strip and etc.
Noise: The video noise refers to the blurry video, poor video quality. It may result from
the optical system distortion or the hardware problem during the video transmission
when recording.
Color cast: Usually the video is color containing RGB. When these three colors
displayed in abnormal rate, we can say color cast occurred.
Out of focus: The clear video presents abundant video details. The video definition
decreases when the distortion event occurs. The out of focus event may result from
many sources such as video transmission, processing and etc.
Over exposure: The color brightness refers to the image pixel intensity. Black is the
darkest and the white is the brightest. We use number 0 to stand for black and use
number 255 to stand for white. Once the brightness threshold of the whole image has
exceeded the threshold value, it means the image is over exposure.
Threshold: The value ranges from 1 to 30. System can generate an alarm once the
value is higher than the threshold you set here.
Содержание PENDVR-EL16M4K
Страница 1: ...PENDVR EL16M4K ELITE SERIES...
Страница 20: ...247 2 3 Connection Sample...
Страница 128: ...363 restore original status Figure 4 115 Figure 4 116 4 9 1 3 1Upgrade Camera...
Страница 151: ...386 Figure 4 137 Figure 4 138...
Страница 158: ...393 Figure 4 145 Step 2 Draw tripwire 1 Click Draw button to draw the tripwire See Figure 4 146 Figure 4 146...
Страница 162: ...397 Figure 4 149 Step 2 Draw the zone 1 Click draw button to draw the zone See Figure 4 150 Figure 4 150...
Страница 164: ...399 Figure 4 151 Step 2 Draw the zone 1 Click draw button to draw the zone See Figure 4 152 Figure 4 152...
Страница 166: ...401 Figure 4 153 Step 2 Draw the zone 1 Click Draw button to draw a zone See Figure 4 154...
Страница 172: ...407 Figure 4 157 Figure 4 158...
Страница 173: ...408 Figure 4 159 Figure 4 160...
Страница 174: ...409 Figure 4 161 Figure 4 162...
Страница 177: ...412 Figure 4 165 Figure 4 166...
Страница 178: ...413 Figure 4 167 Figure 4 168...
Страница 184: ...419 Figure 4 177 Figure 4 178 4 9 4 1 2 2 Trigger Snapshot...
Страница 186: ...421 Figure 4 180 Figure 4 181 4 9 4 1 2 3 Priority...
Страница 192: ...427 Figure 4 186 Figure 4 187...
Страница 197: ...432 Figure 4 193 Figure 4 194...
Страница 210: ...445 Figure 4 209 For digital channel the interface is shown as below See Figure 4 210 Figure 4 210...
Страница 217: ...452 Figure 4 218 Step 2 Click Add user button in Figure 4 218 The interface is shown as in Figure 4 219 Figure 4 219...
Страница 283: ...518 Figure 5 69 Figure 5 70...
Страница 299: ...534 device Figure 5 86 Figure 5 87...
Страница 305: ...540 Figure 5 94 Figure 5 95...
Страница 306: ...541 Figure 5 96 Figure 5 97 Please refer to the following sheet for detailed information...
Страница 310: ...545 Figure 5 101 Figure 5 102 Figure 5 103 Please refer to the following sheet for detailed information...
Страница 333: ...568 Figure 5 136 Note For admin you can change the email information See Figure 5 137...
Страница 363: ...598 448K 196M 512K 225M 640K 281M 768K 337M 896K 393M 1024K 450M 1280K 562M 1536K 675M 1792K 787M 2048K 900M...


