264
Icon
Function
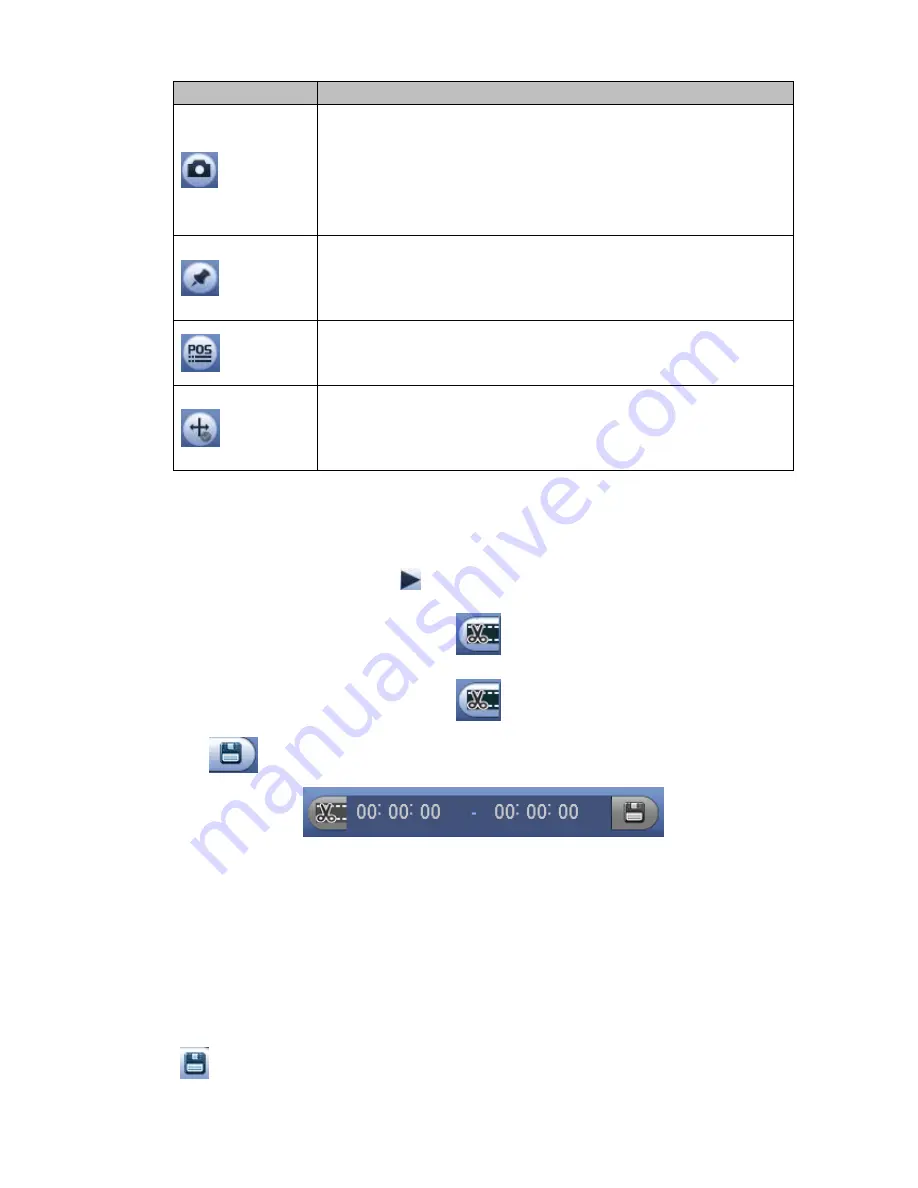
Click the snapshot button in the full-screen mode, the system can
snapshot 1 picture.
System supports custom snap picture saved path. Please connect the
peripheral device first, click snap button on the full-screen mode, you
can select or create path. Click Start button, the snapshot picture can
be saved to the specified path.
Mark button.
Please note this function is for some series product only. Please make
sure there is a mark button in the playback control pane.
You can refer to chapter 4.6.4 for detailed information.
Display/hide POS information.
In 1-channel playback mode, you can click it to display/hide POS
information on the video.
Note
This function is for some series only.
In 1-channel playback mode, click it to enable/disable display IVS rule
information on the video.
4.6.2.2 Clip
This function allows you to clip some footages to a new file and then save to the USB device. See Figure
2-46. Please follow the steps listed below.
1) Select a record first and then click
to playback.
2) Select a time at the time bar and then click
to start clip,
3) Select a time at the time bar and then click
to stop clip,
4) Click
, system pops up dialogue box to save the clip file.
Figure 4-99
Note
Clip function is for one-channel/multiple-channel.
Max save 1024 files at the same time.
This function is not for the file already checked in the file list.
4.6.2.3 Record Backup
This function is to backup files you checked in the file list, or the file you just clip.
Click
, enter the following interface. See Figure 4-100.
Содержание NVR-ELE4ME-WS
Страница 1: ...1080p Resolution 1yr Warranty Motion Activated Recording PTZ Control View From Anywhere NVR ELE4ME WS...
Страница 33: ...163 Figure 3 3 3 5 4 Compact 1U Series Please refer to Figure 3 4 for connection sample...
Страница 34: ...164 Figure 3 4 3 5 5 Compact 1U Wireless Series Please refer to Figure 3 5 for connection sample...
Страница 43: ...173 Figure 3 16 3 5 17 Professional 1 5U Series Please refer to Figure 3 17 for connection sample...
Страница 45: ...175 Figure 3 18 3 5 19 Professional 2U Series Please refer to Figure 3 19 for connection sample...
Страница 47: ...177 Figure 3 20 3 5 21 Professional 2U with RAID series Please refer to Figure 3 21 for connection sample...
Страница 48: ...178 Figure 3 21 3 5 22 Professional 3U Series Please refer to Figure 3 22 for connection sample...
Страница 50: ...180 Figure 3 23 3 5 24 Beneficio Vertical 1U Series Please refer to Figure 3 24 for connection sample...
Страница 51: ...181 Figure 3 24...
Страница 63: ...193 Figure 4 14 Figure 4 15 Step 2 Set network camera login password WARNING...
Страница 71: ...201 Figure 4 24 Step 2 Click device display edit interface See Figure 4 25...
Страница 148: ...278 Figure 4 114 Figure 4 115...
Страница 159: ...289 Figure 4 126 Figure 4 127...
Страница 161: ...291 Figure 4 129 Click draw button to draw the zone See Figure 4 130...
Страница 165: ...295 Figure 4 133 Click Draw button to draw a zone See Figure 4 134 Figure 4 134...
Страница 170: ...300 Figure 4 139 Click draw button to draw the zone See Figure 4 140...
Страница 183: ...313 Figure 4 151 Figure 4 152...
Страница 184: ...314 Figure 4 153 Figure 4 154...
Страница 214: ...344 Figure 4 189 In Figure 4 189 click one HDD item the S M A R T interface is shown as in Figure 4 190 Figure 4 190...
Страница 250: ...380 Figure 4 236...
Страница 294: ...424 Figure 5 60 Figure 5 61...
Страница 295: ...425 Figure 5 62 Figure 5 63...
Страница 319: ...449 Figure 5 97 Figure 5 98...
Страница 322: ...452 Figure 5 101 Figure 5 102...


