B-2
Firmware Upgrade Instructions
Date Code 20011205
SEL-311A Instruction Manual
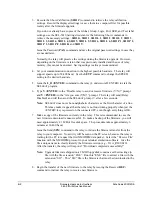
3. Execute the Show Calibration (
SHO C
) command to retrieve the relay calibration
settings. Record the displayed settings (or save them to a computer file) for possible
reentry after the firmware upgrade.
If you do not already have copies of the Global, Group, Logic, Port, SER, and Text label
settings, use the SEL-5010 Settings Assistant or the following Show commands to
retrieve the necessary settings:
SHO G
,
SHO 1
,
SHO L 1
,
SHO 2
,
SHO L 2
,
SHO 3
,
SHO L 3
,
SHO 4
,
SHO L 4
,
SHO 5
,
SHO L 5
,
SHO 6
,
SHO L 6
,
SHO P 1
,
SHO P 2
,
SHO P 3
,
SHO P F
,
SHO R
, and
SHO T
.
Issue the Password (
PAS
) command and save the original password settings in case they
are needed later.
Normally, the relay will preserve the settings during the firmware upgrade. However,
depending on the firmware version that was previously installed and the use of relay
memory, this cannot be ensured. Saving settings is always recommended.
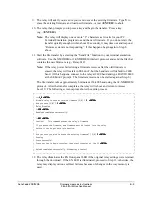
4. Set your communication connection to the highest possible baud rate. The relay will
support speeds up to 38,400 baud. Use the
SET P
command to change the SPEED
setting to the desired baud rate.
5. Issue
the
L_D <ENTER>
command to the relay (L underscore D ENTER) to start the
SEL
BOOT
program.
6. Type
Y <ENTER>
to the “Disable relay to send or receive firmware (Y/N)?” prompt
and
Y <ENTER>
to the
“
Are you sure (Y/N)?” prompt. The relay will send (Relay
Disabled) and will then send the SEL
BOOT
prompt !> after a few seconds.
Note:
SEL
BOOT
does not echo nonalphabetic characters as the first character of a line.
This may make it appear that the relay is not functioning properly when just the
<ENTER> key is pressed on the connected PC, even though everything is OK.
7. Make a copy of the firmware currently in the relay. This is recommended in case the
new firmware download is unsuccessful. To make a backup of the firmware, you will
need approximately 2.3 MB of free disk space. The procedure takes approximately 6
minutes at 38,400 baud.
Issue the Send (
SEN
) command to the relay to initiate the firmware transfer from the
relay to your computer. No activity will be seen on the PC screen, because the relay is
waiting for the PC to request the first XMODEM data packet. Select the “Receive File”
function with the XMODEM protocol in your terminal emulation software. Give the
file a unique name to clearly identify the firmware version (e.g., 311A_R200.S19).
After the transfer, the relay will respond: “Download completed successfully!”
Note:
Upgrade firmware shipped on a 2 MB floppy disk contains a self-extracting zip
file with the file extension “EXE”. Run this “EXE” file to extract a file with the
extension “S19”. This “S19” file is the firmware that must be downloaded to the
relay.
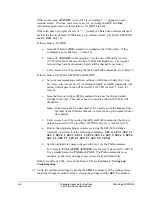
8. Begin the transfer of the new firmware to the relay by issuing the Receive (
REC
)
command to instruct the relay to receive new firmware.
Содержание SEL-311A
Страница 6: ......
Страница 8: ......
Страница 10: ......
Страница 24: ......
Страница 40: ......
Страница 66: ......
Страница 96: ......
Страница 98: ......
Страница 112: ......
Страница 114: ......
Страница 122: ......
Страница 170: ......
Страница 202: ......
Страница 204: ......
Страница 246: ......
Страница 248: ......
Страница 286: ......
Страница 290: ......
Страница 304: ......
Страница 306: ......
Страница 334: ......
Страница 384: ......
Страница 386: ......
Страница 394: ......
Страница 398: ......
Страница 402: ......
Страница 404: ......
Страница 410: ......
Страница 412: ......
Страница 426: ......
Страница 444: ......
Страница 460: ......
Страница 474: ......

