


2-5
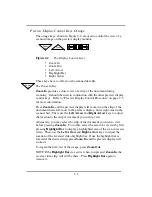
magnified when you press
Zoom In
. You may move the highlight bar to
the left or right with the
Left Arrow
key or the
Right Arrow
key,
respectively, before you press
Zoom In
. Refer to “Preview Display
Control Procedure” on page 2-5 for more information.
The Right Arrow Key
The
Right Arrow
key moves the area shown in the preview display 3/4-
window width or 768 pixels to the right. If the
Highlight Bar
key has
been pressed first, the
Right Arrow
key moves the bar produced by the
Highlight Bar
key a 3/4-window width or 768 pixels to the right. (One
window width = 1024 pixels.) The number of window widths displayed on
the screen depends on the resolution of the scanner, the size of the
document, and whether or not you are already zoomed in.
Right Arrow
is always used in conjunction with the other preview display
control keys. Refer to “Preview Display Control Procedure” on page 2-5
for more information.
Pressing the
Right Arrow
key may be repeated for further movement.
You can also use it to view the extreme boundaries of large-size
documents on the display. When the window can be moved no further to
the right, you will hear a tone when pressing this key.
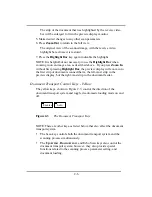
Preview Display Control Procedure
The following instructions demonstrate the usual sequence in which the
preview display control keys are used to zoom in on an area of a scan and
then to zoom out to the full view of the scan.
1. Scan a document.
2. Press the
Highlight Bar
key.
A strip of the image appears in reverse video in the preview display
monitor. The reverse video highlight bar indicates the section of the
display that will be displayed and magnified when you press
Zoom In
.
3. Use the directional arrow keys to adjust the position of the reverse video
highlight bar before zooming in.
Press the
Left Arrow
key or the
Right Arrow
key to move the reverse
video highlight bar to the left or right, respectively.
4. Press the
Zoom In
key to zoom in on the highlighted strip of the
document.
Содержание CF1000/44
Страница 12: ......