8
7
Before First Use
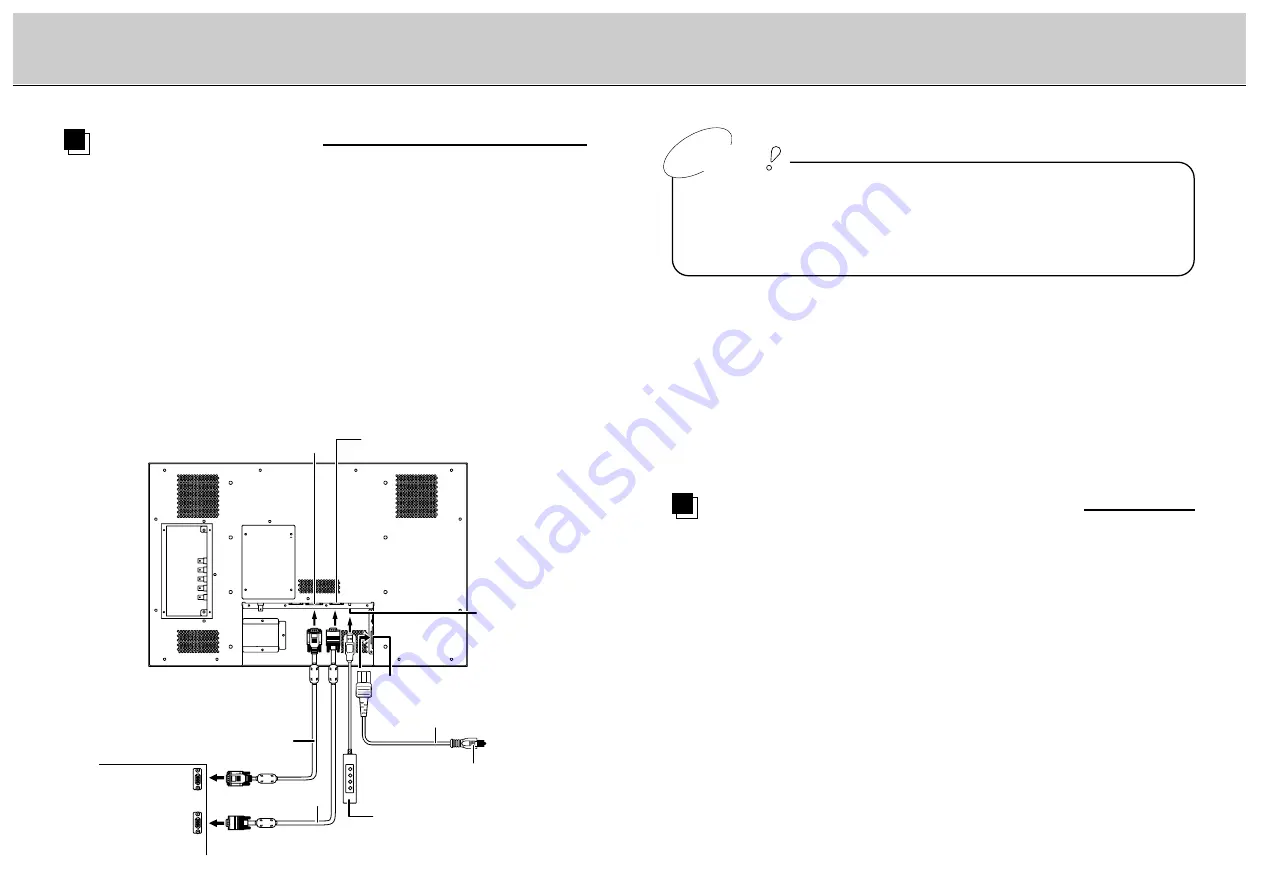
Installation
DVI
Connector
RGB Connector
AC-IN
Power Plug
External
OSD
Connector
OSD Control
Box
AC Power Cord
DVI Cable
(not included)
RGB Cable
Connect to
the computer’s
connectors
Connect the Computers
Before doing anything, make sure the Power Switch on the monitor and a computer are
turned off.
1
Plug the cable(s) into the connector on the monitor securely and fix
them in place with two screws (each).
2
Plug the other end of the cable(s) into the connector on a computer.
3
Plug the AC Power Cord into the AC-IN on the monitor.
4
Plug the Power Plug into an outlet.
5
Plug the External OSD Control Box if necessary.
6
Switch on the monitor before starting up a computer.
¡
Do not plug the External OSD Control Box into the computer's USB port, as this may
cause malfunction of the computer.
¡
When connecting a DVI Cable, be sure to use a DVI Cable with cores on the
market. If not, interference may happen to peripherals aside.
¡
When multiple video cables are connected to the monitor. It is necessary to connect
OSD Control Box to switch display signal (see page 12).
Caution
Connect the Video deck, DVD player etc.
Turn off the power for the monitor and AV equipment before the connection.
1
Plug the cable(s) into the connector on the monitor securely.
2
Plug the other end of the cable(s) into the connector on AV
equipment.
3
Plug the AC Power Cord into the AC-IN on the monitor.
4
Plug the Power Plug into an outlet.
5
Plug the External OSD Control Box if necessary.
6
Switch on the monitor before starting up AV equipment.


