English
_41
● LIVE
Using the PTZ camera
You can use a single PTZ camera to perform the Pan, Tilt and Zoom operations to monitor multiple places, and
configure the custom settings of the presets in a desired mode.
1.
Open the <
PTZ Control
> menu.
The <
> icon in the left bottom of the screen will turn yellow, indicating that the system accesses "
PTZ
Control
" mode. You will see the "
PTZ Control
" launcher menu.
M
`
The PTZ working (active) mark can be active even if the PTZ operation is not available in normal mode. So ensure that you
have completed the PTZ settings before proceeding.
2.
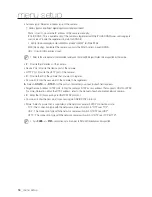
Use the PTZ wheel in the launcher menu to adjust the monitoring area, or use the direction buttons
(▲▼◄►).
• PTZ Wheel : Click a near area from the center to move the camera lens slowly; clicking a far area will move it
fast.
`
If clicking and holding the mouse in the left will turn the camera counterclockwise; if clicking and holding the mouse in the right
will move the camera lens clockwise.
• Zoom : Activate the Zoom operation of the PTZ camera.
• Iris : Adjust the amount of light incoming to the camera.
• Focus : You can adjust the focus manually.
• Swing : Swing is a monitoring function that moves between two preset points and enables you to trace the
motion.
• Group : The group function enables you to group various presets before calling them in sequence.
• Trace : Tracking remembers the trace of movements that you instructed and reproduces it for your reference.
`
Some cameras may differ in the menu title and operation with regard to Swing, Group and Trace.
J
`
Even if the network camera supports the PTZ operations by default, the PTZ control can be enabled only if the applicable
menu is active in the launcher menu.

