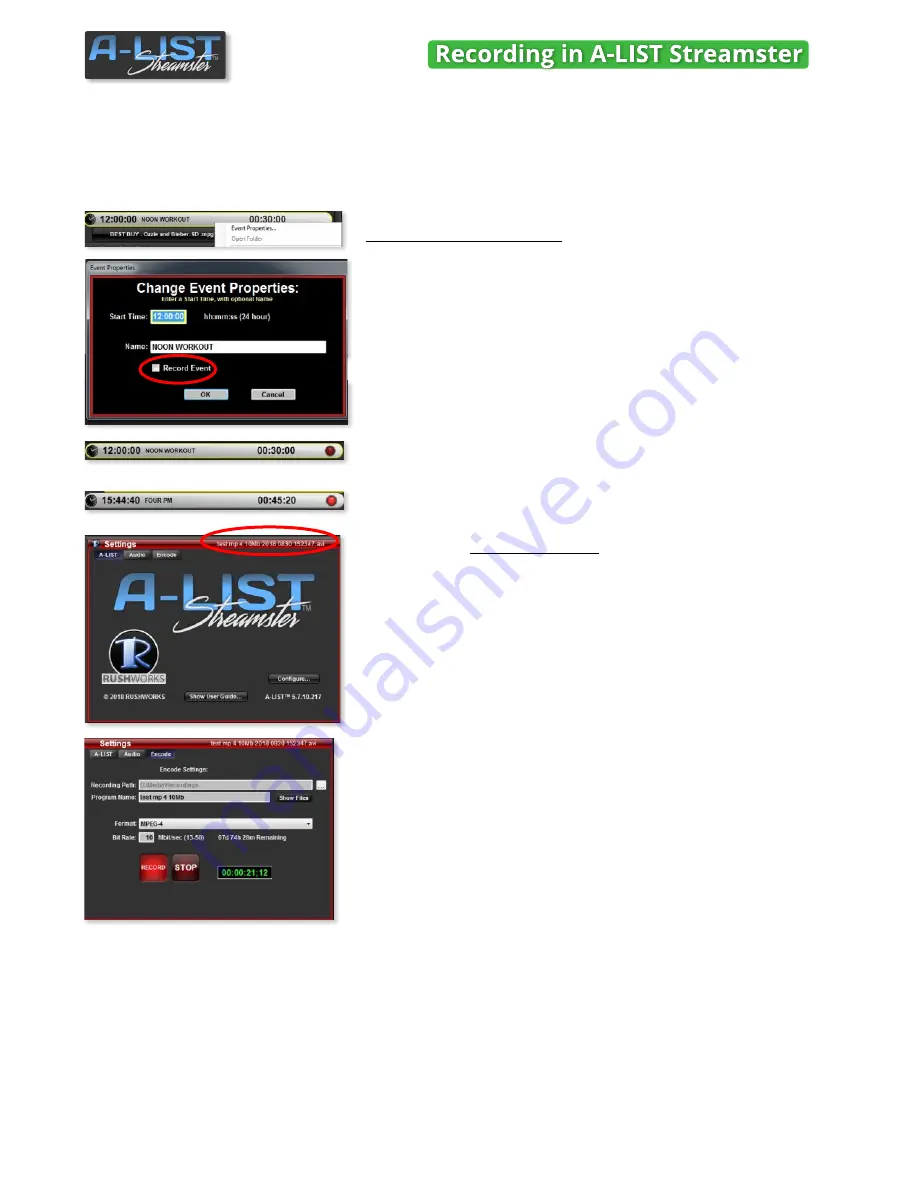
Record Scheduled Events
To record a scheduled Event
, right-click the Event banner and select
Event Properties …
or double-click the Event banner to open the
Change Event Properties
window.
Click the
Record Event
checkbox.
Click OK, and you’ll notice the
RECORD LED
indicator appears on the
Event banner next to the Event locked icon.
The recording will automatically start about a half second before the
Event playback begins. You’ll see the RECORD LED indicator glow bright
red to indicate
record-in-progress
.
The
Settings
panel in the lower right will also be outlined in red with the
file name of the currently recording file displayed in the upper right of
the window title bar.
If you click the
Encode
tab in the Settings window, you’ll see the name of
the file being recorded, a glowing red RECORD button, and a green timer
that indicates how long the file has been recording.
The file prefix is automatically copied from the Program Name of the
scheduled Event … followed by a date/time stamp in the complete file
name. The encoding parameters, such as file type and data rate, are
taken from the settings you have previously selected on the user-
defined fields on the Encode tab.
33
SOFTWARE
You can record any scheduled Event, regardless of the contents of that Event. The Event may include any
combination of clips, graphics, or LIVE input segments. By definition, LIVE segments are those where a video
stream is configured as an input for the system, and passed through the automation engine to the output
stream for a specified duration. Sources can be NDI, HLS or MPEG-DASH formats.
Record Duration


