Manually Displaying a BUG
Using AUTO-BUG
Scheduling a BUG
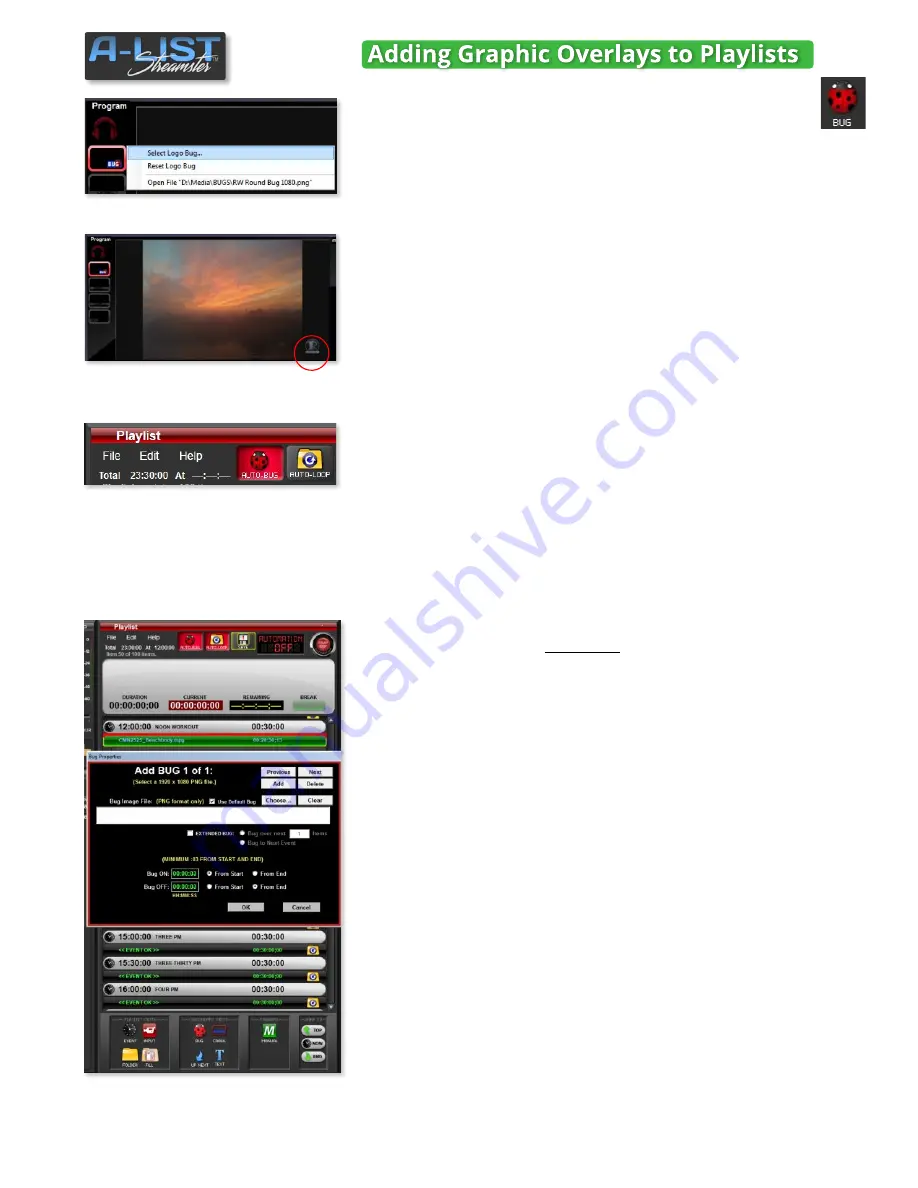
Right-click the BUG icon on the Program monitor bezel, and choose
Select Logo Bug
. This opens a dialog where you can select the graphic
you want to use for the primary BUG. Most often this will be a branding
graphic that’s typically displayed in the lower right corner of the screen.
Once that association is made, click the BUG icon it lights up, and the
selected graphic fades on. Click the bug icon again to deactivate it (fade
off). When you click the BUG icon again the graphic will fade off.
To enable or disable
AUTO-BUG
, just click on the AUTO-BUG button at
the top of the playlist window. When the AUTO-BUG feature is active, the
selected graphic will fade on and be displayed over any file or Event
duration over two minutes and three seconds long (>00:02:03:00).
It will automatically fade off when the next file or event is less than that
duration. When the graphic is being displayed, the BUG icon on the
Program monitor bezel will glow red. Manually turn off the bug at any
time by clicking on the icon.
NOTE
: For Bugs (and other graphics with transparency)
use
PNG
files with a size of
720 x 480
for Standard Definition (SD),
and
1920 x 1080
for 1080HD and
1280x720
for 720 HD.
Whereas AUTO-BUG fades the main Bug on and off over files that are
longer than 00:02:03:00, a
scheduled
Bug is associated with a specific
file or files. You can schedule multiple bugs (but not overlapping) over
the duration of an item, or extend them over multiple items.
There are
three ways to schedule a Bug relative to a file.
1
) Drag the
BUG
icon above the item where you want the bug to appear.
The red line indicates the drop point. When dropped into the list, the
Add BUG
window opens. Click the
Choose
... button to open the
D:\Media\Bugs folder where you can select the desired Bug graphic.
2
) Click on the file you want to associate with the Bug … then click the
BUG icon at the bottom of the playlist. The
Add BUG
window will open
where you can select the desired Bug graphic, as well as the display
properties of that graphic.
3
) Right-click the file you want to associate with the Bug. A fly-out menu
will appear. Select
Add Bug
… and the Add BUG window will open for
output selection.
To remove a Bug
… select
No Bug
from the right-click fly-out menu.
26
SOFTWARE


