13
FONT SELECTION
Click the menu button to the right of the Name field. It will open the
Windows Font selection panel.
Choose the
Font
,
Font style,
Size
and
Color
using this menu. When you
click OK, you’ll see the values appear in the respective fields in the
Streamster FONT section.
SOFTWARE
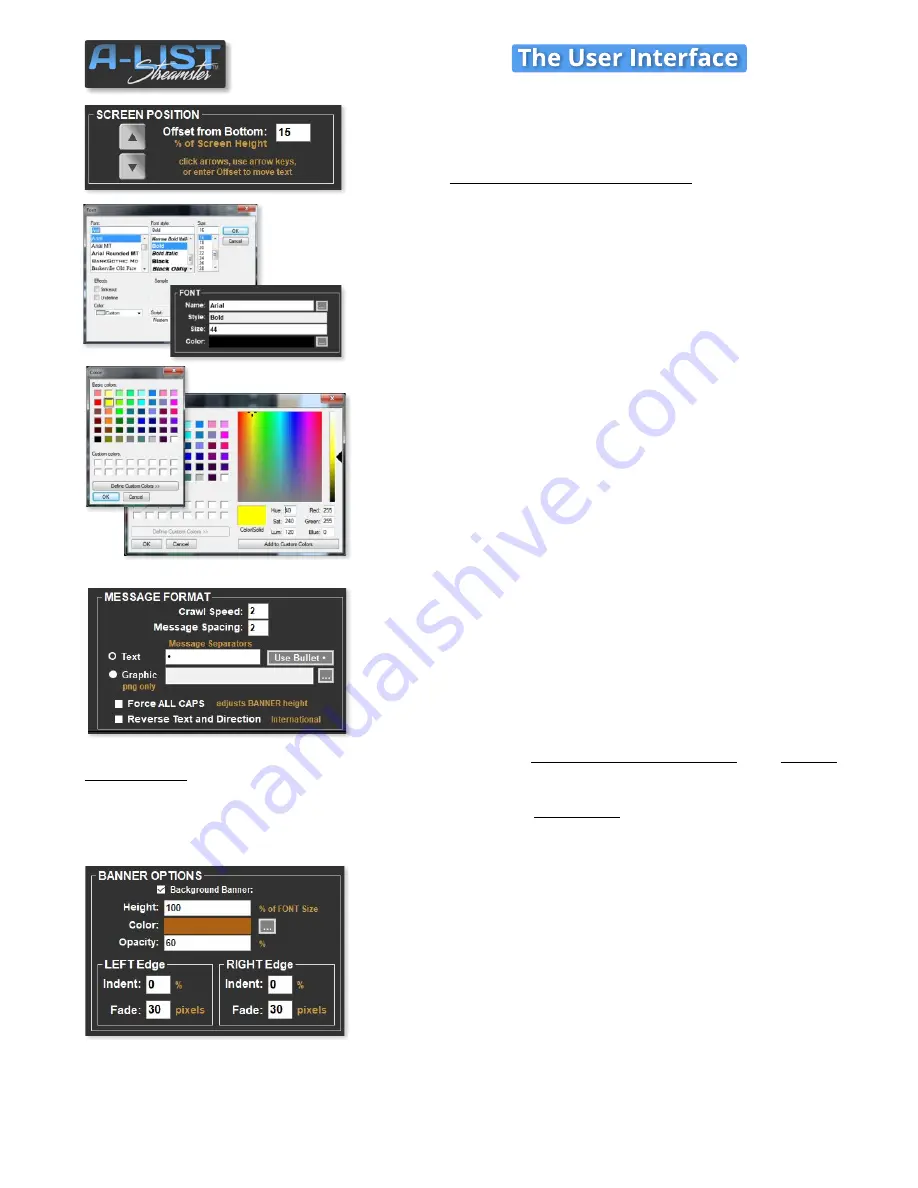
SCREEN POSITION
These controls are used to position the crawl (text and banner) vertically
on the screen. You can enter/modify the
Offset from Bottom
(default
for Crawl 1 is 15%), or you can click the
Up and Down arrows
to move
the position. You’ll see the result in the Crawl Preview window. You can
also use the
keyboard Up and Down arrow keys
to change the crawl
position.
Custom Color Selection
If you want to work with a wider range of color choices, click the menu
to the right of the Color field in the FONT section. This window will
appear, and you can pick from these Basic colors or click the Define
Custom Colors button.
That expands the window to provide thousands of color choices, or let
you enter RGB or HSL values to select a color.
You can Save that color by clicking the Add to Custom Colors button.
MESSAGE FORMAT
Set the
Crawl Speed
according to your preference.
Message Spacing
is
the number of blank characters that appear between each line of text
you enter in the Text Box when creating a crawl.
You can also add
Text
as a separator. To add a “Bullet” in addition to or
instead of the Message Spacing value, click the
Use Bullet •
button to
add it to the Text Message Separator. You can also enter any text or
character value in that field.
To use a
Graphic
(usually a small branding logo) as a separator,
click the Graphic radio button
, then
click the
browse button
to the right. Locate and select the PNG file you wish to use.
Force ALL CAPS
, when checked,
changes mixed upper/lower case to all uppercase for your crawls. This automatically adjusts the banner height.
REVERSE Text & Direction,
when checked, changes the crawl to
Left To Right
for use with several international
character sets.
BANNER OPTIONS
Click the Background Banner checkbox to make it visible.
Select the
Height
of the banner, which defaults to the same size as the
font you’ve selected (in percentage). To make the banner larger than the
font, just enter a value greater than 100.
Click the browse button to the right of the Color display box to open the
same Color picker used for the font, and make your selection.
Enter a value for the Opacity of the banner in percent. The higher the
value, the less you can see the video behind the banner.
You can
Indent
the Left and Right Edges of the banner by entering a value representing a percent of the total
screen width. You can also ‘soften’ the Left and Right Edges of the banner by entering a
Fade
value in pixels.


