92
Input/output patchbay
Input/output patchbay
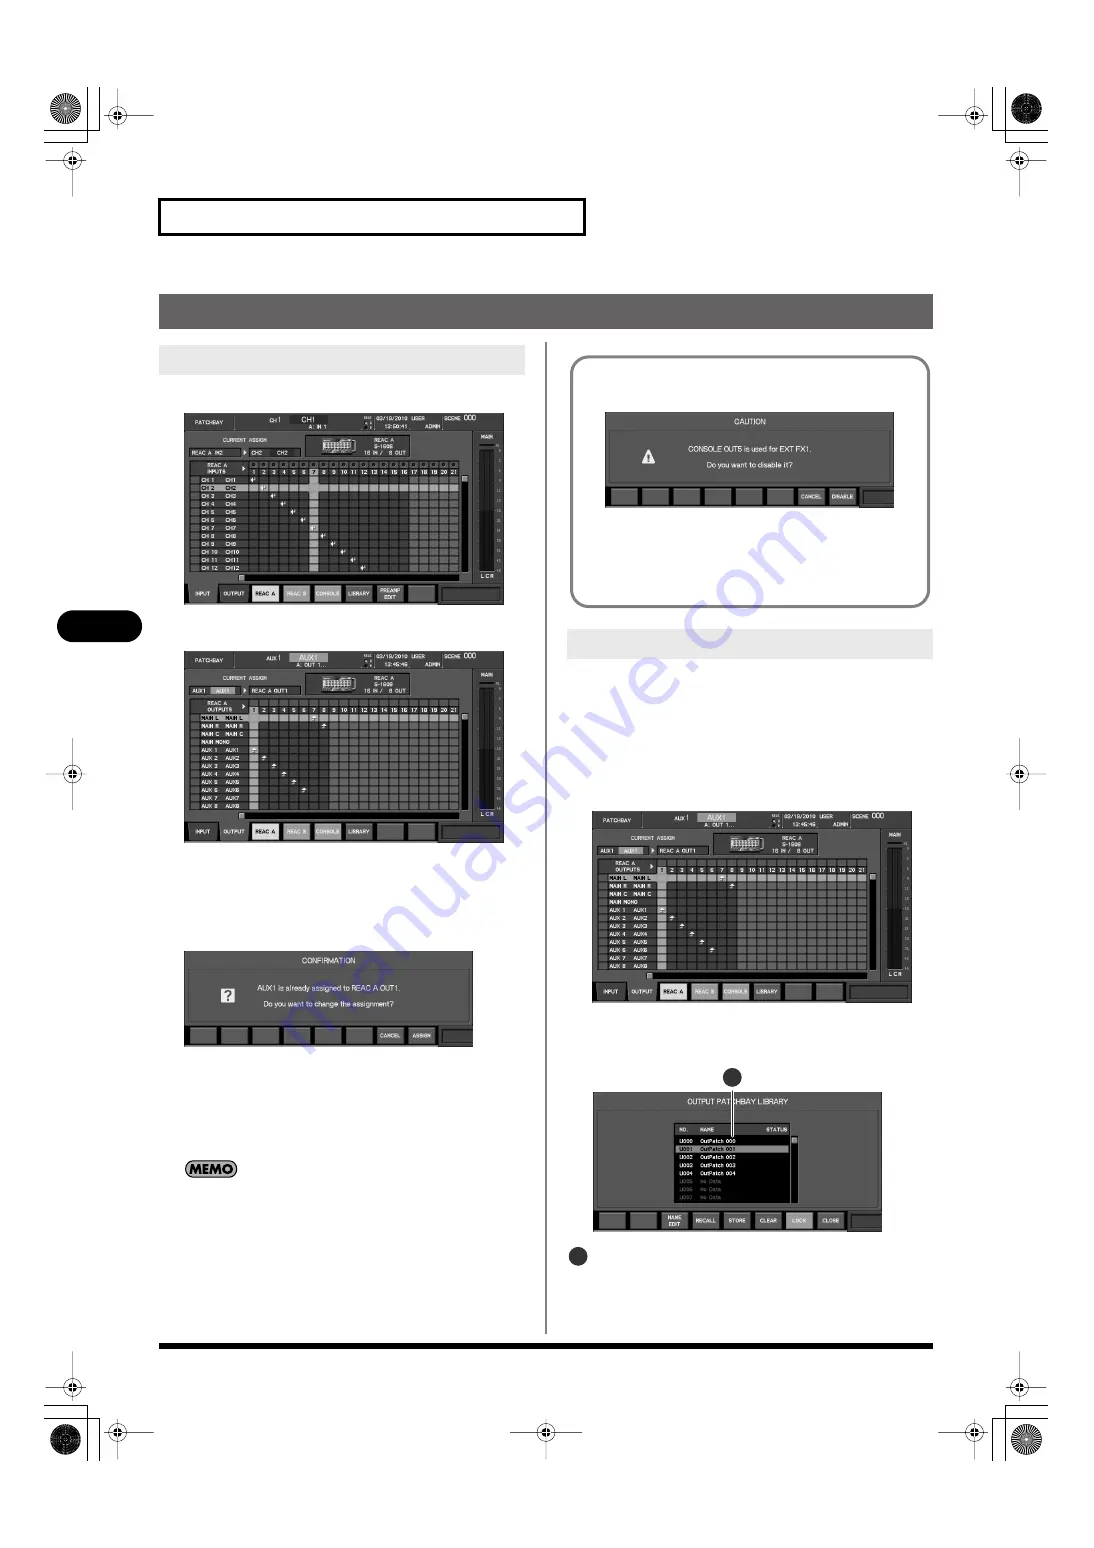
Output patchbay operations
1.
Access the PATCHBAY screen.
fig.ScrPatchIn1608.eps
2.
Press [F2 (OUTPUT)] to access the OUTPUT tab.
fig.ScrPatchOut1608.eps
3.
Press [F3 (REAC A)], [F4 (REAC B)], or [F5 (CONSOLE)] to
select the desired location for the output jack.
4.
Move the cursor to the intersection of the desired
channel and jack, and press [ENTER].
fig.ScrPatchOutChgConf.eps
If a channel is already patched to the output port, a message
will ask you to confirm the output patching change.
Press [F8 (ASSIGN)] to change the output patching.
If you press [F7 (CANCEL)] the output patching change will
be cancelled.
If the “PATCHBAY CHANGE” item in the CONFIRMATION section
of User Preference (p. 137) is unselected, no confirmation
message will appear in step 4.
The output patchbay library lets you store the current output
patchbay settings for later recall.
The OUTPUT PATCHBAY LIBRARY popup is used to perform
output patchbay library operations.
1.
Access the PATCHBAY screen.
2.
Press [F2 (OUTPUT)] to access the output patchbay.
fig.ScrPatchOut1608.eps
3.
Press [F6 (LIBRARY)] to access the OUTPUT PATCHBAY
LIBRARY popup.
fig.ScrOutPatLibGuide.eps
Library data list
This is a list of library data.
Editing the output patching
Using the output patchbay library
If you attempt to patch to a CONSOLE OUT that an EXT FX is
using, a caution message such as the following will appear:
fig.ScrOutPatchExtFx.eps
Press [F8 (DISABLE)] to disable the corresponding EXT FX and
continue with the patching change.
If you press [F7 (CANCEL)], the patching change will be
cancelled.
1
1
M-300_e.book 92 ページ 2010年4月22日 木曜日 午前8時17分


