Creating Data with 3D Engrave
This section describes the basic steps for cutting a relief using 3D Engrave.
3D Engrave is a program for adding thickness to a flat (two-dimensional) graphic to create a relief (raised engraving).
You can also add thickness to figures and other images.
Starting 3D Engrave
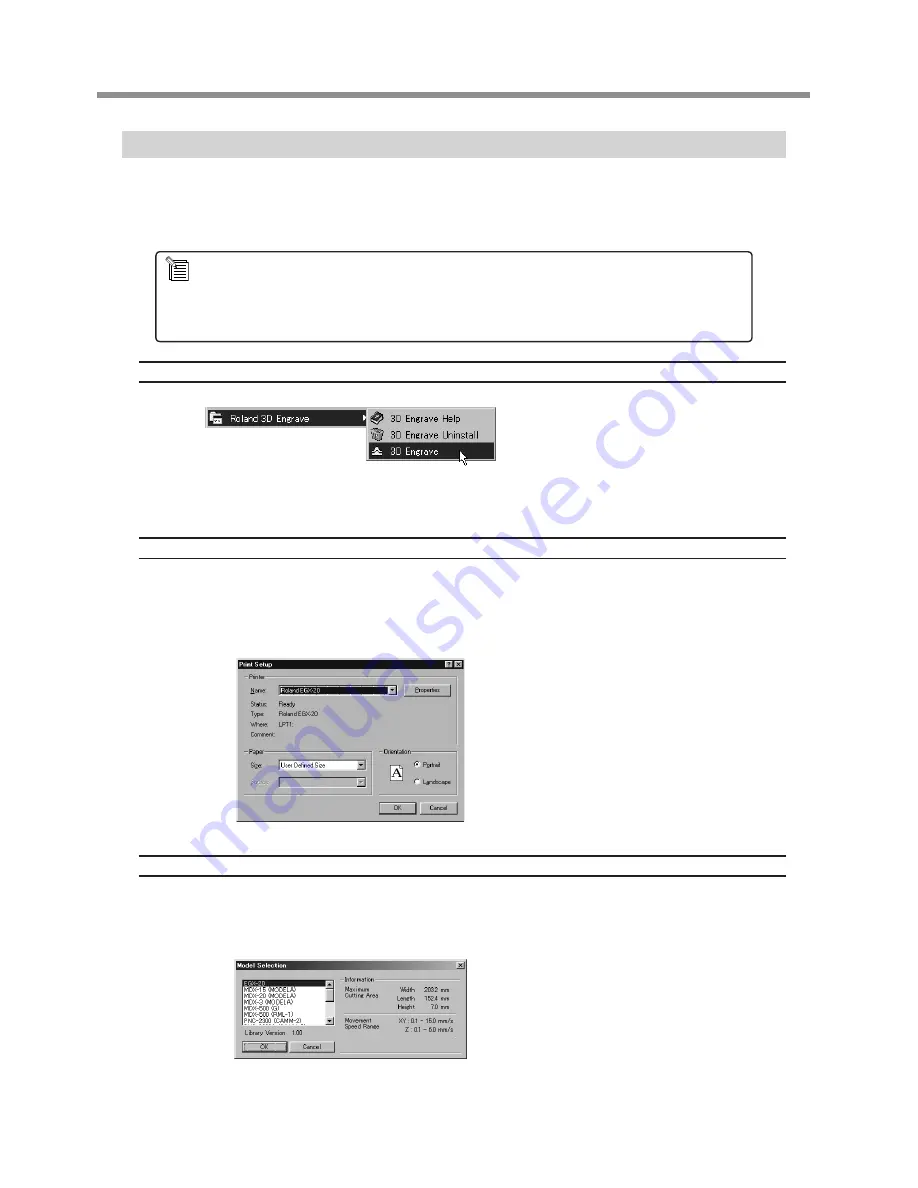
In Windows, click the [Start] button. At
the Start menu, point to [Programs],
then to [Roland 3D Engrave]. At the
menu that appears, click [3D En-
grave].
3D Engrave starts.
Selecting the Driver
Select the output device (driver). Even if you click [Properties] and make sets for the size of the material or the cutting condi-
tions (tool speed, depth, and so on), the data that is output is not affected.
In 3D Engrave, go to the [File] menu and select [Output Device Setup].
The [Print Setup] dialog box appears.
Make sure the printer name is set to
[Roland EGX-20] (if the printer name
is not [Roland EGX-20], then click the
drop-down arrow and select [Roland
EGX-20]), then click [OK].
Selecting the Model
Select the model name. This generates a tool path matched to the selected model.
In 3D Engrave, go to the [Cut] menu and choose [Machines].
The [Model Selection] dialog box appears.
Select [EGX-20], then click [OK].
The following explanation is for Windows 95/98/Me. For an explanation for Windows NT 4.0/2000/XP, or for a more
detailed explanation, see the help for 3D Engrave or refer to the 3D Engrave User's Manual (PDF) on the Roland
Software
34
4 Creating a Relief (3D Cutting Mode)
Содержание EGX-20
Страница 51: ......


